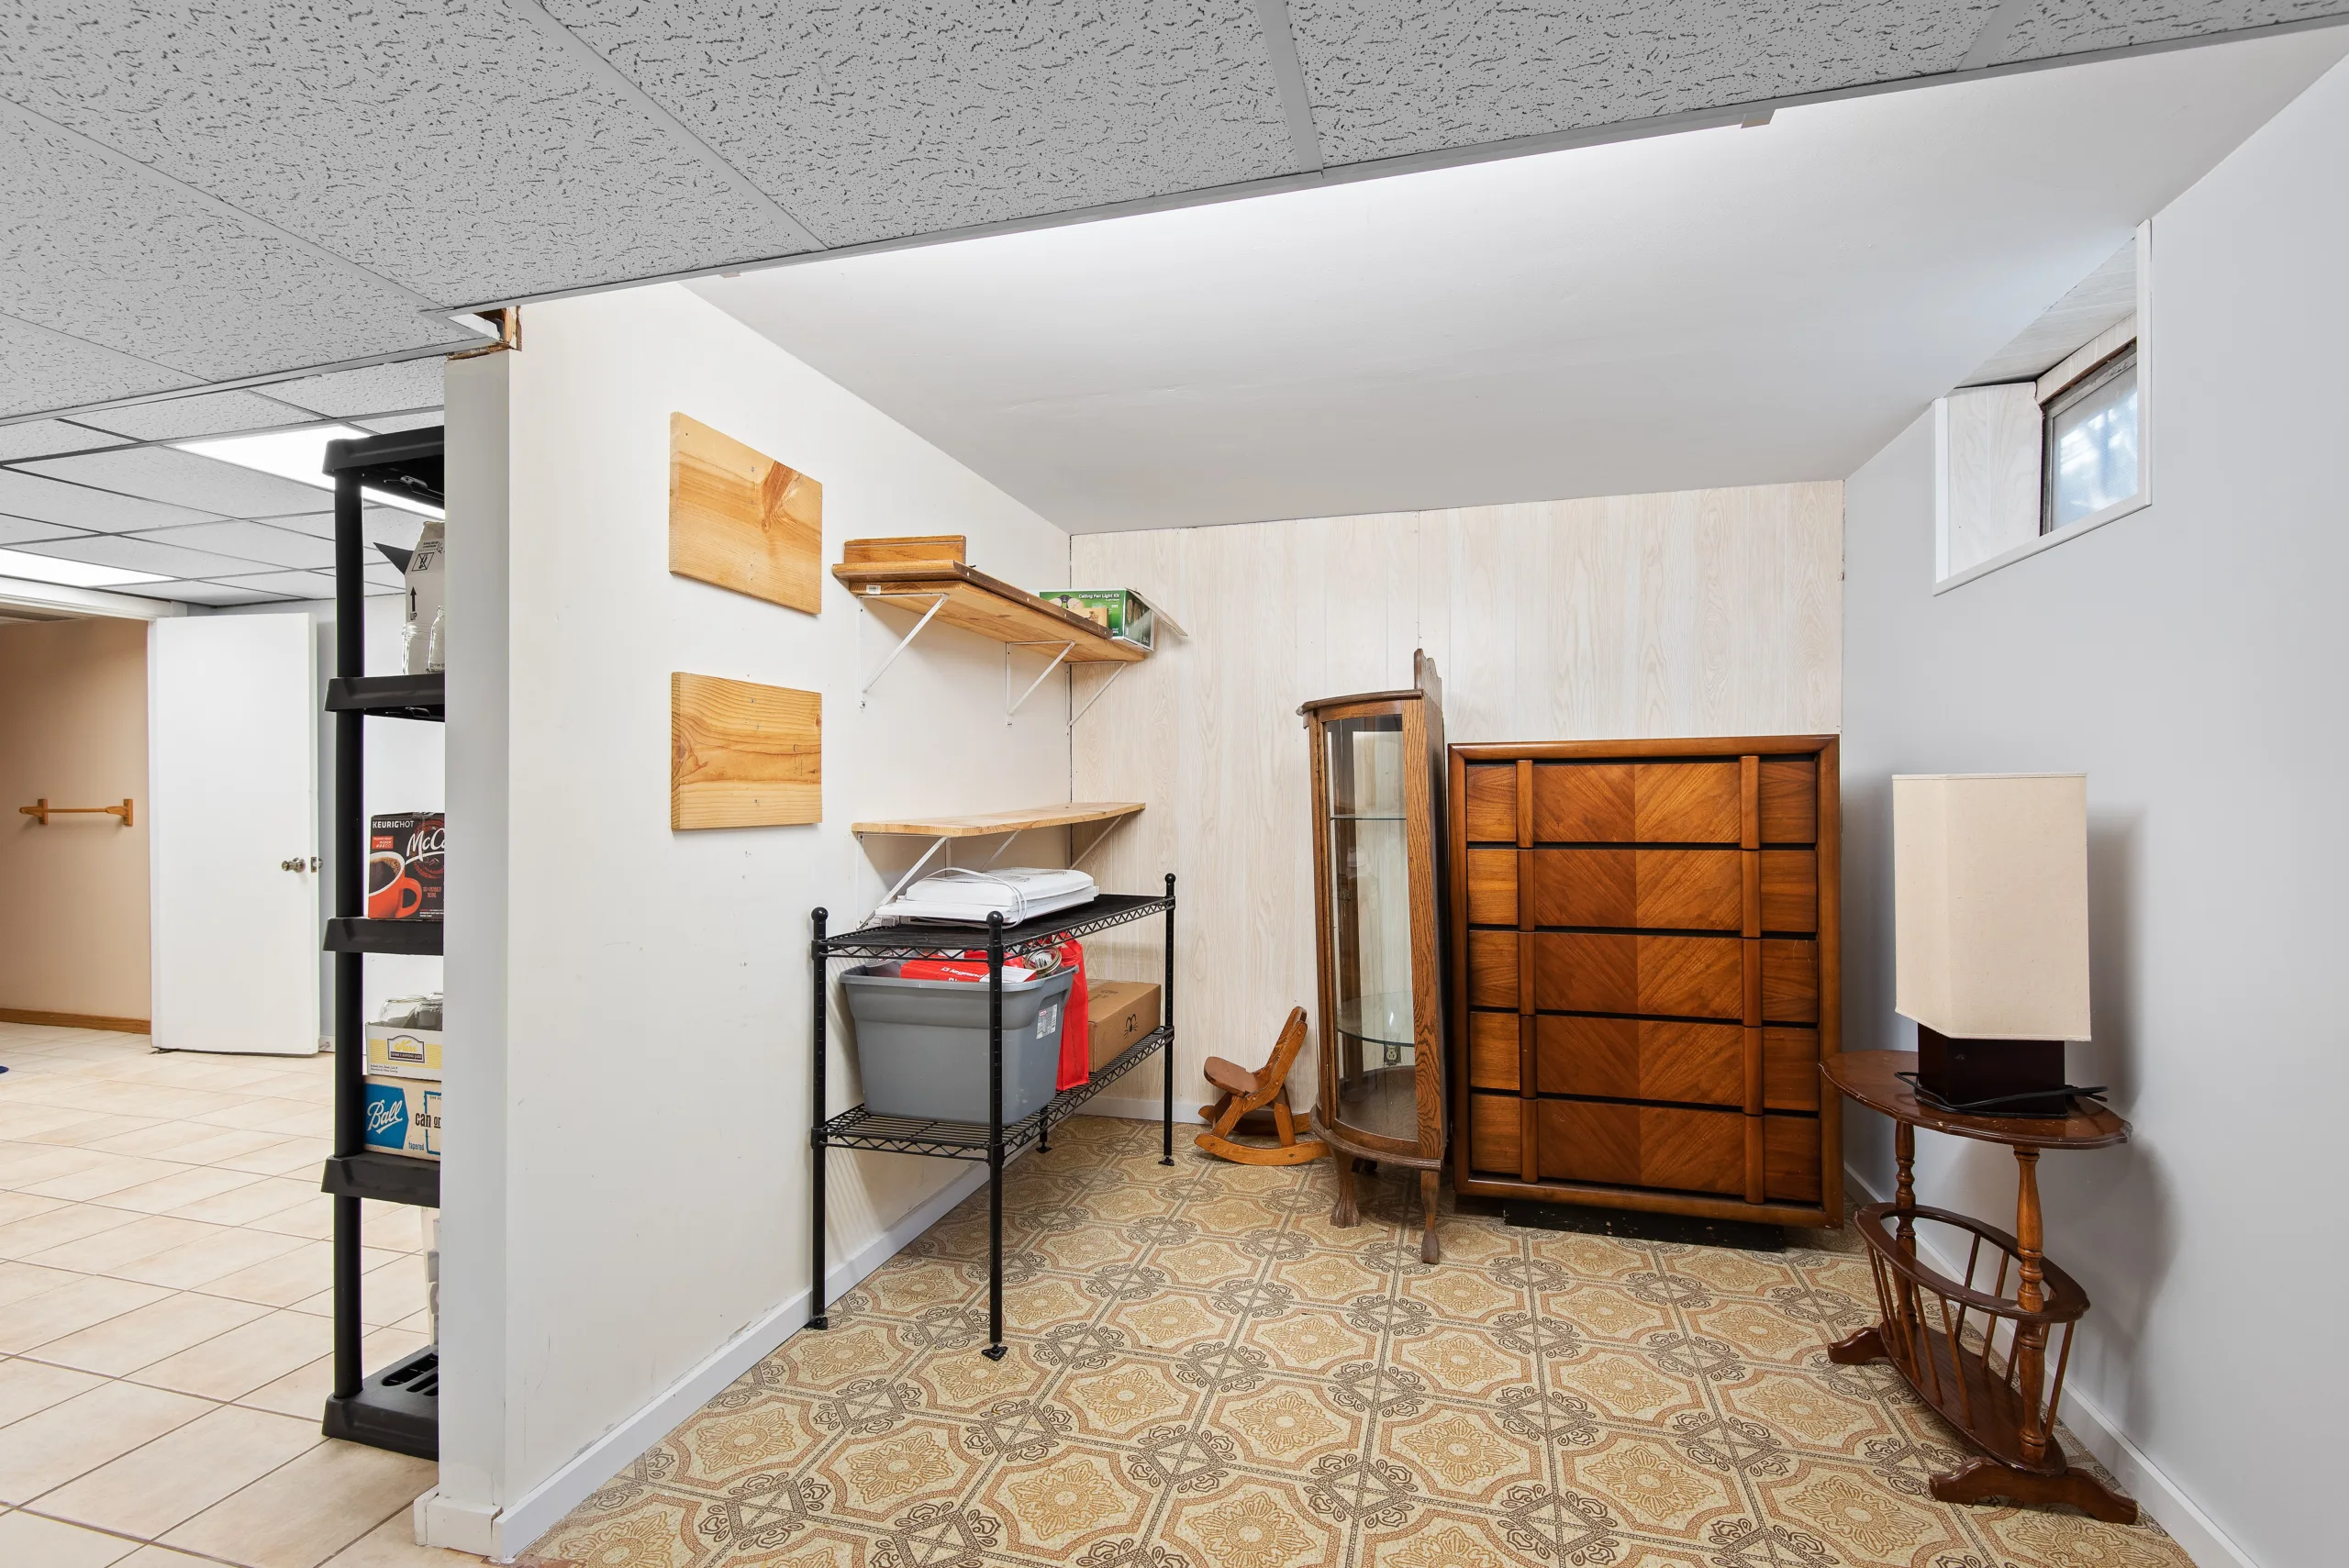
Your basement started as a place to park a few boxes. Now bikes, paint cans, and holiday totes are piled on the concrete floor.
Then you dig for one tool and knock over three stacks. A cardboard box gives out, and the water heater is buried behind everything.
You don’t need drywall or a big remodel to fix it. Raw plywood, simple 2×4 frames, and secondhand racks are enough, and these unfinished basement storage ideas prove it.
Below are 19 real setups, from labeled clear bins to ceiling-hung bikes and a walk-in food room. Pick the ones that fit your walls, your gear, and your budget.
1. Stacked Clear Bins Labeled Beside a White Freezer
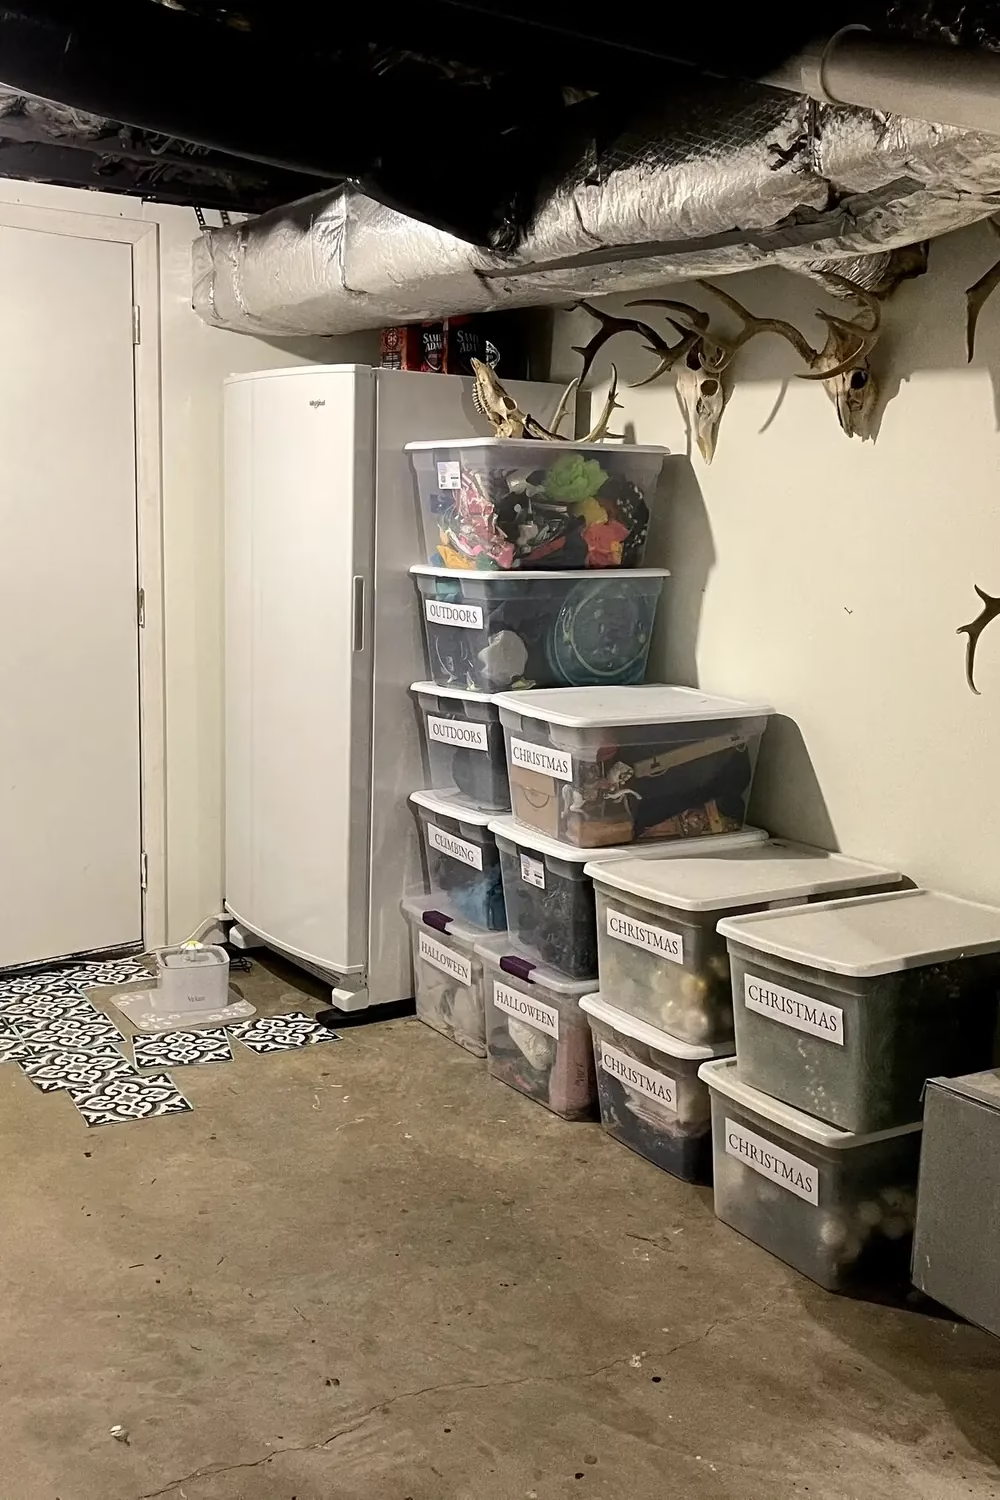
Tucked beside the door, this corner proves you don’t need fancy furniture. Clear bins with white lids are stacked in a stepped pile against a tall white freezer, and plain white labels read Christmas, Halloween, Outdoors and Climbing. You can see what’s inside without opening a thing. A fresh patch of black and white patterned floor tile adds a little charm to the bare concrete and exposed ducts above.
To copy it, buy one size and style of bin so the stacks stay steady. Print labels in a big, simple font and put them on the front, not the lid. Keep the heaviest bins on the bottom. If you have a spare corner near the stairs, this is the easiest first zone to set up.
2. Dark Metal Rack Loaded With Camping Gear Bins
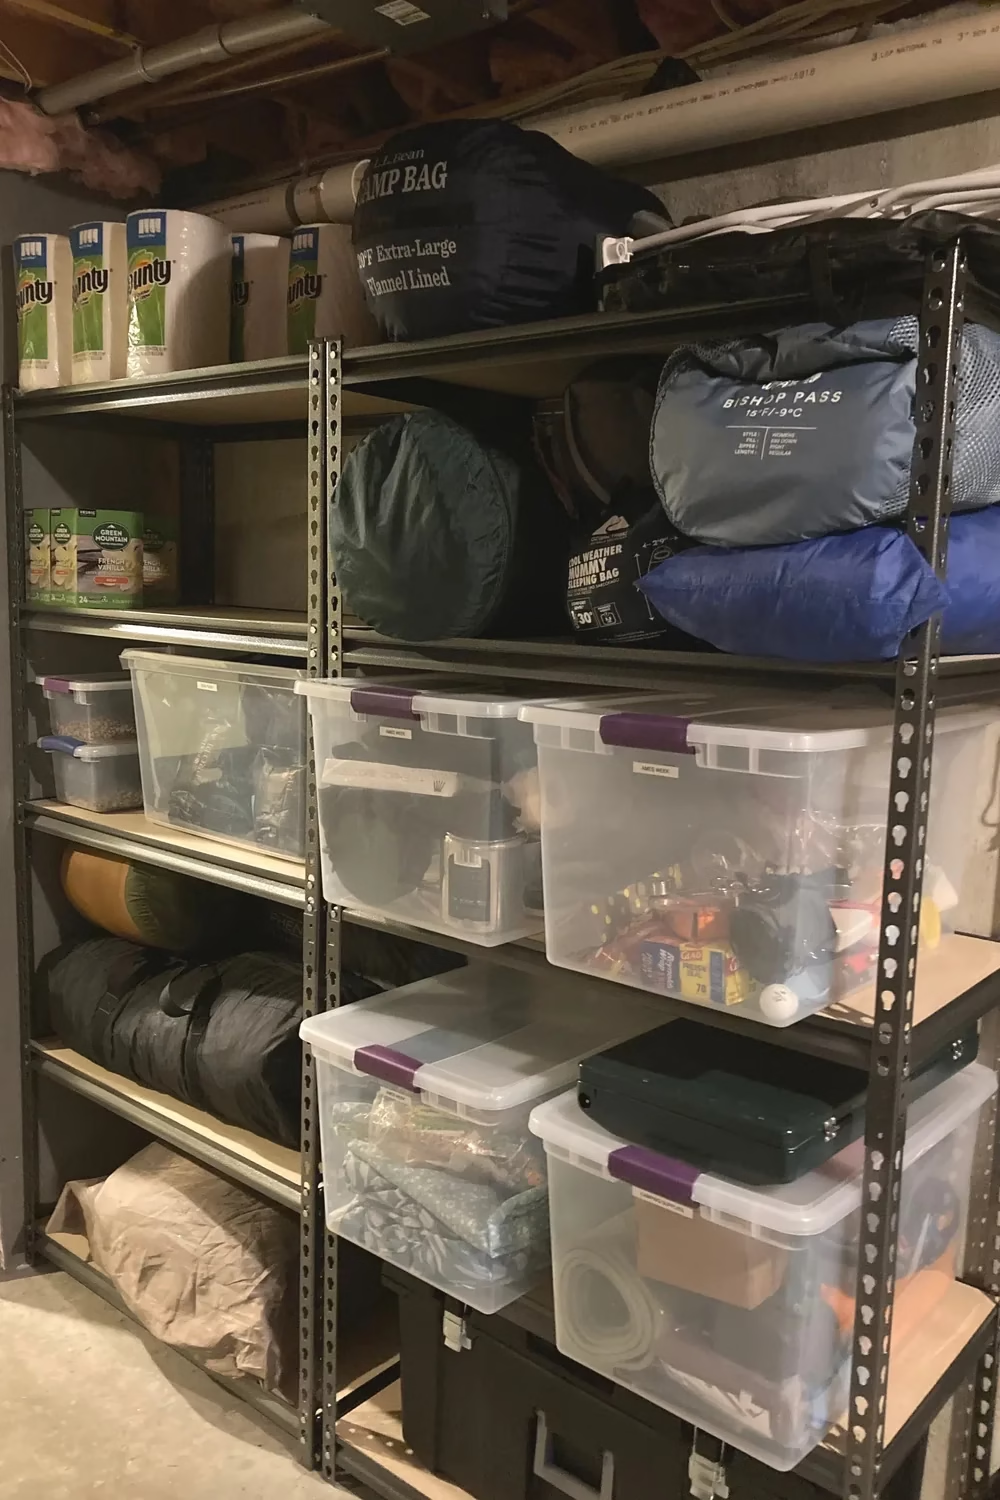
This freestanding metal rack turns one basement wall into a full camping station. Sleeping bags in navy, blue and green sit up top where they’re light and easy to reach. Clear bins with purple latches hold the smaller gear, and you can spot cookware and food supplies through the sides. Paper towels and coffee pods share the high shelves, so the whole rack works like one big supply closet.
You can recreate it with any boxed steel shelving unit with wood decking. Put bulky, light items high and heavy bins at waist height. Add a small label to each bin so family members can grab a kit without digging. It suits anyone who heads out on weekend trips and wants everything in one grab-and-go spot.
3. Deep Wood Shelves Holding Duffels and Moving Boxes
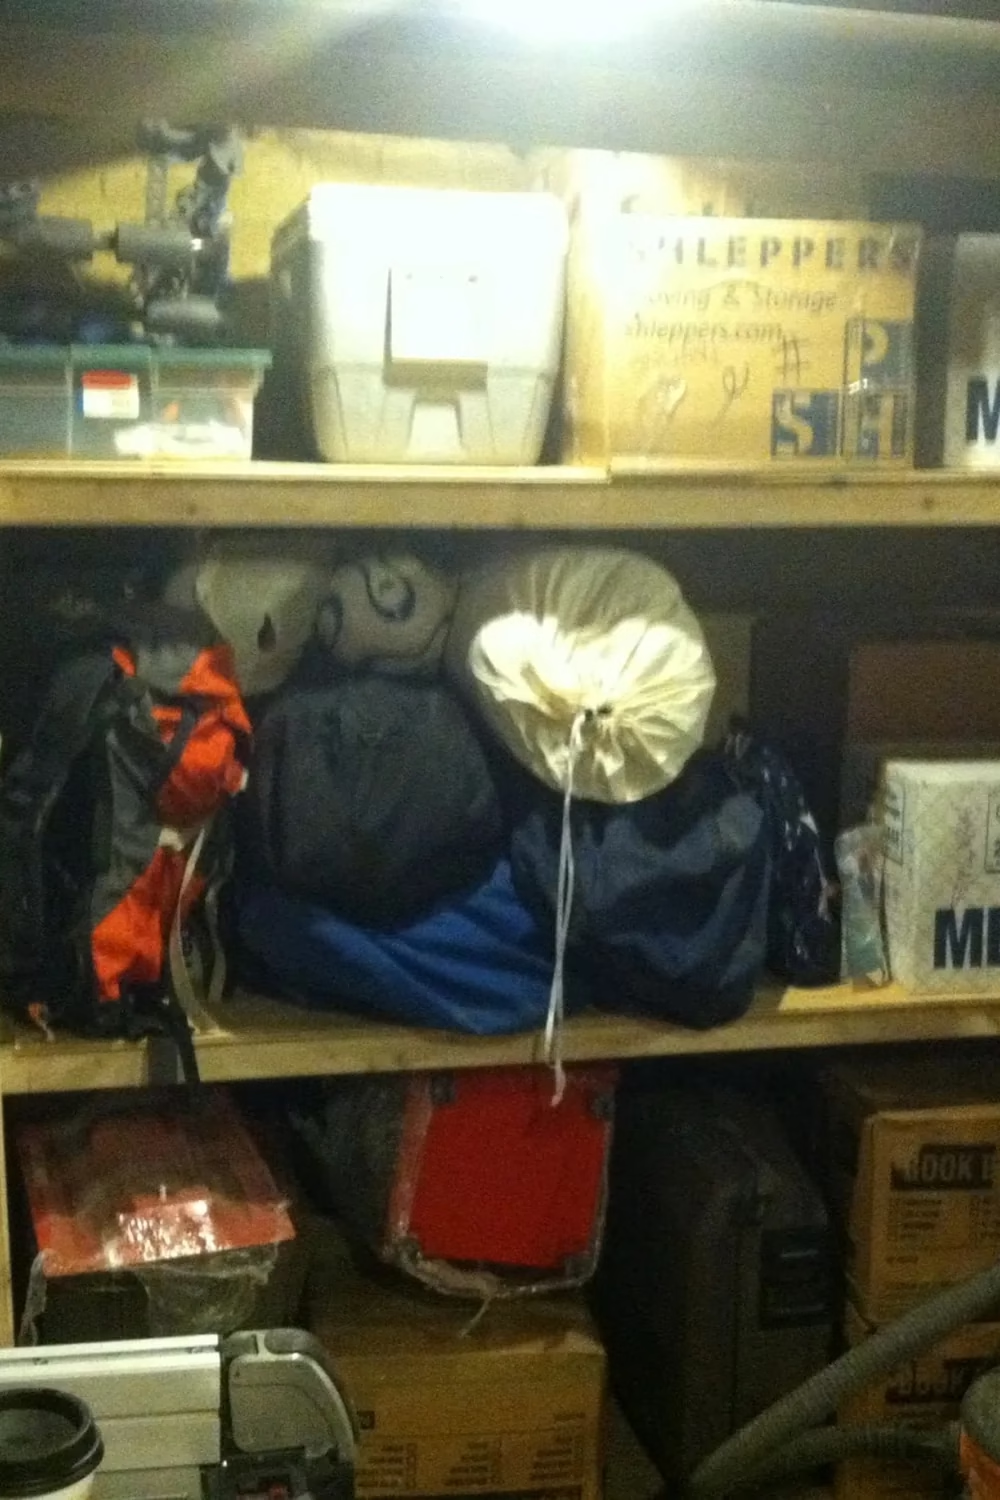
Deep raw lumber shelves can swallow all the awkward stuff. Here, a cooler, a cardboard moving box, a bright orange backpack, duffels and a cream drawstring sack sit side by side on thick wood shelves. The depth means big, bulky items fit without any fuss. Lower down, boxes and a red case rest near a workshop vacuum hose.
If you want this look, build simple frames from two-by-three lumber and top them with plywood. Ask the lumberyard to cut the plywood to size so it’s easy to carry downstairs. Put a light directly over the shelves, since a dim basement hides things fast. It’s a smart pick for luggage, bags and bulky seasonal gear.
4. Color-Coded Holiday Totes on Sturdy Wood Shelves
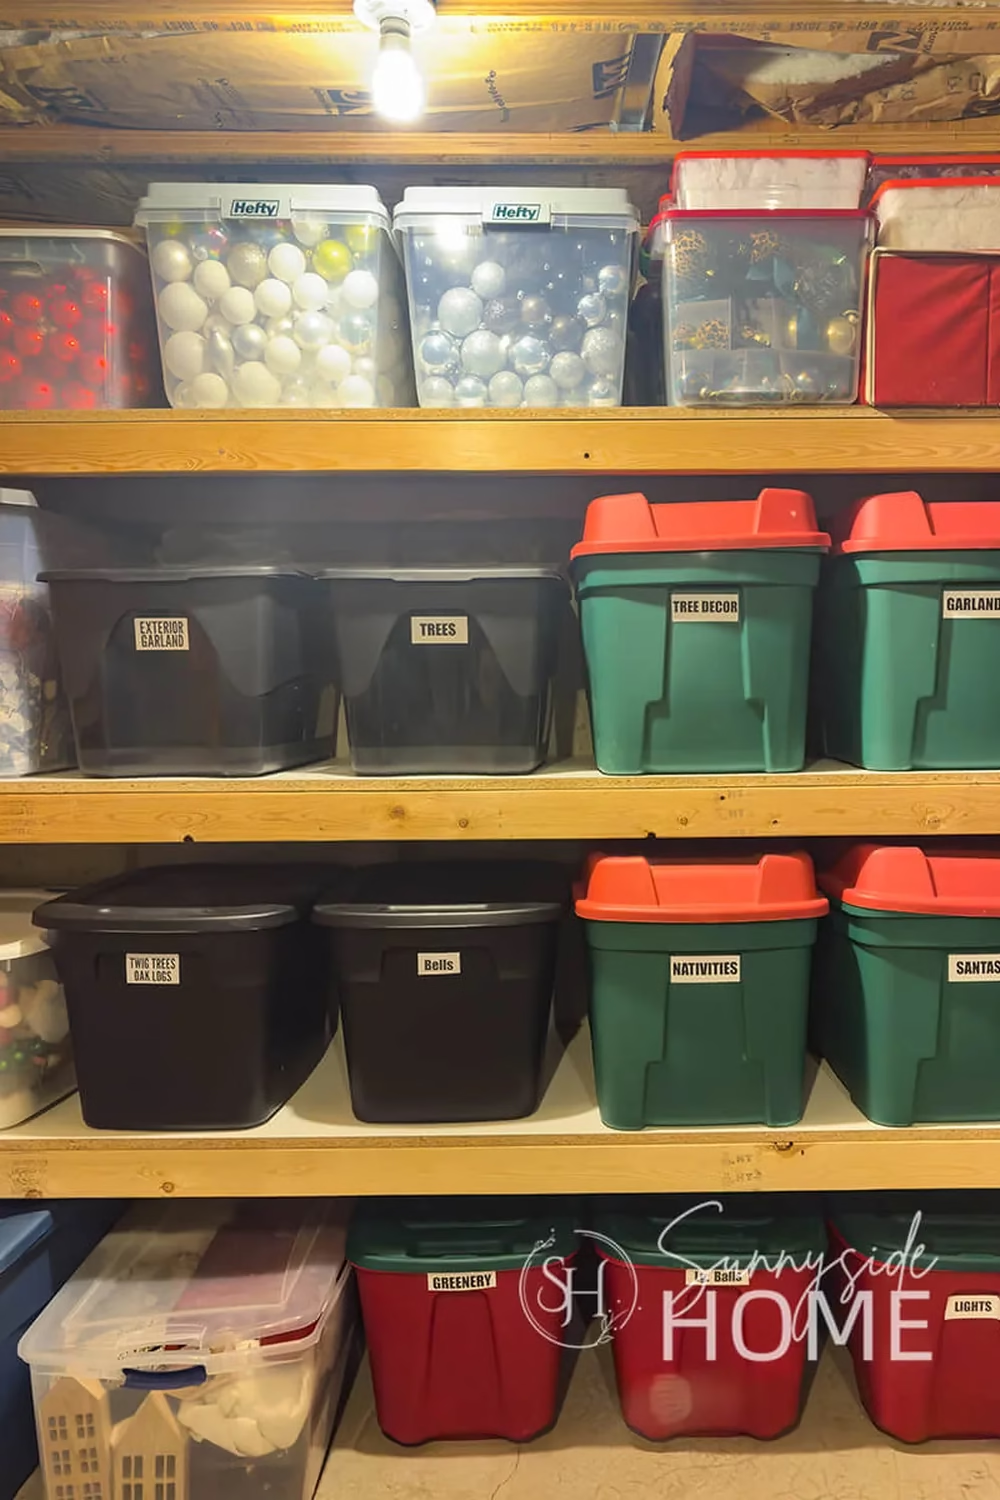
This holiday wall is organized and a little cheerful. Green totes with red lids and red totes with green lids hold the festive pieces, while black bins take garlands and bells. Clear bins up top show off silver, white and gold ornaments. Simple white labels read Trees, Garland, Nativities, Santas, Greenery and Lights, so every bin has a clear job.
To copy it, pick a color for each category, like green for decor and black for artificial greenery. Label the short end of each bin so the words face you on the shelf. Sturdy wood shelving anchored into the joists can handle the weight. Mixed bins work too, as long as the labels are consistent.
5. Clear and Black Bins Lined Up Between Wall Studs
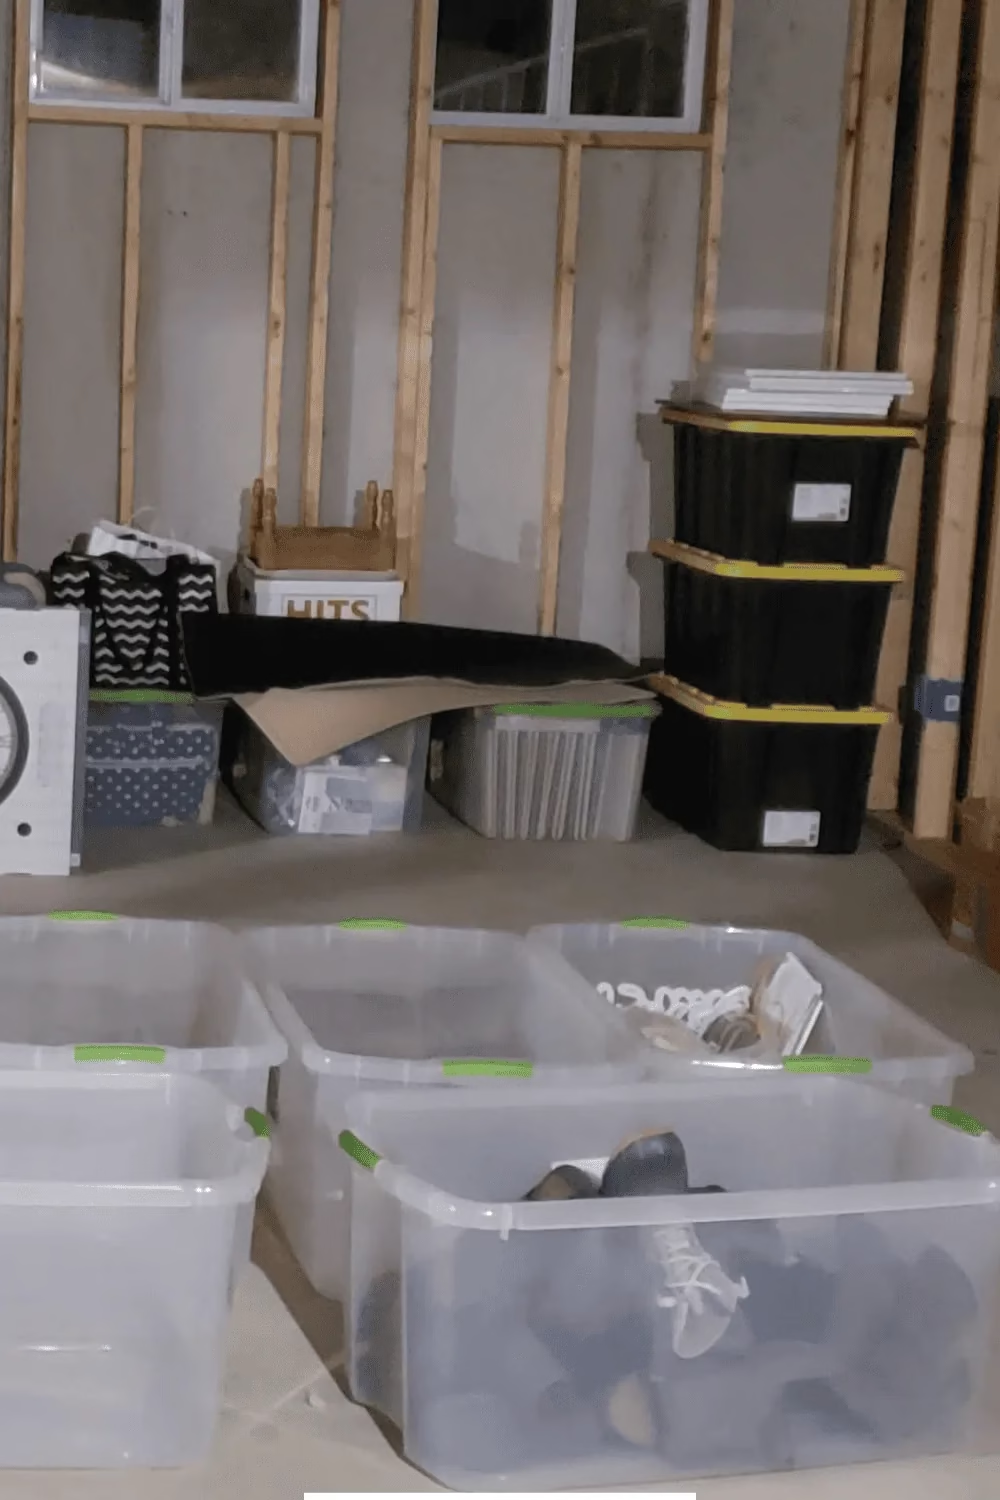
Open wall studs and a concrete floor make a blank slate. Here, clear bins with bright green latches sit in a neat row, and heavy black totes with yellow trim are stacked three high in the corner. You can see shoes through the clear sides, which makes sorting quick. The look is practical and simple, with no fancy materials needed.
The smart upgrade is lifting bins off the concrete. A low wood shelf or a few pallets keeps cardboard and fabric away from damp floors. Choose clear bins for things you reach for often and dark ones for items you rarely touch. This is a good, low-cost setup for a basement that’s still waiting for walls.
6. Raw Plywood Shelves Built Along a Stone Wall
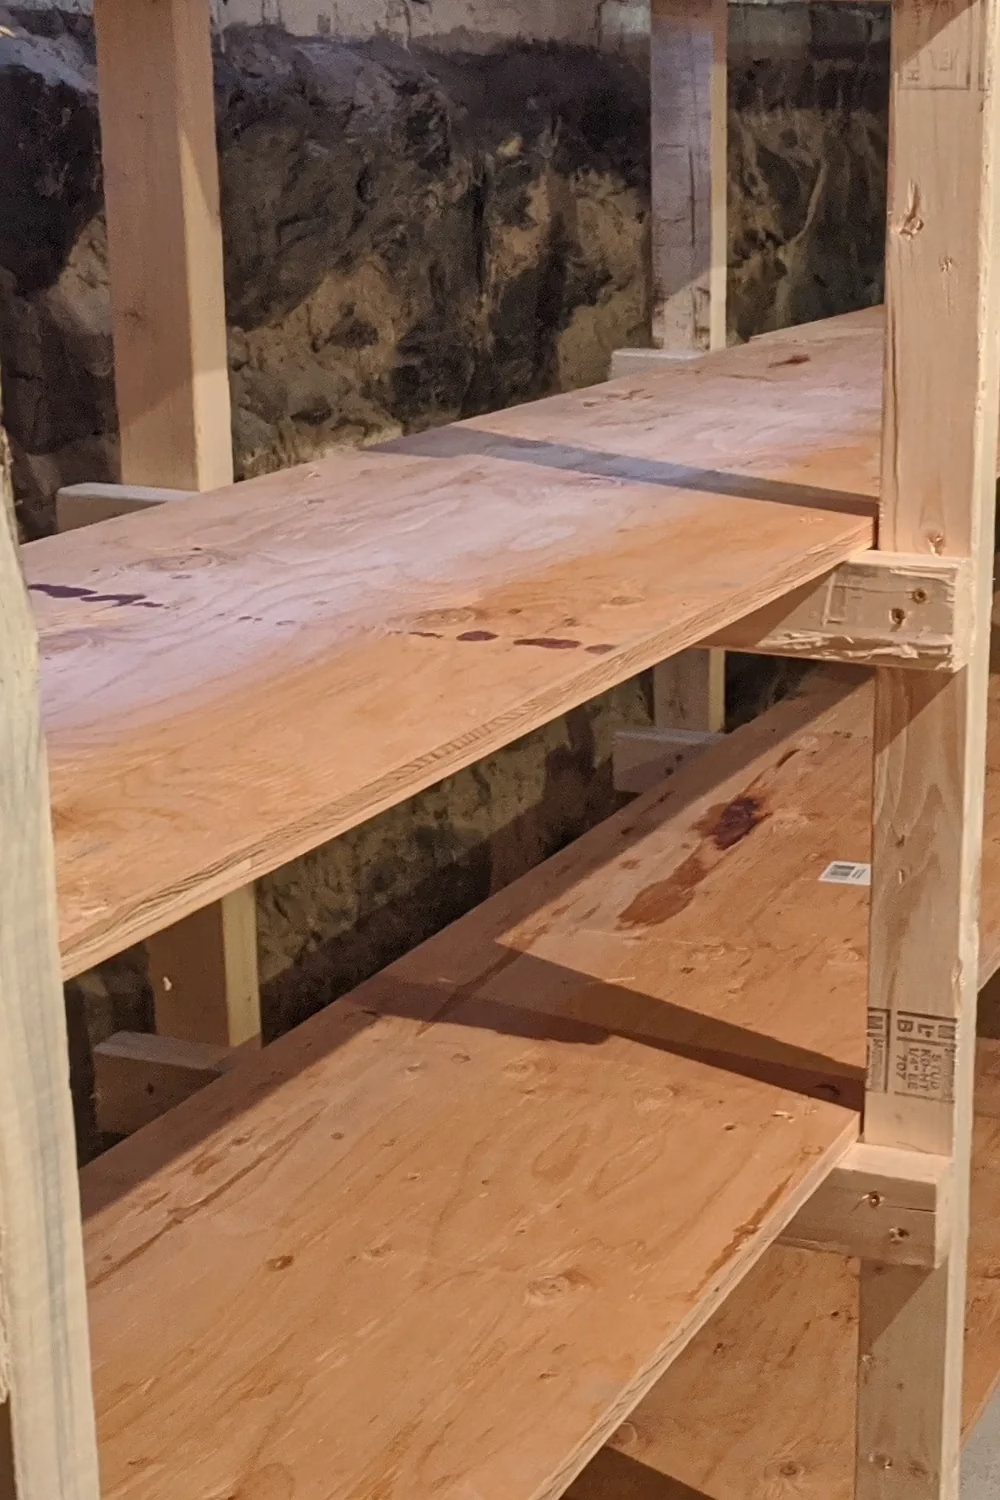
Bare plywood strips and chunky two-by-three frames give this old stone foundation a clean, warm line of storage. The ladder-style frames hang from the ceiling joists, so nothing touches the uneven wall. Narrow shelves run the length of the room, and the light wood stands out nicely against the dark stone. It’s shown before loading, which makes it easy to see how simple the build is.
To recreate it, build the side frames first, then drop in the plywood strips. Pick a depth that fits your bins, since shelves that are too deep tend to hide things at the back. Sand any rough edges and add a coat of sealer if your basement runs damp. It suits long, awkward walls.
7. Narrow Wood Shelves Showing Off Home Canned Jars
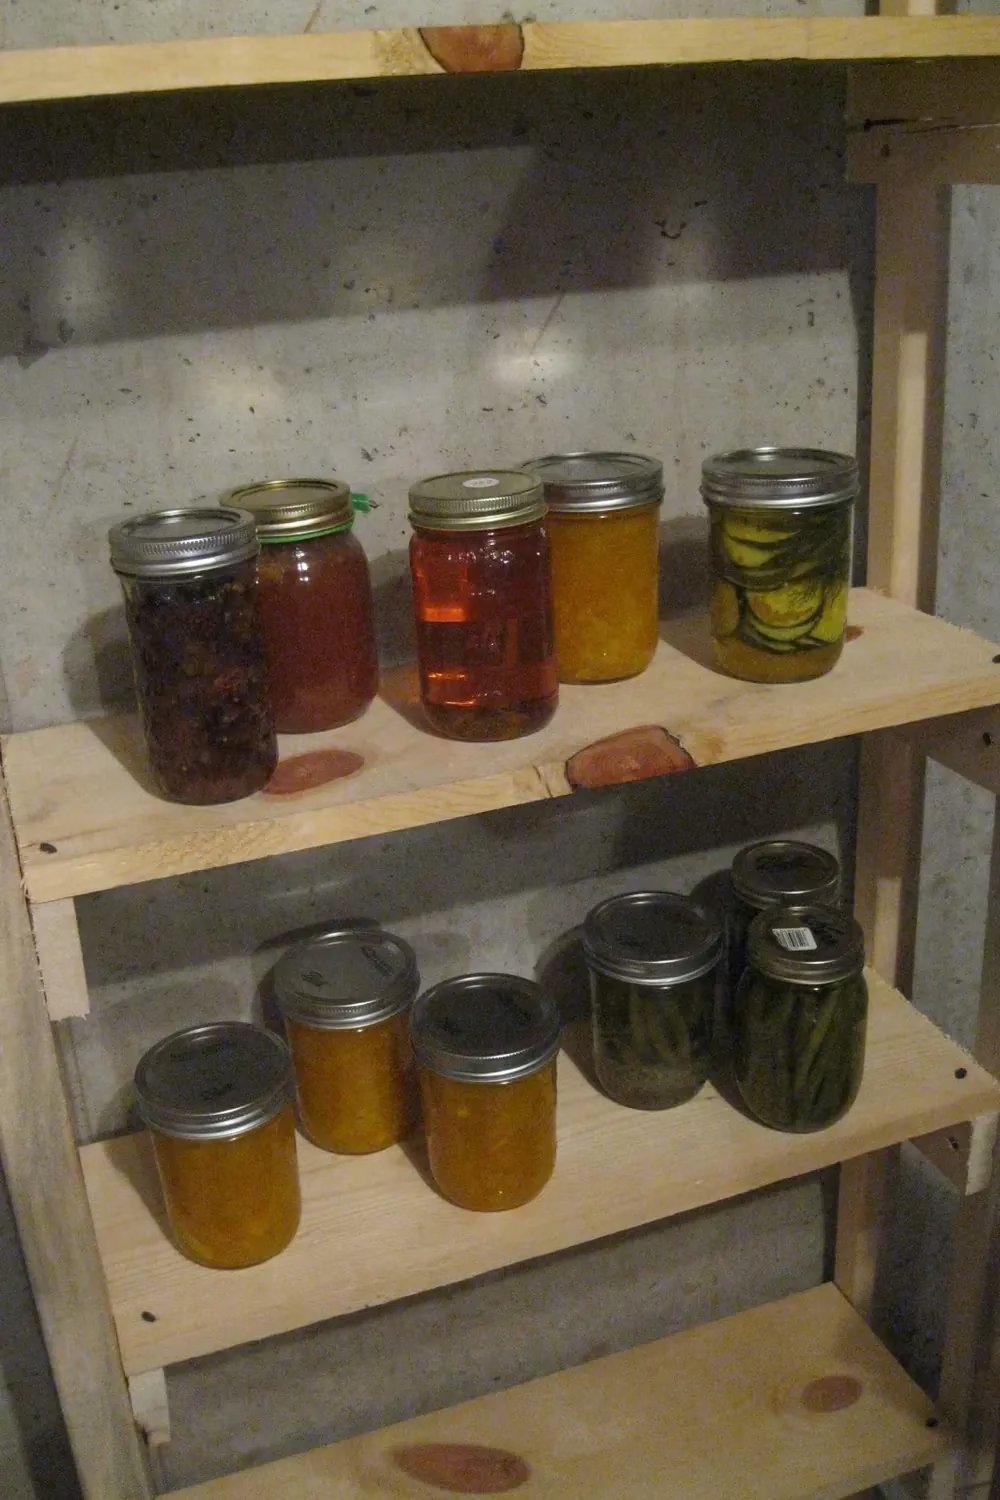
Warm jars of amber, gold and green look almost like decor against the gray poured concrete. Pickles, green beans, jams and preserves sit in a single neat row per shelf, with metal lids catching the light. The slim wood frame is simple, with a rough, handmade feel that matches the home-canned food. Spacing the jars out makes each one easy to spot.
For a similar pantry, keep the shelves shallow so jars sit one deep and nothing gets lost behind another. Attach the frame securely to the wall, since glass is heavy. Write the contents and date on each lid with a marker. This works well for gardeners and anyone who likes to stock up.
8. Bikes Hung Vertically on Red Ceiling Hooks
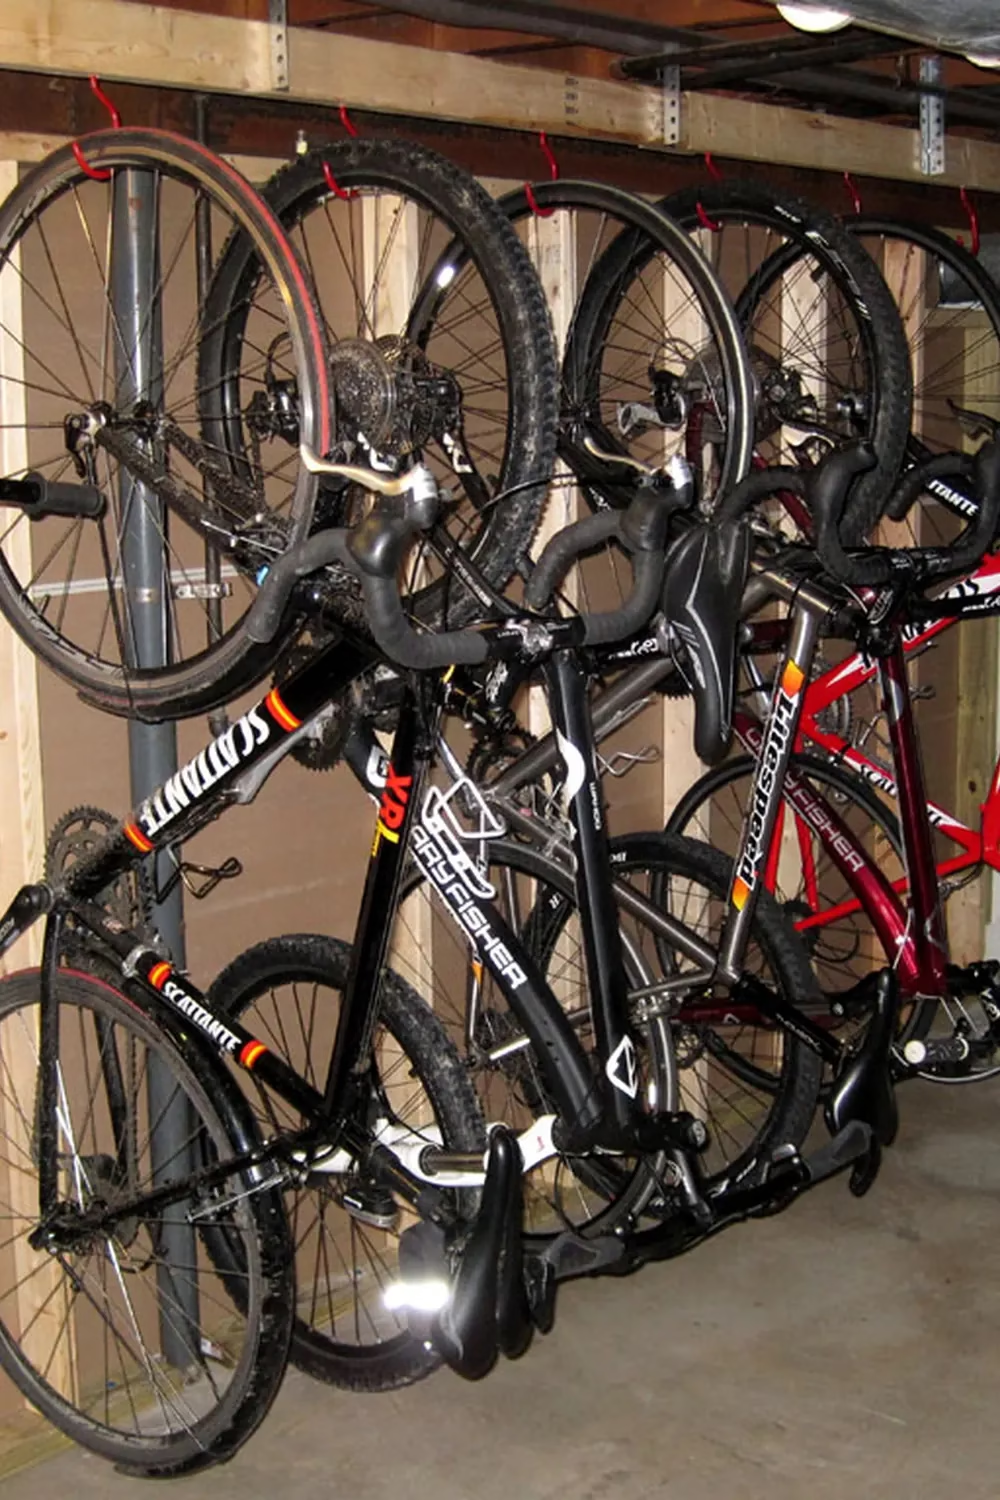
Getting bikes off the floor frees up a surprising amount of room. Bright red hooks grip the front wheels, and the bikes hang in an alternating pattern so the handlebars don’t clash. A sturdy beam runs along the joists above, with metal brackets holding it in place. Black and red frames stand out against the raw wood framing.
To copy it, mount a solid beam to the joists and use hooks rated for your bikes’ weight. Alternate high and low positions, with one bike hung a little higher than its neighbor, so the handlebars can overlap. Leave enough floor space to roll a bike in and out. It’s ideal for families with several bikes and not much room.
9. White Pegboard and Wire Shelves for Tools
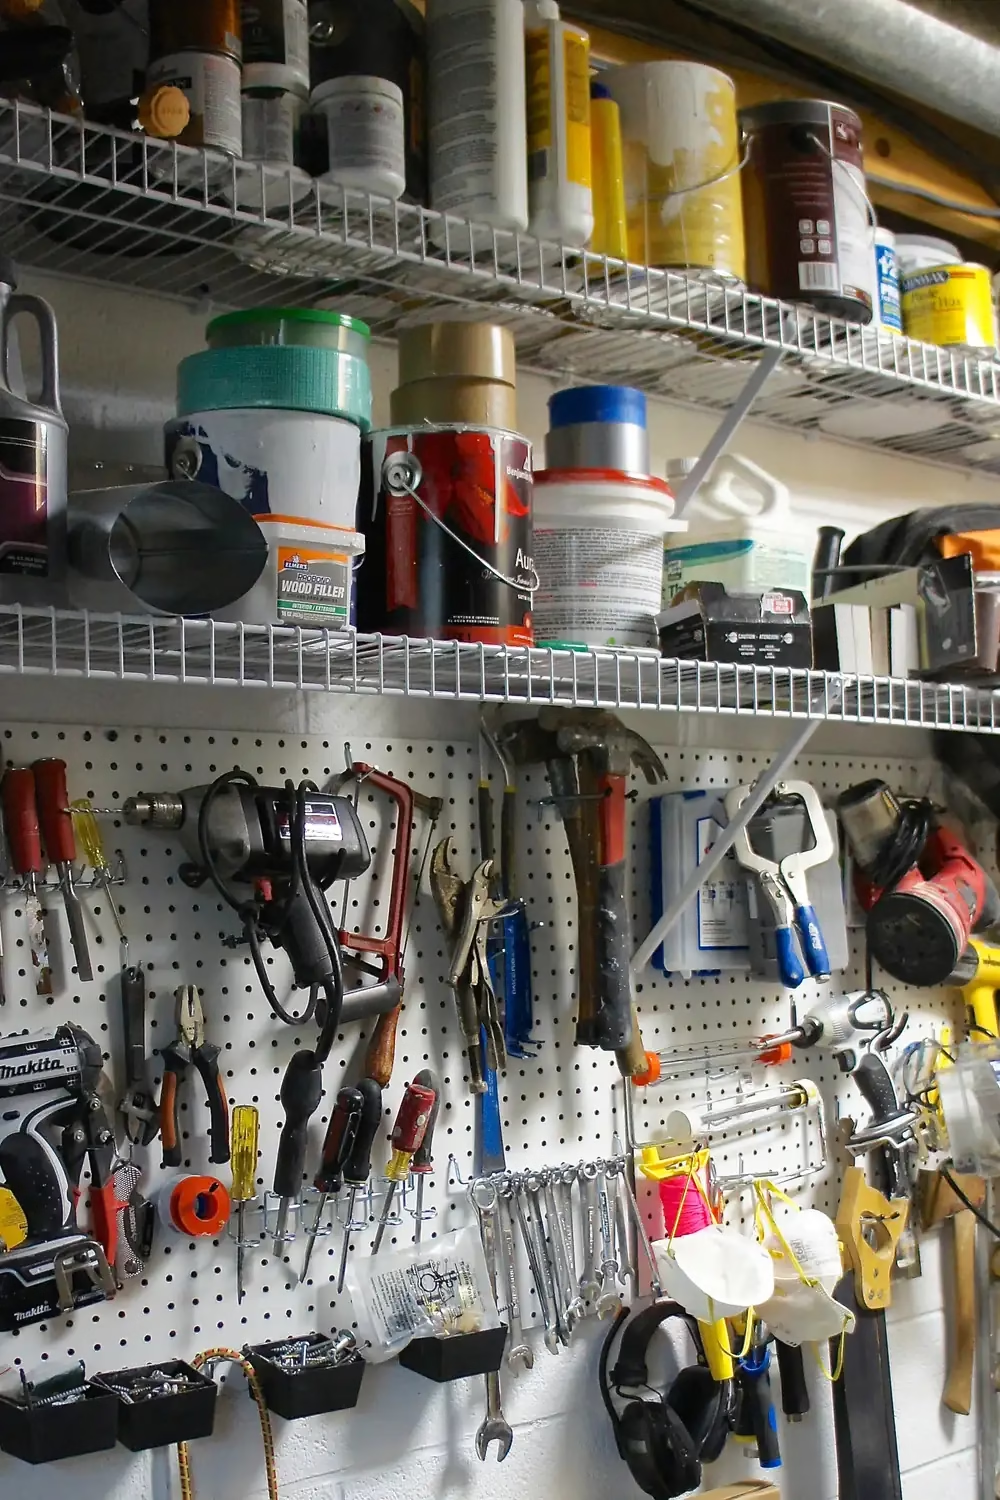
This tool wall is packed but still easy to read. White pegboard holds drills, hammers, pliers, wrenches and screwdrivers on hooks, with small black bins below for screws. Two long wire shelves above are lined with paint cans, glue, tape and spray bottles. Safety masks and ear protection hang right where you need them.
To recreate it, fix the pegboard and wire shelves to the wall with masonry screws if you have cinderblock. Hang tools you use most at eye level, and trace outlines with a marker so each one has a home. Wire shelves keep dust from collecting. It’s a great setup for a part of the basement you plan to leave unfinished.
10. White Bracket Shelves Lined With Paint Cans
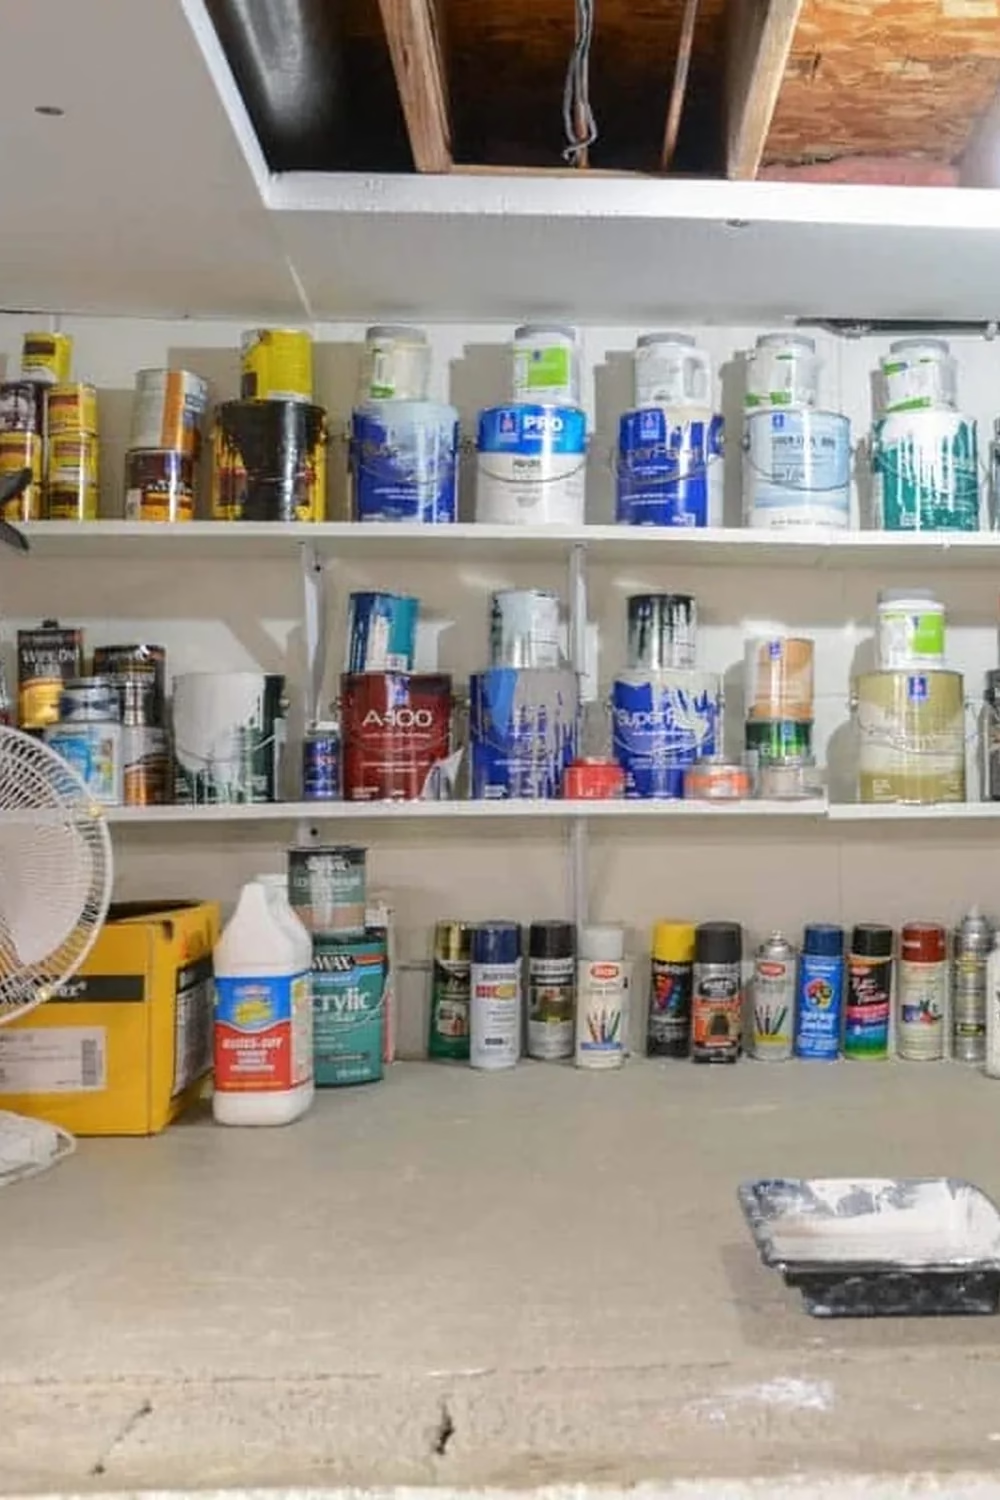
Painted white to match the wall, these simple bracket shelves almost disappear, so the colorful cans take center stage. Gallon cans sit in tidy rows with smaller cans stacked on top, and spray paints line up like soldiers along the back of the counter. A work surface below gives you room to stir and pour. A small fan sits nearby for airflow.
To get this look, use sturdy brackets with long boards, and space the shelves just wider than a gallon can. Group paint by type, with stains together and sprays together. Write the room name on each lid so matching touch-ups is easy. It’s a great fit for DIYers who always have a project going.
11. Secondhand Metal Shelving Lining a Painted Brick Aisle
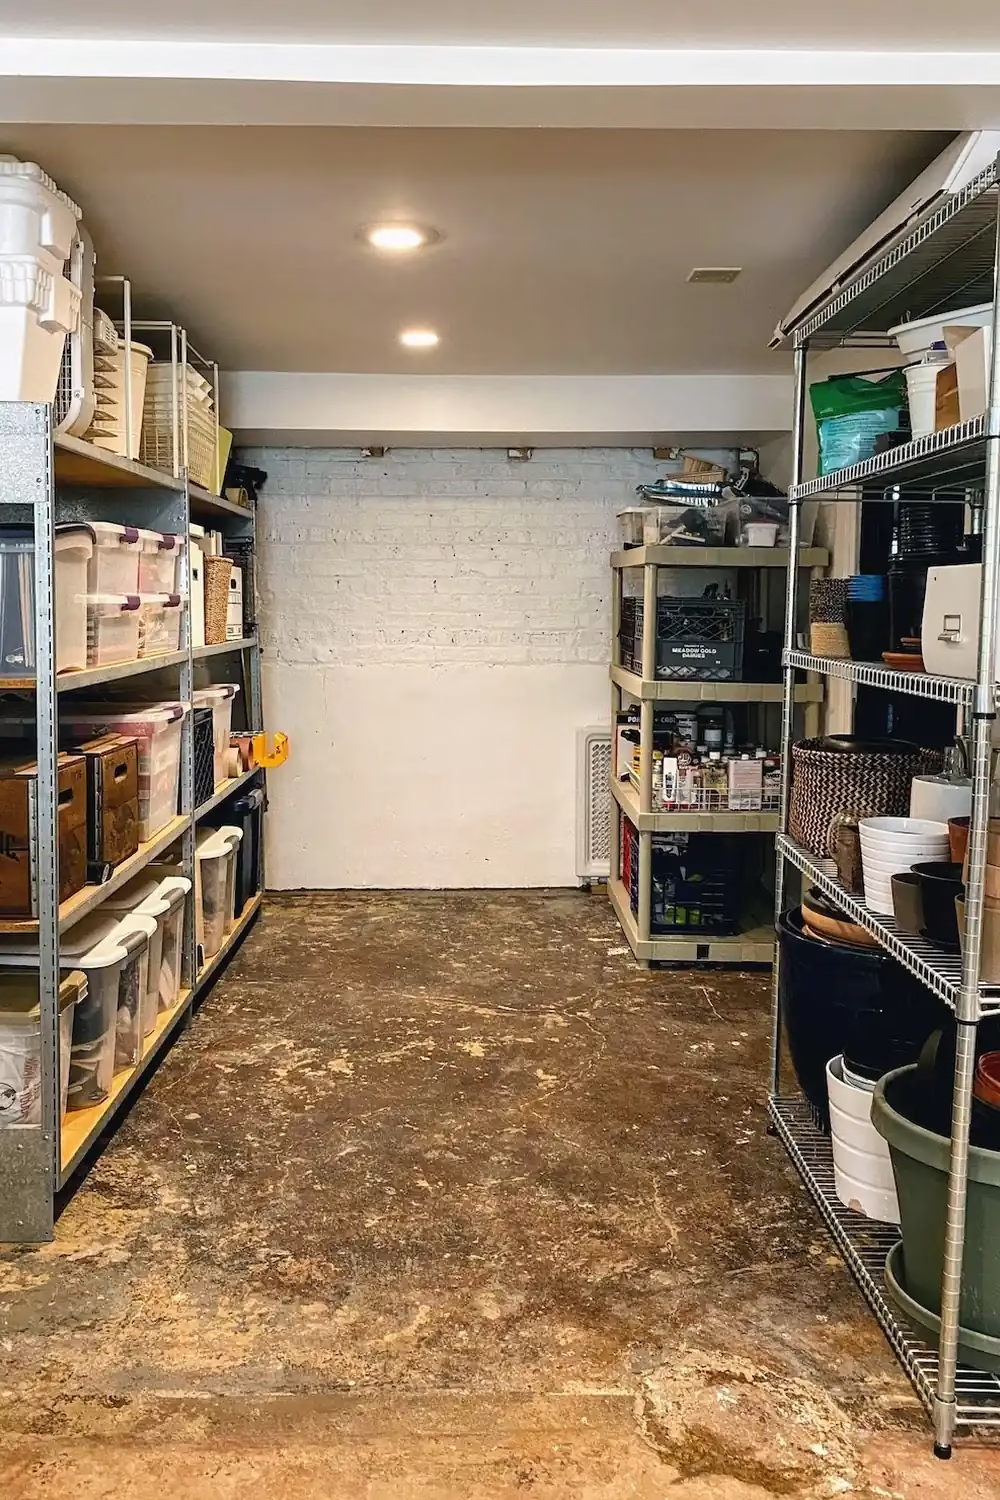
A white-painted brick wall at the end of the aisle makes this storage room feel bright and calm. Metal shelving on the left holds clear bins, wooden crates and baskets, while a wire shelf on the right carries planters and pots. A plastic shelf in the back keeps tools and supplies together. Even with a rough concrete floor, the neat rows make the room feel organized.
Secondhand metal shelving is a smart budget move, since you only need to check that it’s sturdy and level. Mix open shelves with lidded bins so small items stay dust free. Keep a clear walkway down the middle, and add ceiling lights if you can. It works well for anyone who wants a tidy storage room without a full remodel.
12. Floor to Ceiling Wood Cubbies Stacked With Paint Cans
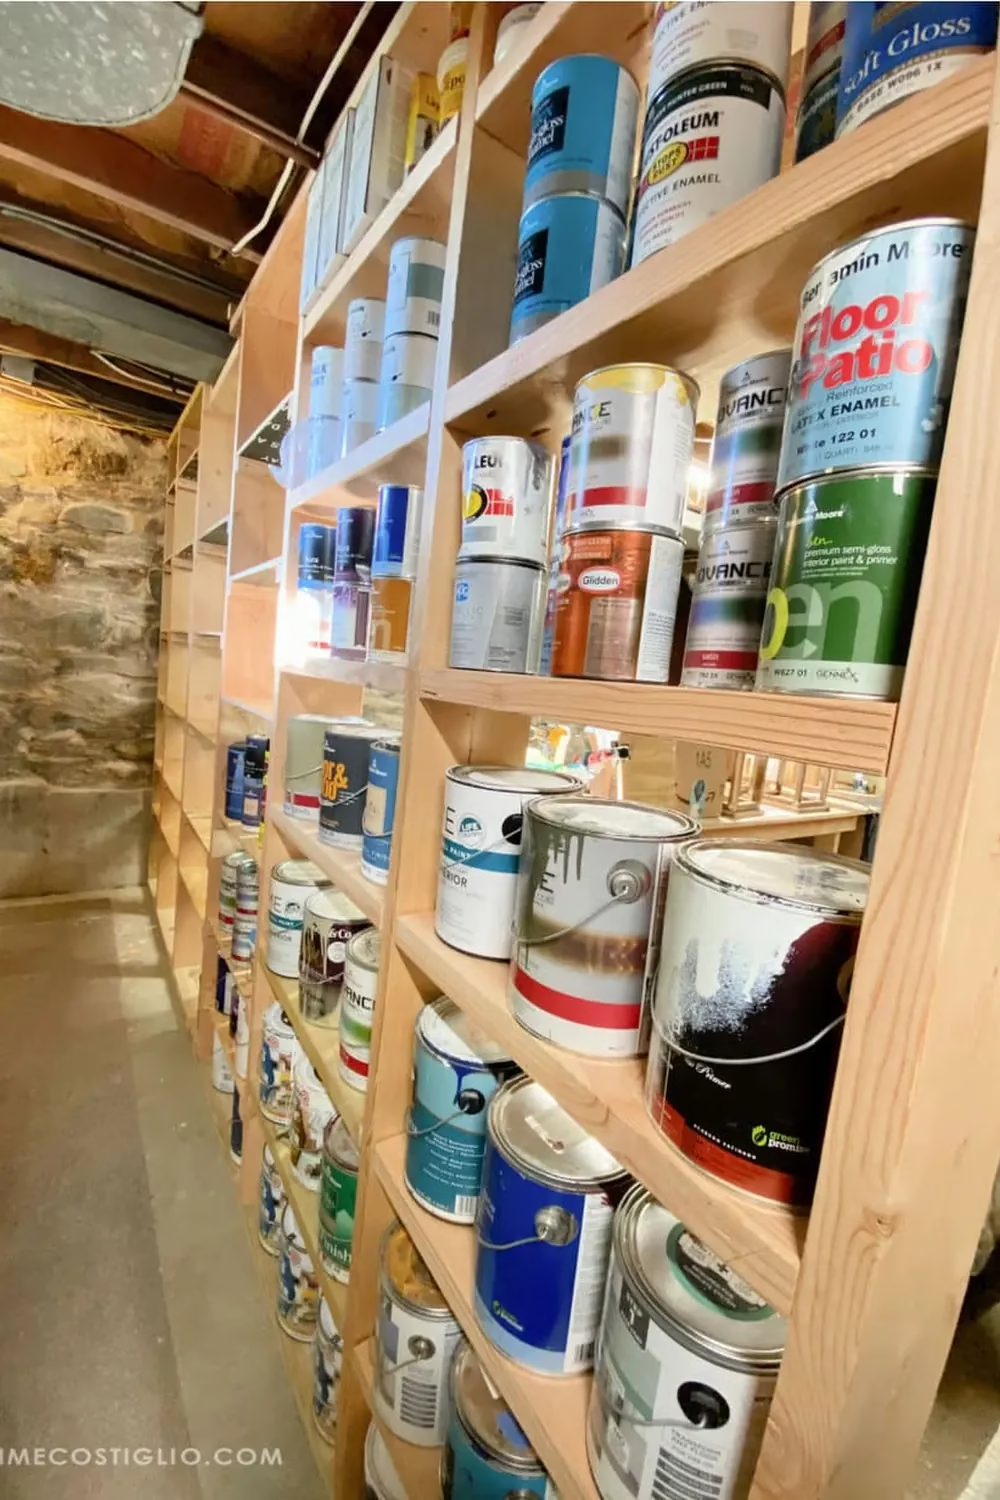
This tall wall of wood cubbies makes the most of the space between joists and a stone foundation. Deep shelves hold gallon cans on their sides with the labels facing out, so you can read each one at a glance. Blues, greens, whites and reds line up like a color library. The pale lumber looks warm against the rough, dark stone.
To build something similar, frame a divider wall with deep studs and add plywood shelves on cleats. Size each opening for a gallon can plus a little wiggle room. Store cans label out, and keep the heaviest ones low. This is a clever idea for homes with lots of leftover paint and a long, narrow basement.
13. Deep Blue Cabinet Against Limewashed Cellar Brick
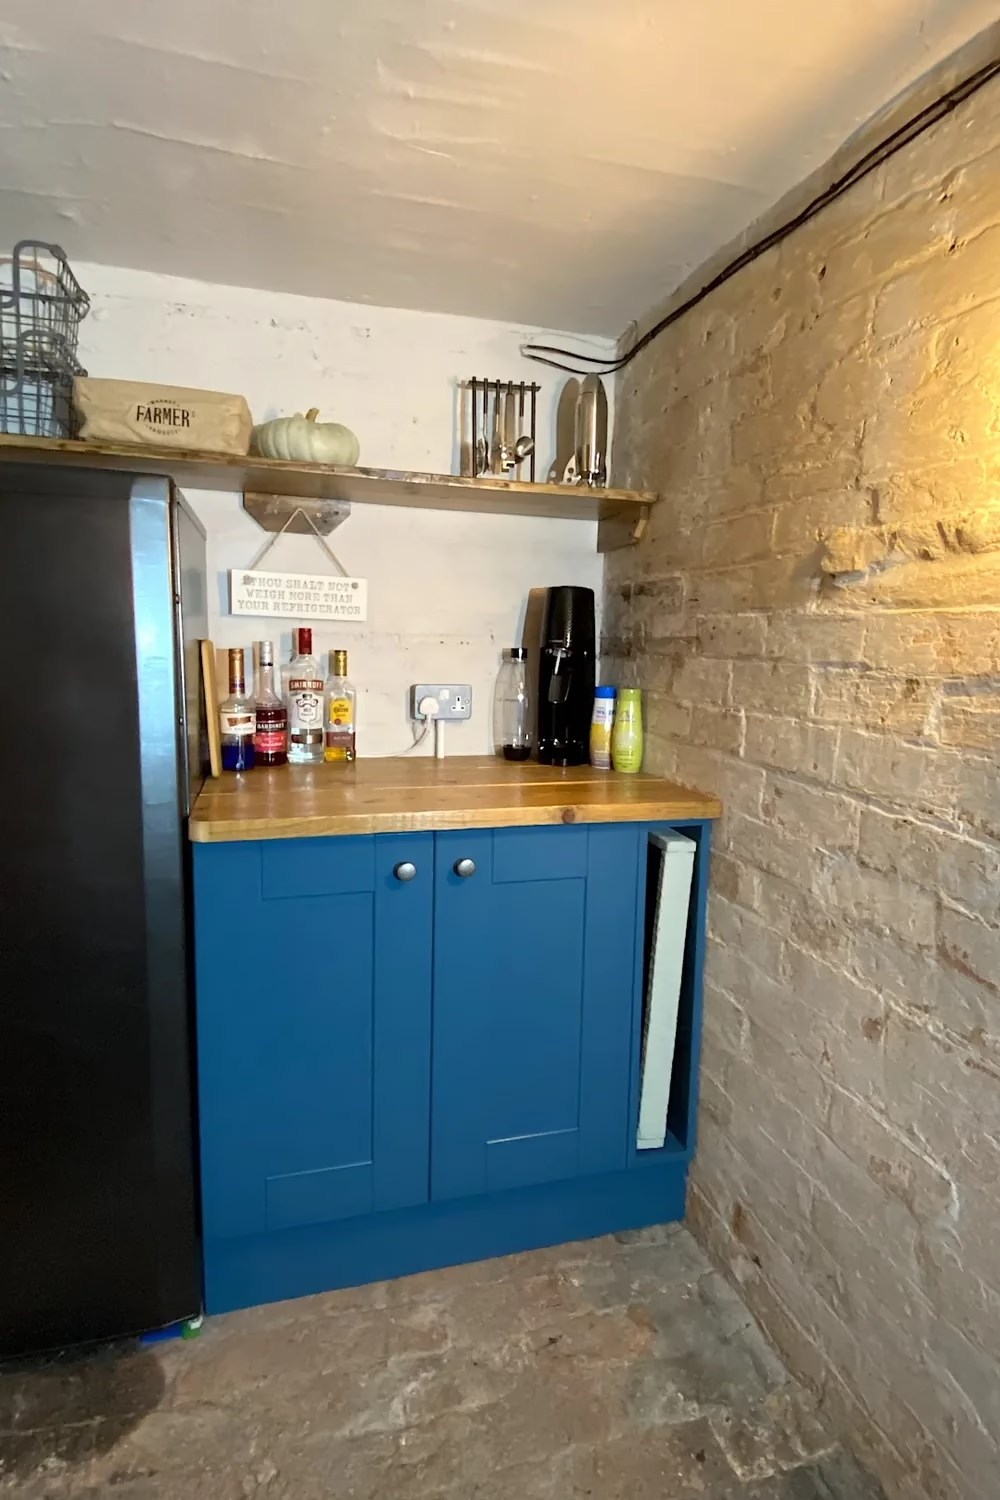
A deep blue base cabinet with shaker doors and round knobs looks rich against pale limewashed brick. The chunky wood countertop and the rough wood shelf above warm everything up. A small bar setup on top, with bottles and a soda maker, turns a damp-looking cellar corner into a spot you want to use.
To recreate it, ask a joiner or kitchen supplier for a standard base unit, then paint the doors in a durable cabinet paint. Pick a moisture-resistant finish for cellar air. On a budget, buy a secondhand cabinet and a thick scaffold-board style top. It suits older homes with rustic brick.
14. Pale 2×4 Frames Holding Wide Plywood Shelves
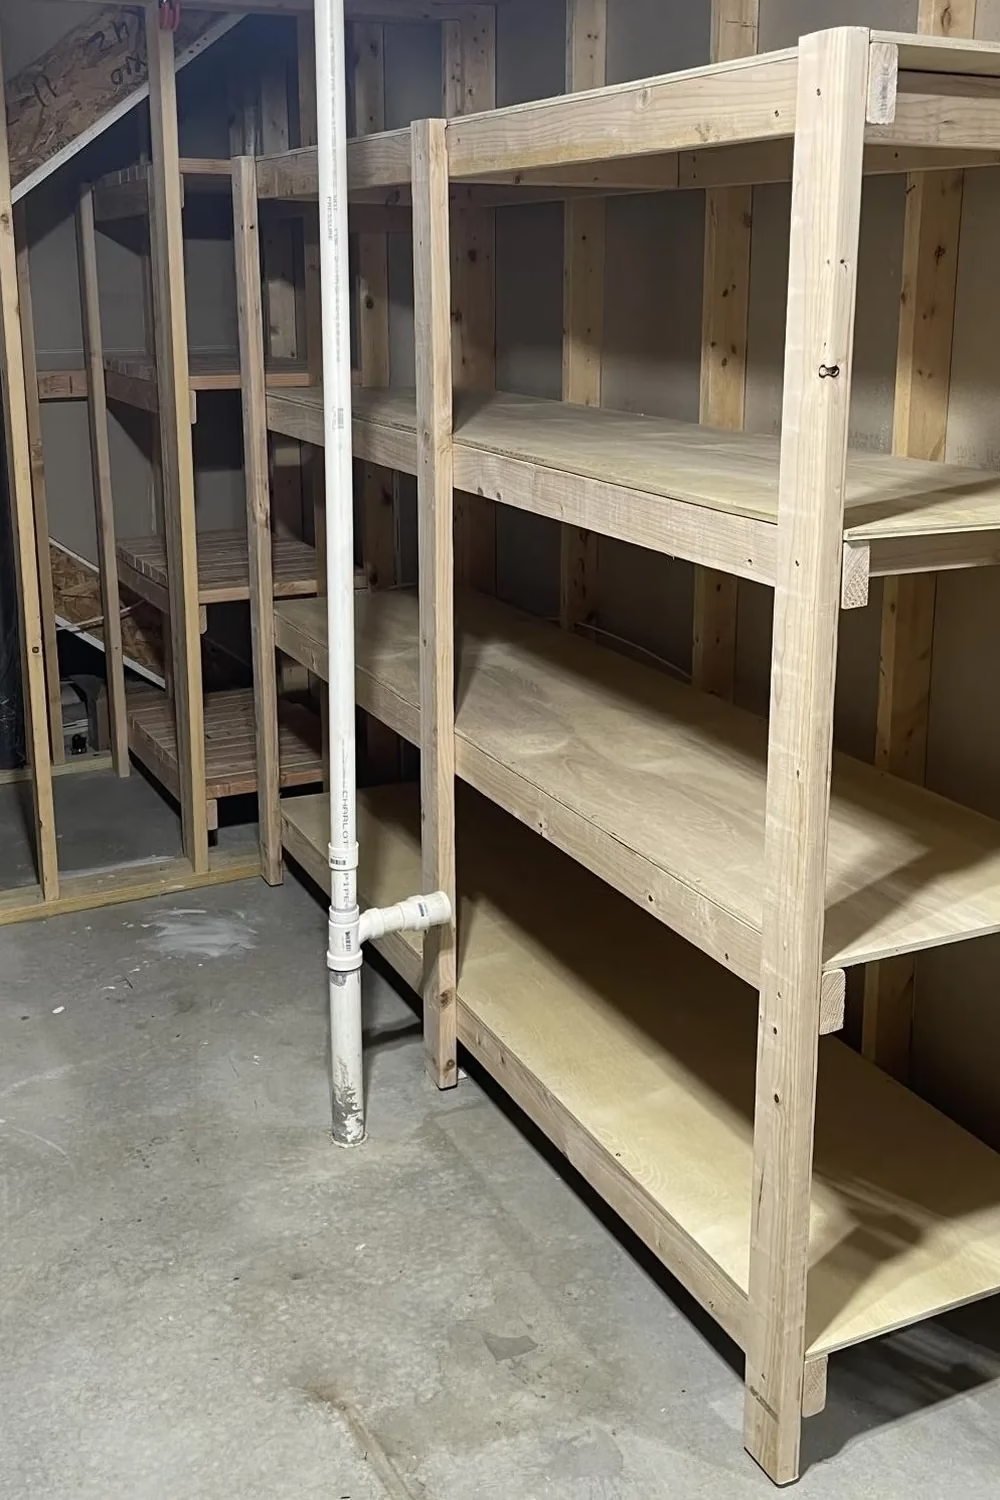
Simple 2×4 uprights with plywood shelves make a sturdy storage wall that fits right into exposed stud framing. The light wood looks clean against the bare concrete floor, and the long, wide shelves give you a lot of room for bins and bulky items. Notice how the build works around the white pipe instead of fighting it.
To copy it, cut your uprights to fit your ceiling height and add cross rails front and back for each shelf. Screw plywood sheets on top. Measure around any pipes or posts first and leave a gap. It’s a great pick for beginners with a saw and a drill, and it costs far less than store-bought racks.
15. Wood Shelf Unit Tucked Beside the Water Heater
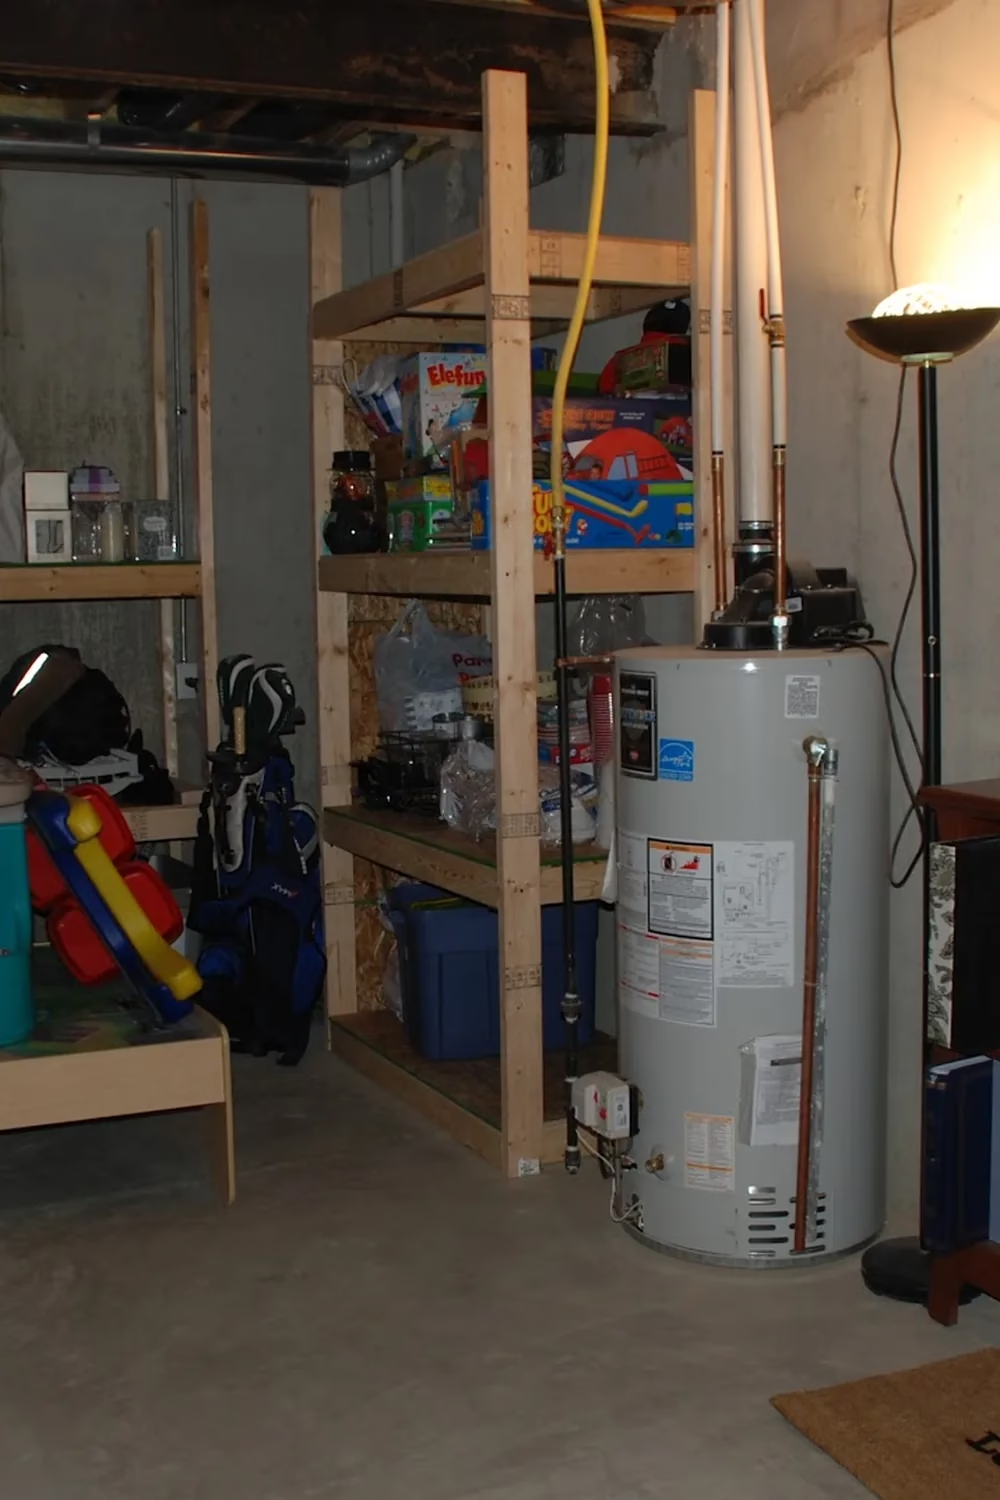
Utility corners often go to waste, but here a tall wood shelf unit fits snugly beside the water heater. Game boxes, a blue tote, and household supplies sit on four open levels. A second shelf nearby holds kids’ gear and golf bags, so the whole corner works hard without crowding the floor.
If you try this, leave a safe gap around the heater and keep the flue and pipes clear. Check local rules on clearance before building. Use the lower shelves for heavy totes and the upper ones for light, grab-and-go items. It suits families who need a quick home for toys and sports gear.
16. Walk-In Food Storage Room With Shelves Both Sides
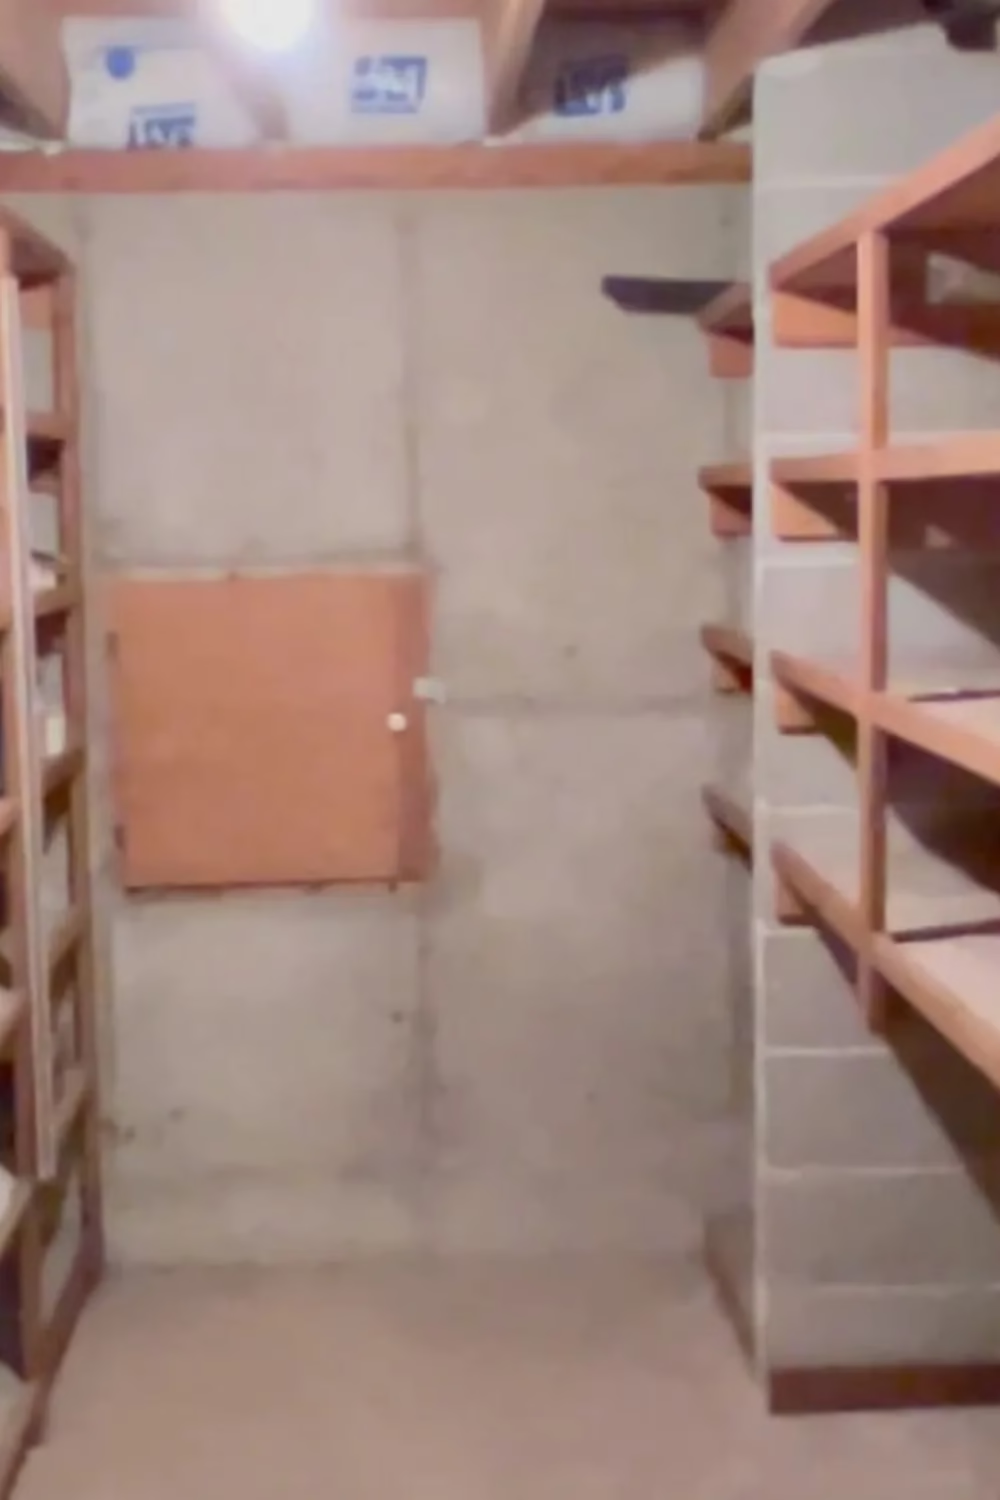
This narrow room uses a simple walk-in layout, with wood shelves running down both sides and a bare concrete wall at the end. A small plywood door in the back wall adds a bit of character. The shelf along the top, tucked right under the joists, even grabs the last bit of overhead space.
To recreate it, build open shelves from sturdy lumber with a middle aisle wide enough to walk through comfortably. Keep the shelf depth modest so you can see everything. Painting the concrete walls a light color would brighten it up a lot. This works well for pantry overflow, canned goods, and bulk food buys.
17. Gray Painted Floor Aisle Lined With Red Totes
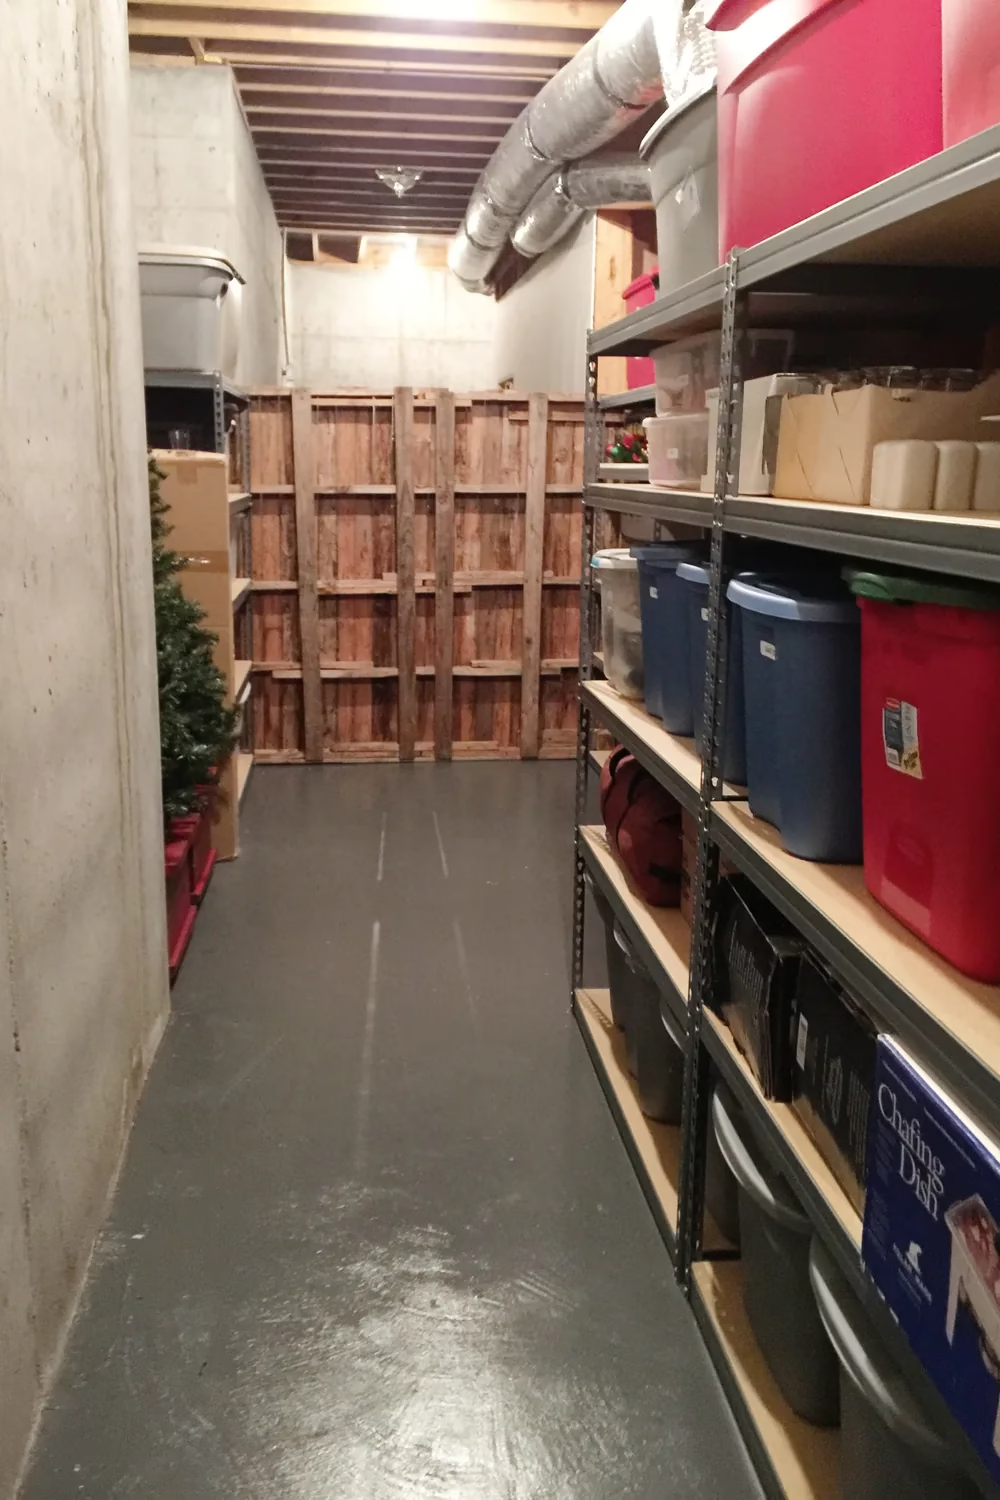
A glossy gray painted floor makes this long, narrow storage aisle feel tidy and finished, even with exposed joists overhead. Metal racks hold bright red and blue totes in a neat row, and artificial trees stand along the opposite wall. The ductwork overhead stays out of the way because the shelves stop below it.
To get the look, paint the concrete with a floor paint made for basements and let it cure fully before moving shelves in. Group your holiday totes together and add labels so you can find them fast. It’s a smart setup for seasonal items, since you only open this aisle a few times a year.
18. Matching Gray Totes With Lime Green Latches on Black Racks
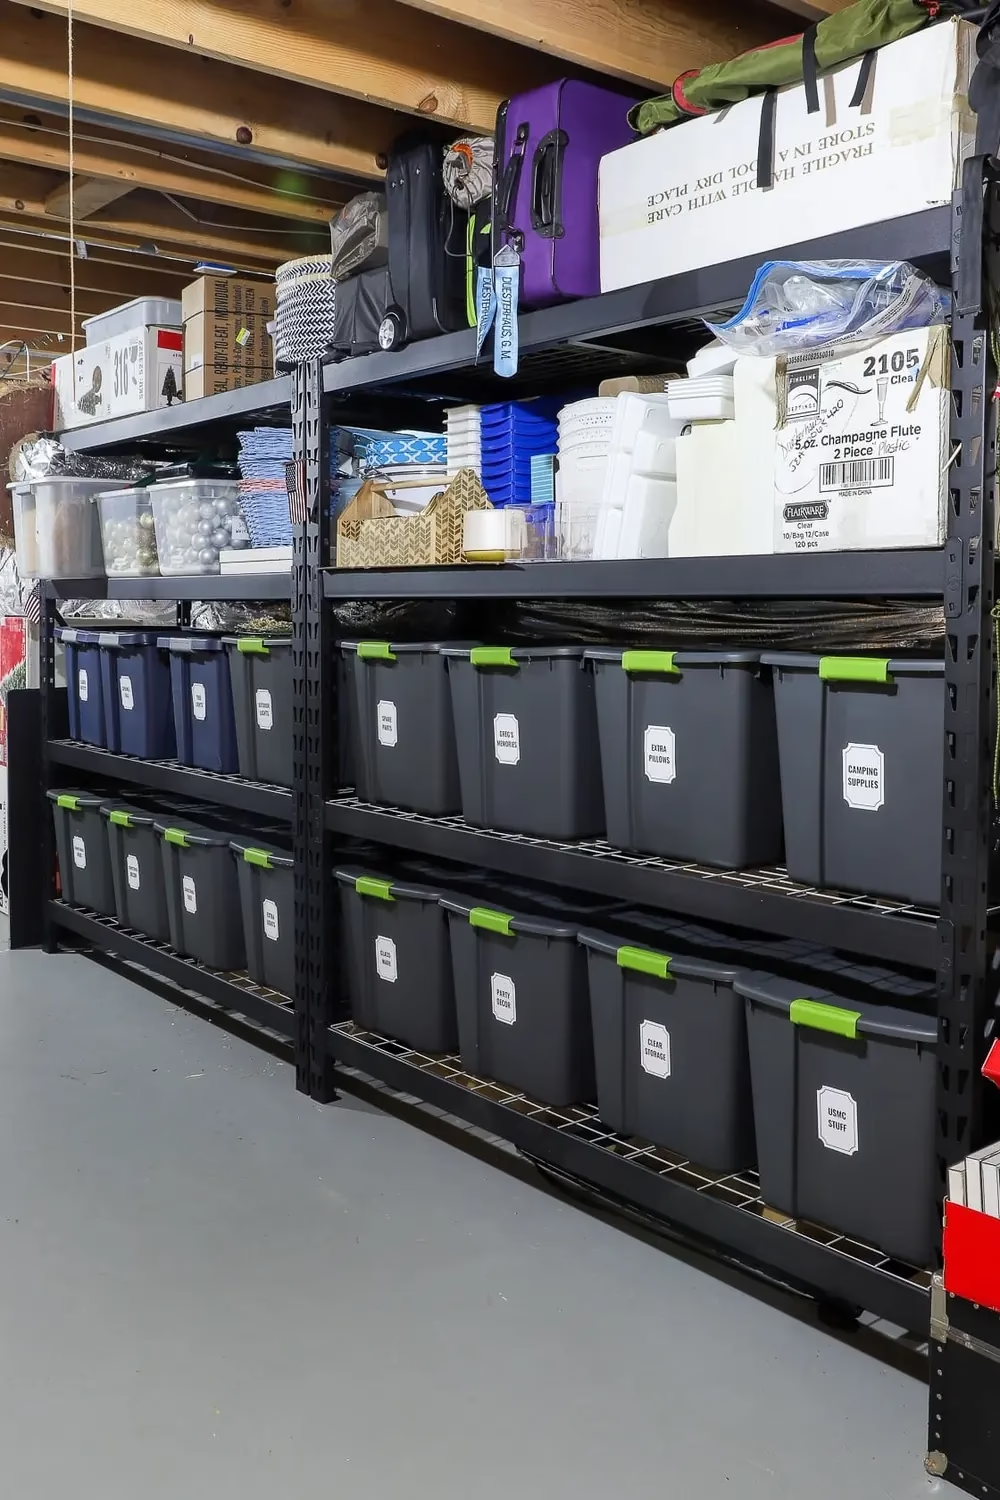
Matching gray totes with bright lime green latches turn a heavy-duty black rack into a neat, almost shop-like display. Each tote has a clean white label, like camping supplies and extra pillows, so nothing needs guessing. Bulkier items like suitcases sit up top, which keeps the floor-level shelves for the heaviest bins.
This is a renter-friendly idea because the racks stand on their own and need no drilling. Buy one tote style in one color so the rows look even, then print simple labels. If a full set is too pricey, start with one shelf and add bins as you go. It suits anyone who wants order fast.
19. Pegboard Gear Wall Above a Simple White Shelf
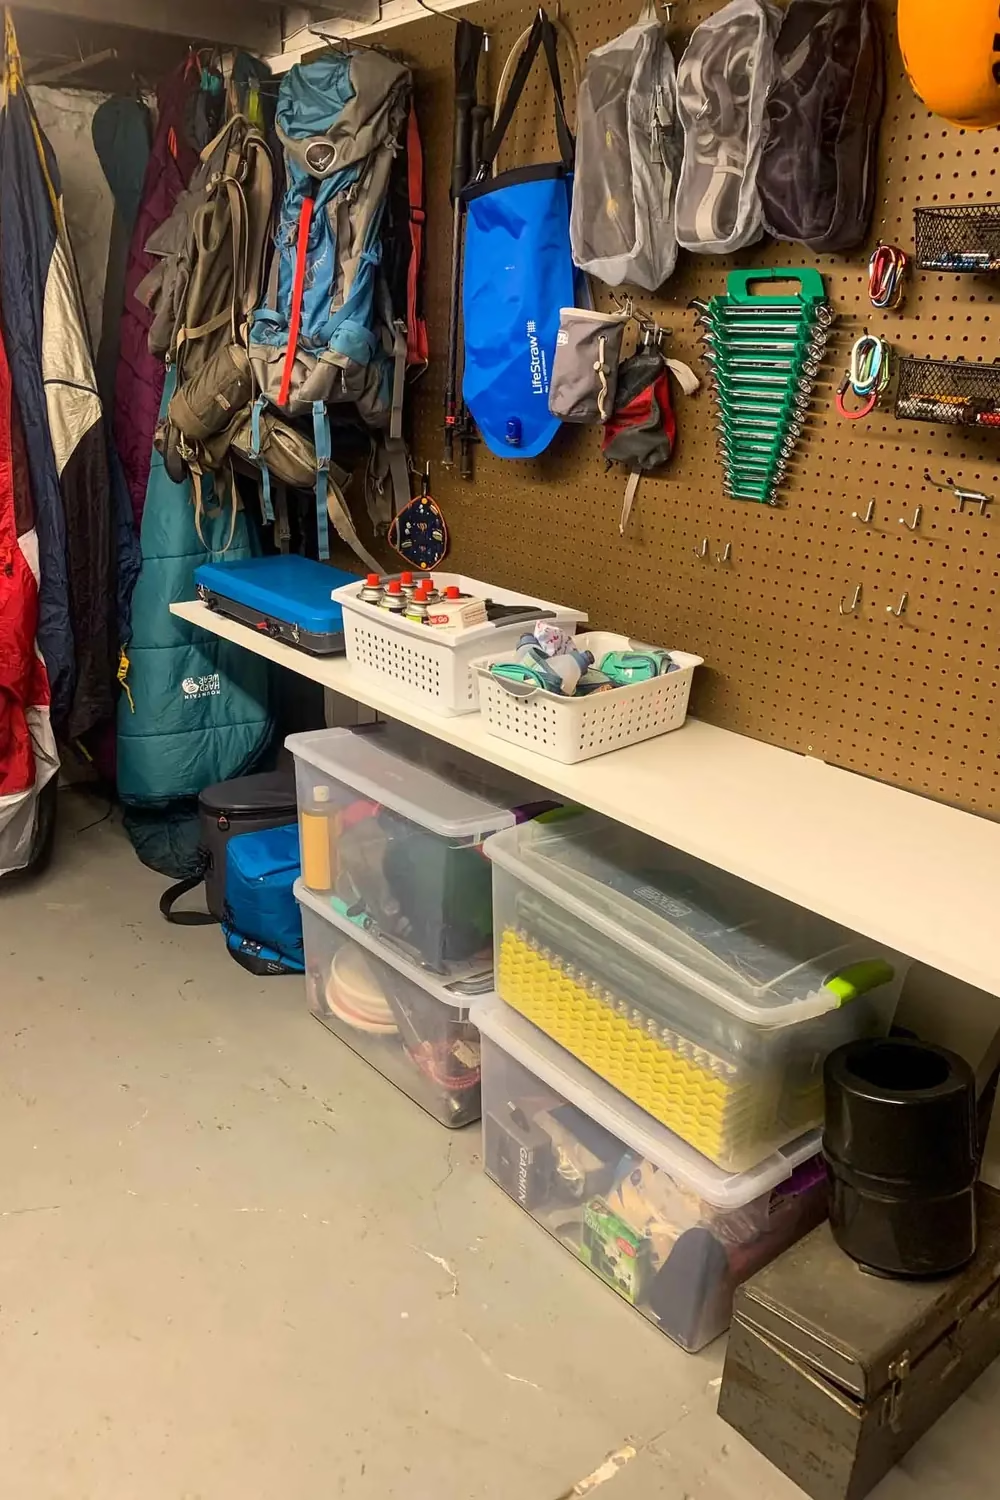
A big pegboard wall holds backpacks, trekking poles, a water bag, and wrenches, all within easy reach. Below it, a plain white shelf works as a counter for a camp stove and two white baskets. Clear tubs tucked underneath keep smaller gear visible, and sleeping bags hang along the side.
To recreate it, screw a pegboard sheet to the wall studs with spacers behind it so hooks can slide in. Mount a long shelf at a comfortable height and slide tubs below. Use small baskets for fuel and loose parts. It’s ideal for a shared basement where each person needs a clear spot for their outdoor gear.
Over to You
You don’t have to tackle the whole basement in one weekend. Start with one wall, one shelf, or one set of matching bins, and let the rest follow.
Save your favorite ideas to a board so they’re ready when you head to the hardware store. Then try one this weekend and enjoy finding things the first time you look.