Fresh ideas for every room, every week

How to Attach a Patio Roof to an Existing House

You love your patio, but the sun beats down at noon and one rain shower sends everyone indoors.

Cushions fade, grills rust, and that outdoor dinner you planned turns into a scramble for towels.

The good news is that a smart roof extension over patio space fixes all of it without making your home feel closed in. Many of these designs also add light, warmth, and real value to the house.

Below are 15 real-world looks, from airy sheer covers to cozy timber ceilings. Scroll through, spot the style that fits your home, and pick up practical tips to make it happen.

1. Gable Skylight Panels
Gable Skylight Panels
Photo by: @perthpatiomagic

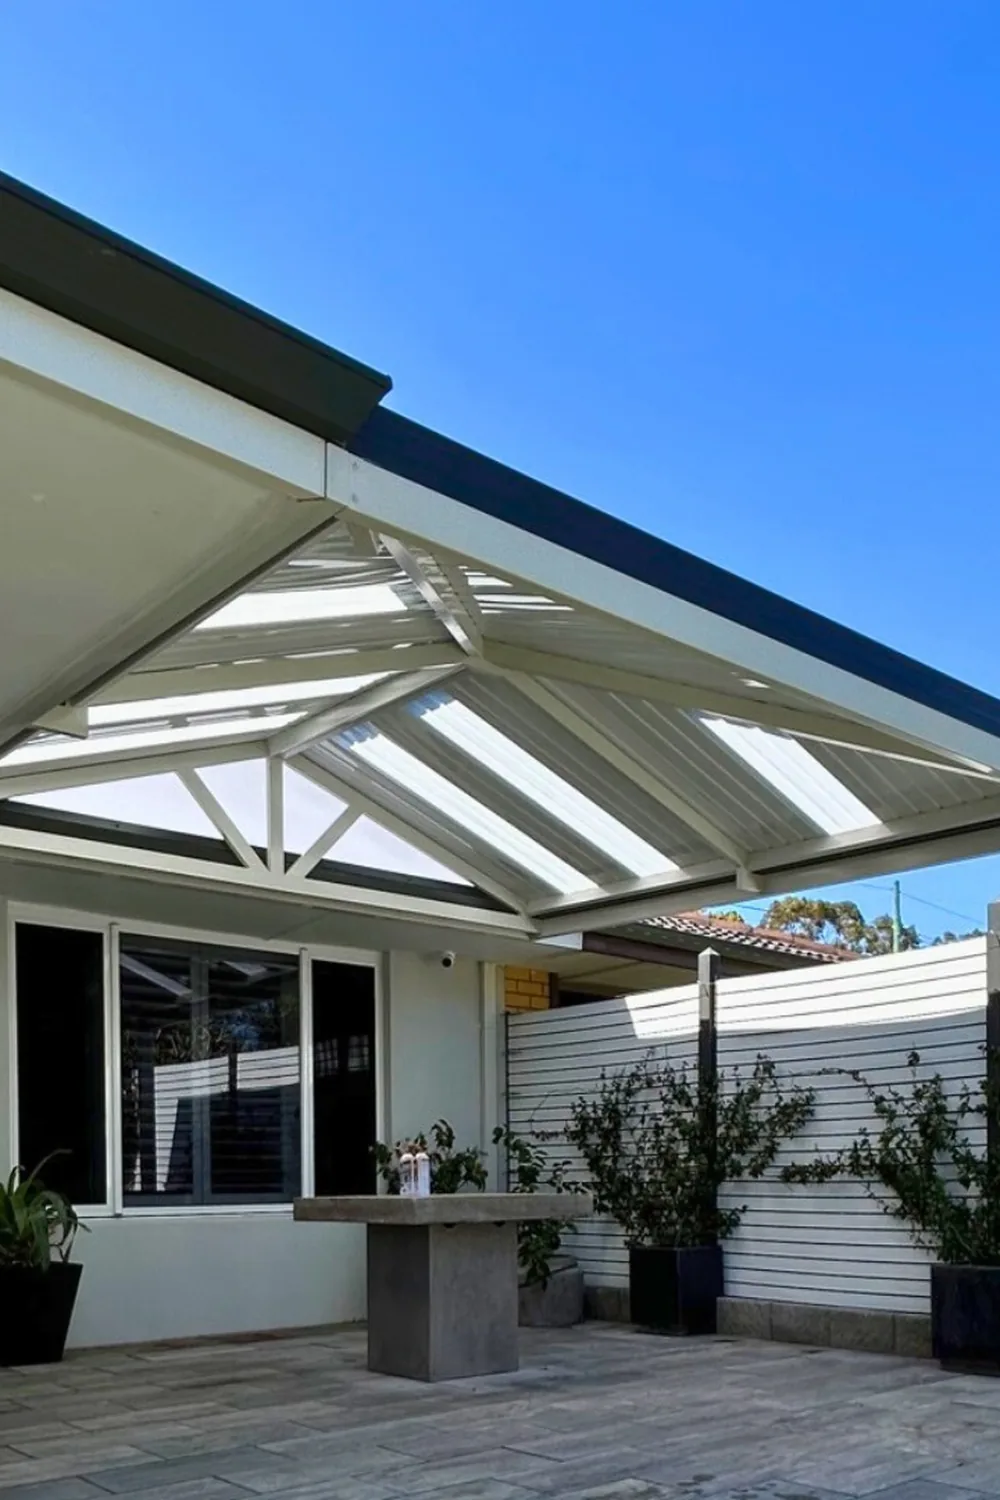
A white gable roof that meets the house wall gives this patio a crisp, architectural look. The clear panels set between the solid sheets let daylight spill onto the pavers, so the space under the roof never feels like a cave. The white trusses and dark gutter line echo the window frames, which keeps everything tidy.

To recreate it, ask your builder about an insulated metal gable with a few translucent skylight panels. Insulation helps keep the heat down, while the panels keep things bright. Add dark planters and a simple stone table, as shown here, for an easy, low-fuss finish.

2. Sloped Sheer Cover
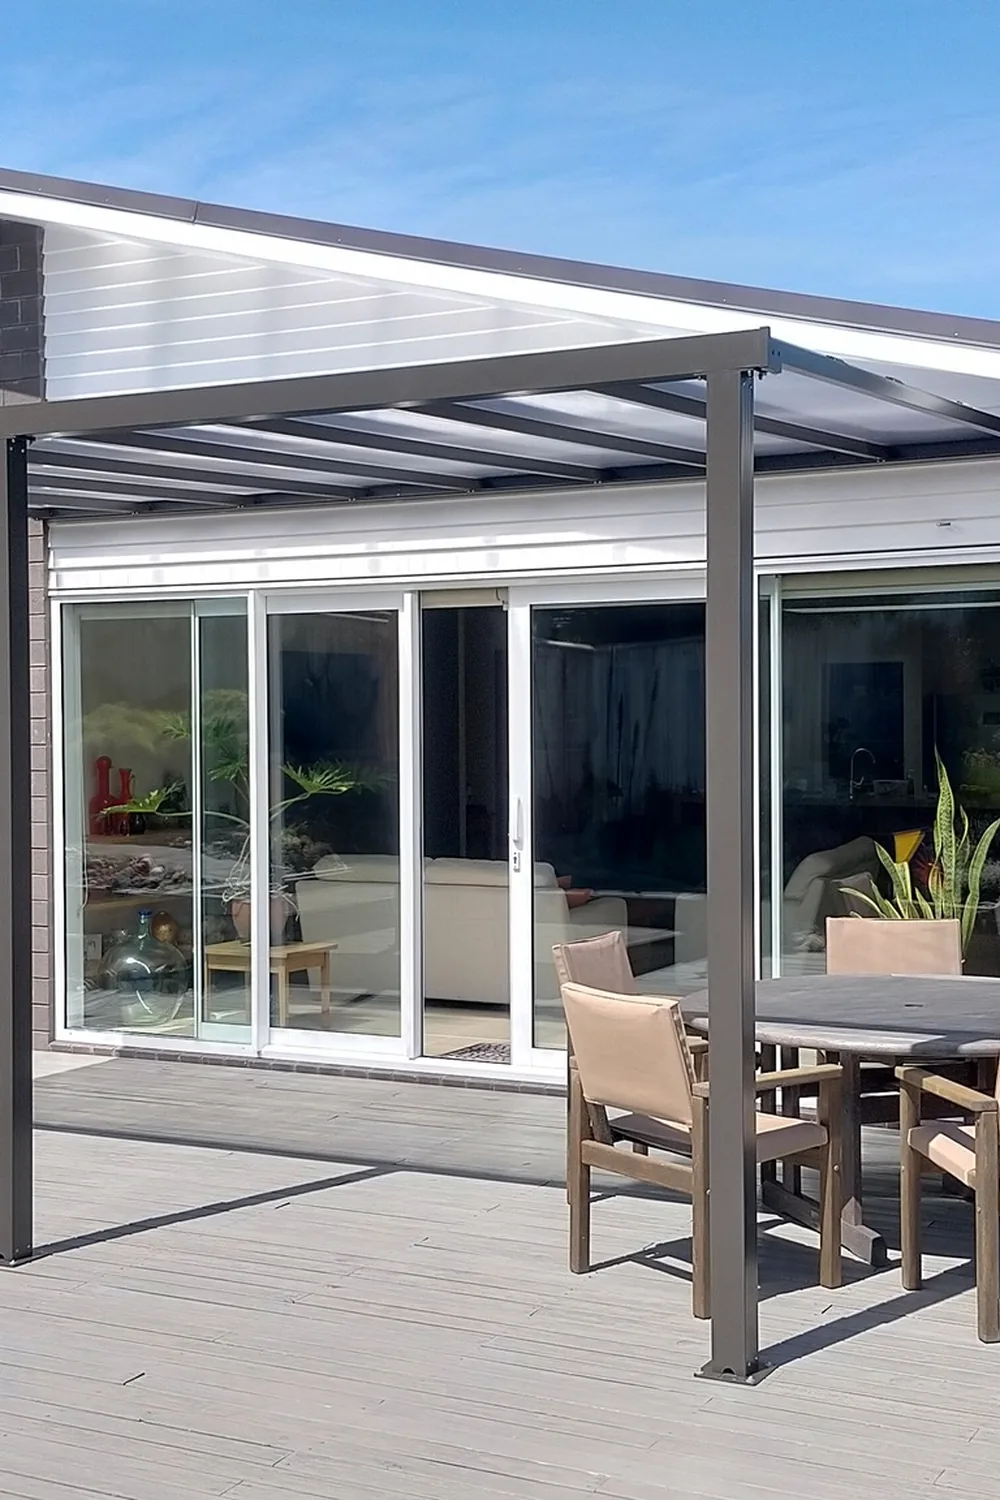
Sloped Sheer Cover
Photo by: @tradetested

A single sloping roof fixed to the back wall is one of the simplest ways to shelter a deck. The frosted panels soften the sun while still letting in plenty of light, and the slim charcoal posts keep the look clean beside the sliding glass doors.

This style suits modern homes with a flat or low wall to attach to. Ask for a skillion (single slope) design so rain runs off the open side, and choose a frame colour that matches your window or roof trim. It also works well over a timber or composite deck with a round dining table.

3. White Fan Cover
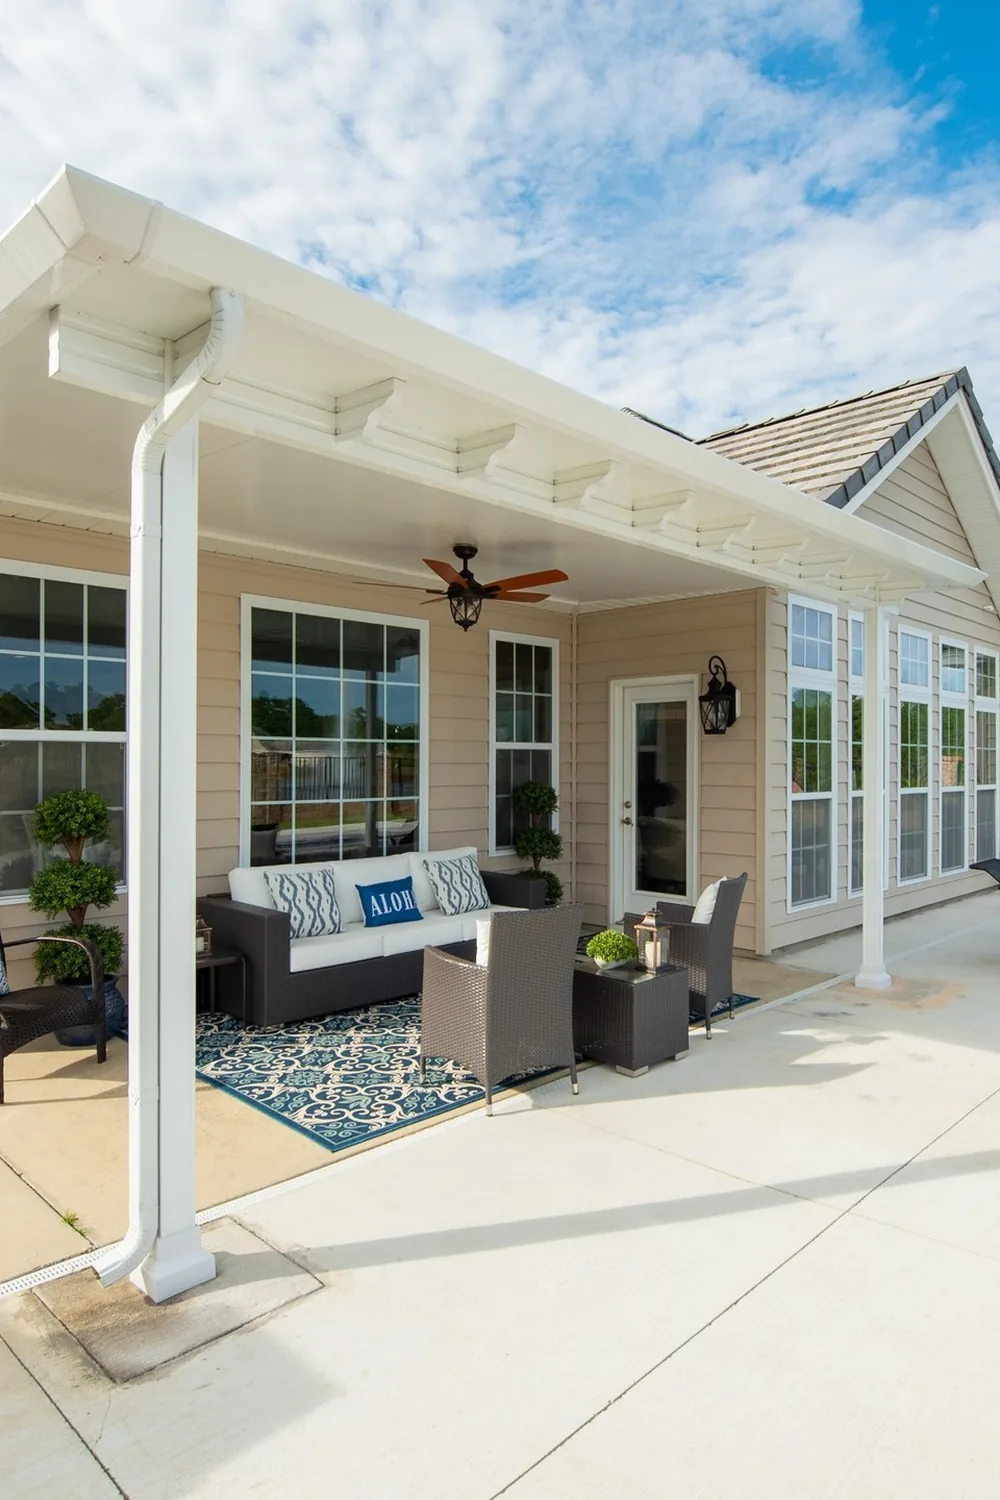
This solid white cover sits flat and low off the back of a two-storey house, creating a shady outdoor living room. The ceiling fan is the star here. It keeps the air moving, while the painted underside bounces soft light onto the sofa and chairs.

Plan your fan wiring and a downpipe position before the roof goes up, since both are easier to place early. A patterned outdoor rug, a couple of topiary pots and a few cushions make the space feel finished. It suits families who want reliable shade without changing the look of the house.

4. Cedar Shake Hip
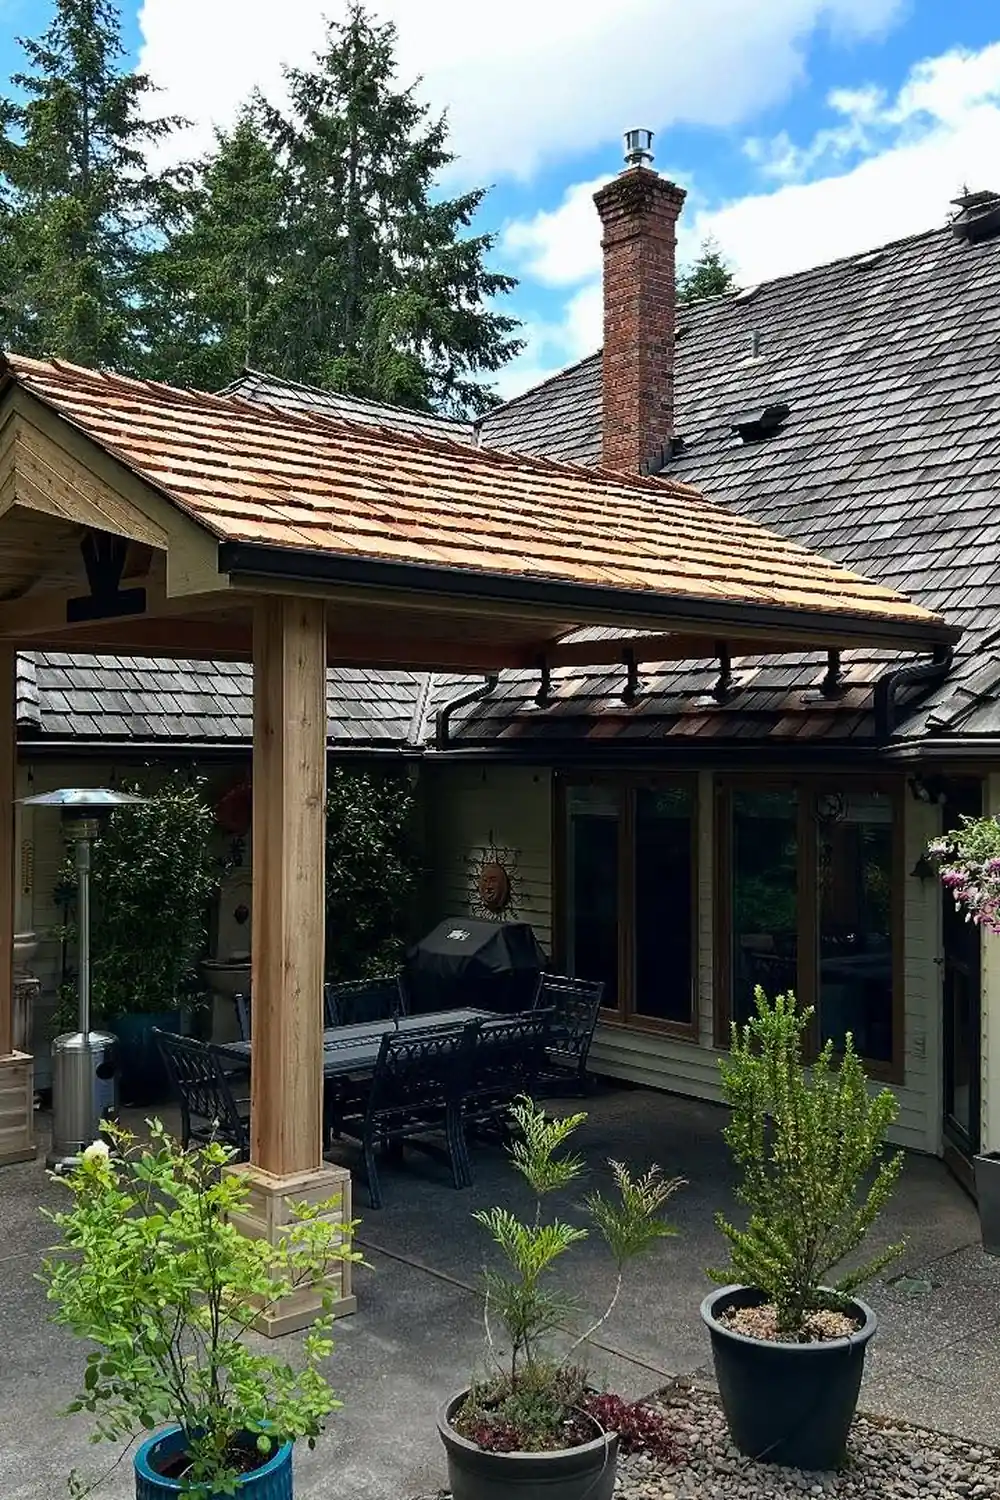
Matching the new roof to the house is what makes this one feel original. The fresh cedar shakes sit beside the older, weathered shakes on the main roof, and the hip shape blends in smoothly. Sturdy wood posts with boxed bases add a warm, handcrafted touch.

If you want a seamless result, ask your contractor to match the roofing material and the roof pitch of your existing home. Fresh cedar will silver over time, so be ready for that change, or ask about a stain. A patio heater and a few potted shrubs turn the space into a cozy dining spot.

5. Truss Gable Kitchen
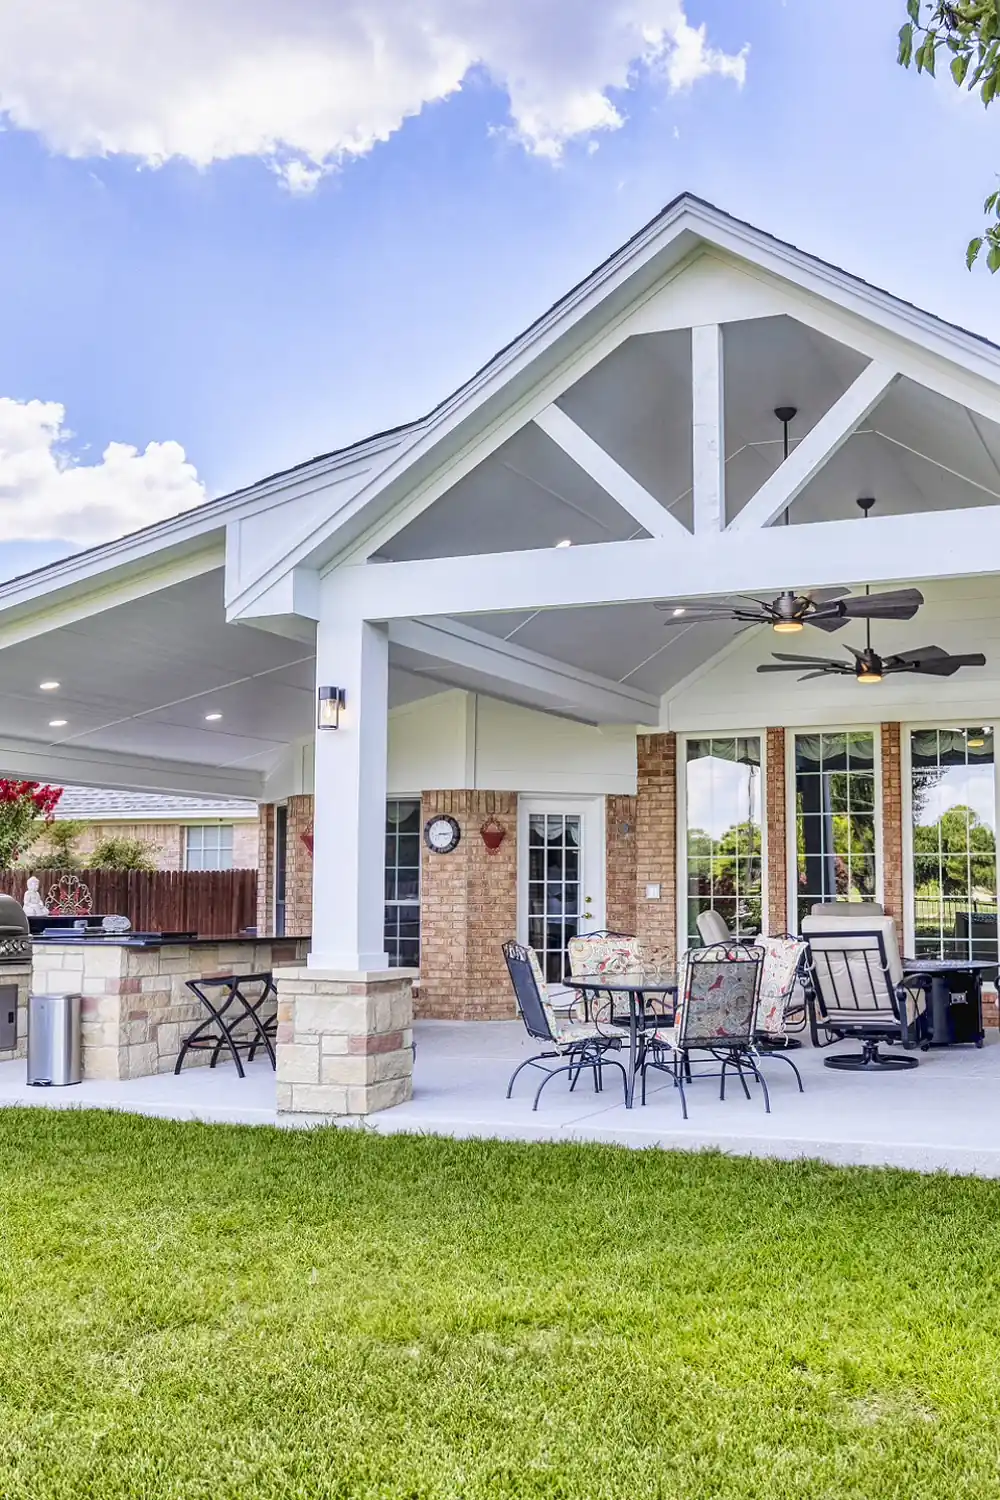
A tall white gable with crossed truss details gives this big patio a real sense of arrival. Two ceiling fans handle the Texas heat, and the stone-clad columns tie in with the outdoor kitchen counter and the brick of the house.

This is a good model if you want to cook, dine and lounge under one roof. Ask your builder to extend the cover far enough to include the grill area, and add recessed lights for evening use. A budget swap is to keep the gable and skip the stone, using painted columns instead.

6. Skylit Plank Ceiling
Skylit Plank Ceiling
Photo by: @austin_home

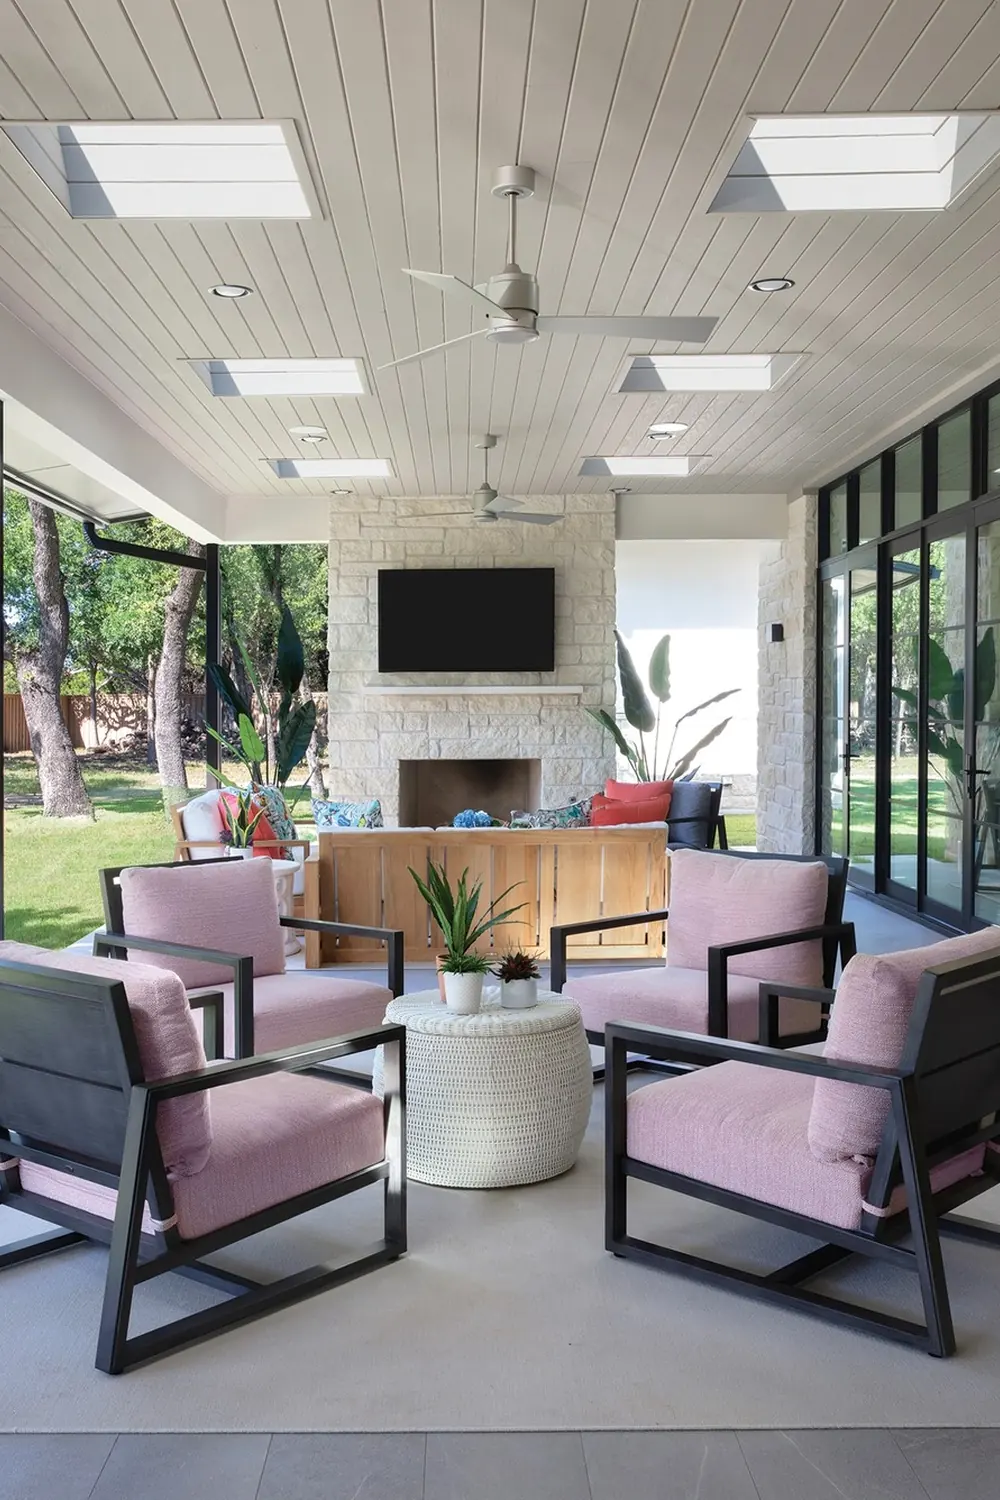
White planked boards overhead give this covered lounge a bright, finished feel, and the square skylights let sunlight drop in without losing the shade. The pale stone fireplace and mounted TV make it feel like a true extra room.

To get the look, ask for a tongue and groove style ceiling in a moisture-safe material, then request a few skylights spaced evenly. Add fans and recessed lights so it works day and night. The soft pink armchairs and a white woven table show how colour can lift a mostly neutral space.

7. Dusk Fire Lounge
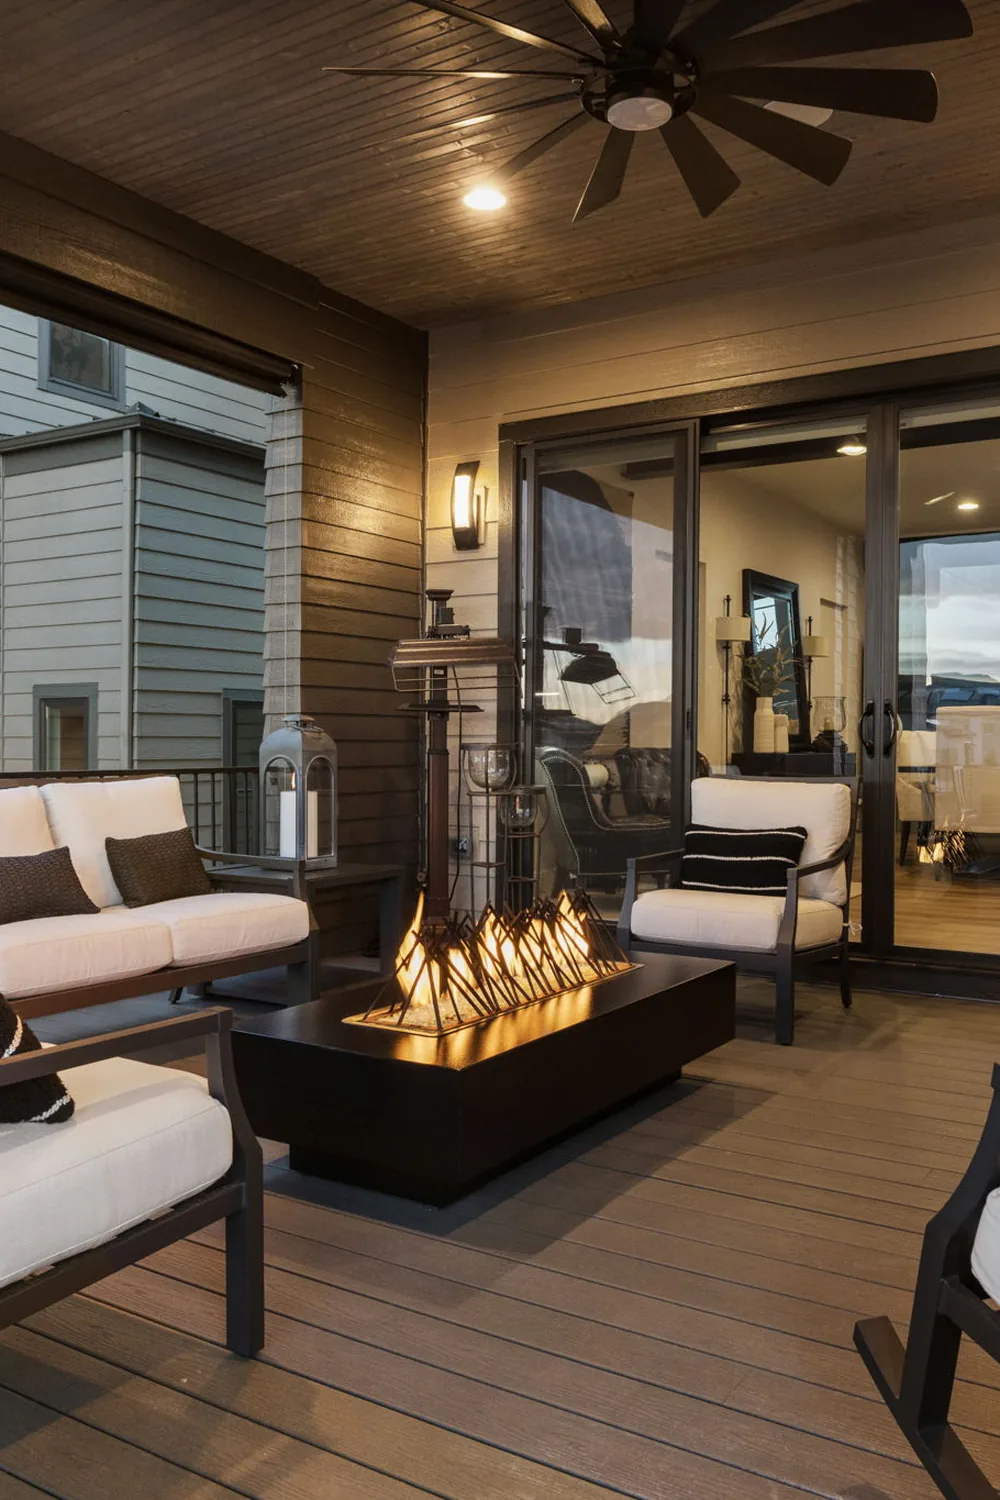
At dusk, this covered deck glows. The warm wood ceiling, recessed lights and a long linear fire table create a calm, hotel-like mood. Cream cushions with dark frames keep the seating crisp against the composite decking.

You can borrow the feel even if your roof is simpler. Choose a stained wood ceiling, add dimmable recessed lights, and place a fire table as the centrepiece so seating can surround it. A big fan helps in summer. Keep the furniture low and clean so the lighting does the talking.

8. Cedar Ceiling Terrace
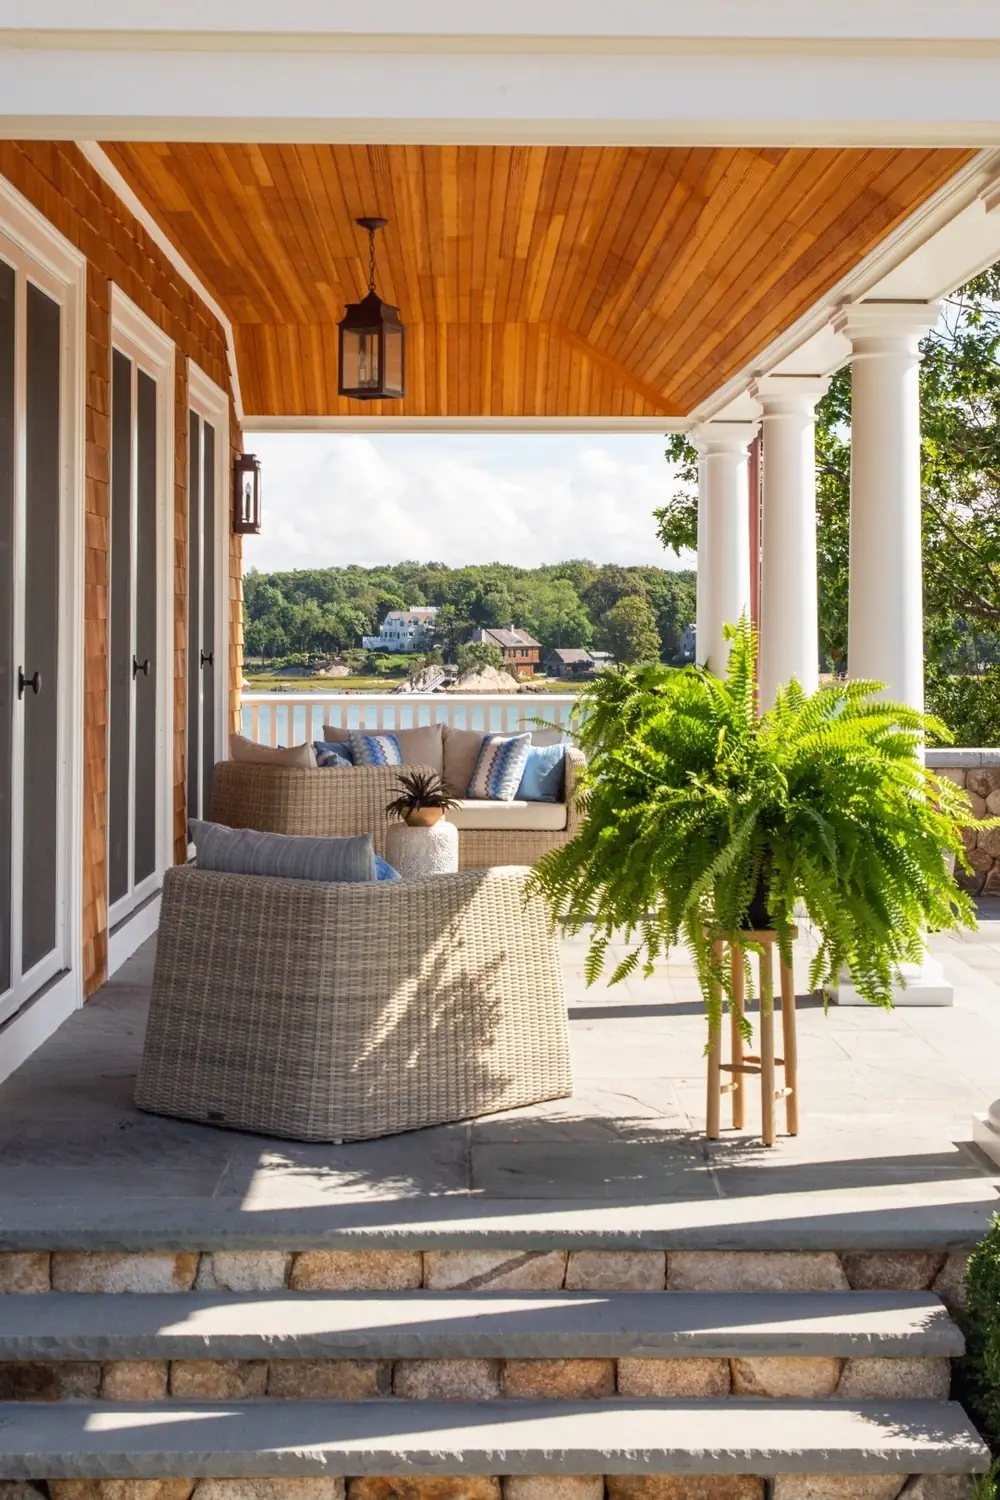
The golden cedar ceiling is what makes this terrace so inviting. It glows against the white columns and trim, and the lantern pendant adds a classic coastal touch. With a water view just beyond, the covered area feels like a natural stop on the way outside.

If you love this look, ask for a clear-finished wood ceiling and white painted columns to match your trim. Pair it with wicker seating and blue patterned cushions, then add one large fern for a fresh pop of green. It works best on a bluestone or similar patio floor.

9. Rooftop Pine Canopy
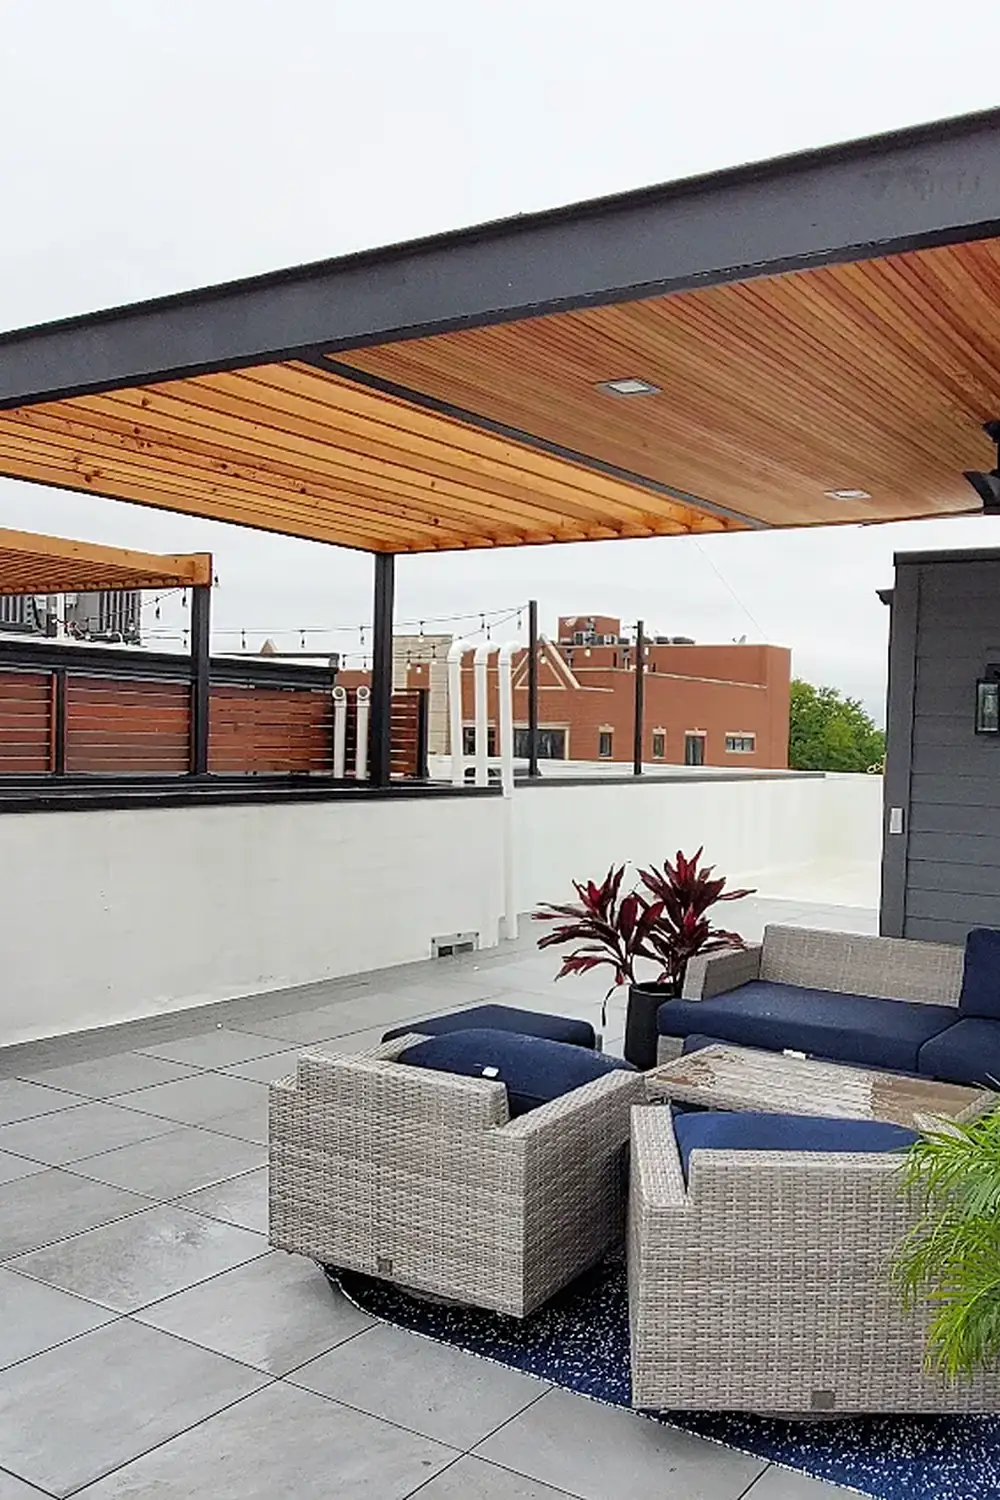
On a city rooftop, a solid canopy with a lined pine underside turns bare space into a real lounge. The black steel frame looks sharp against the warm timber, and the small recessed lights make it usable after dark. The covered part is solid, so it gives true shelter from rain.

Because only part of the roof is covered, you get the best of both worlds: shade and rain cover in one zone, open sky in the other. Check with an engineer about the structure and weight on a rooftop. Navy cushions and red leafy plants add colour.

10. Beachfront Soffit Cover
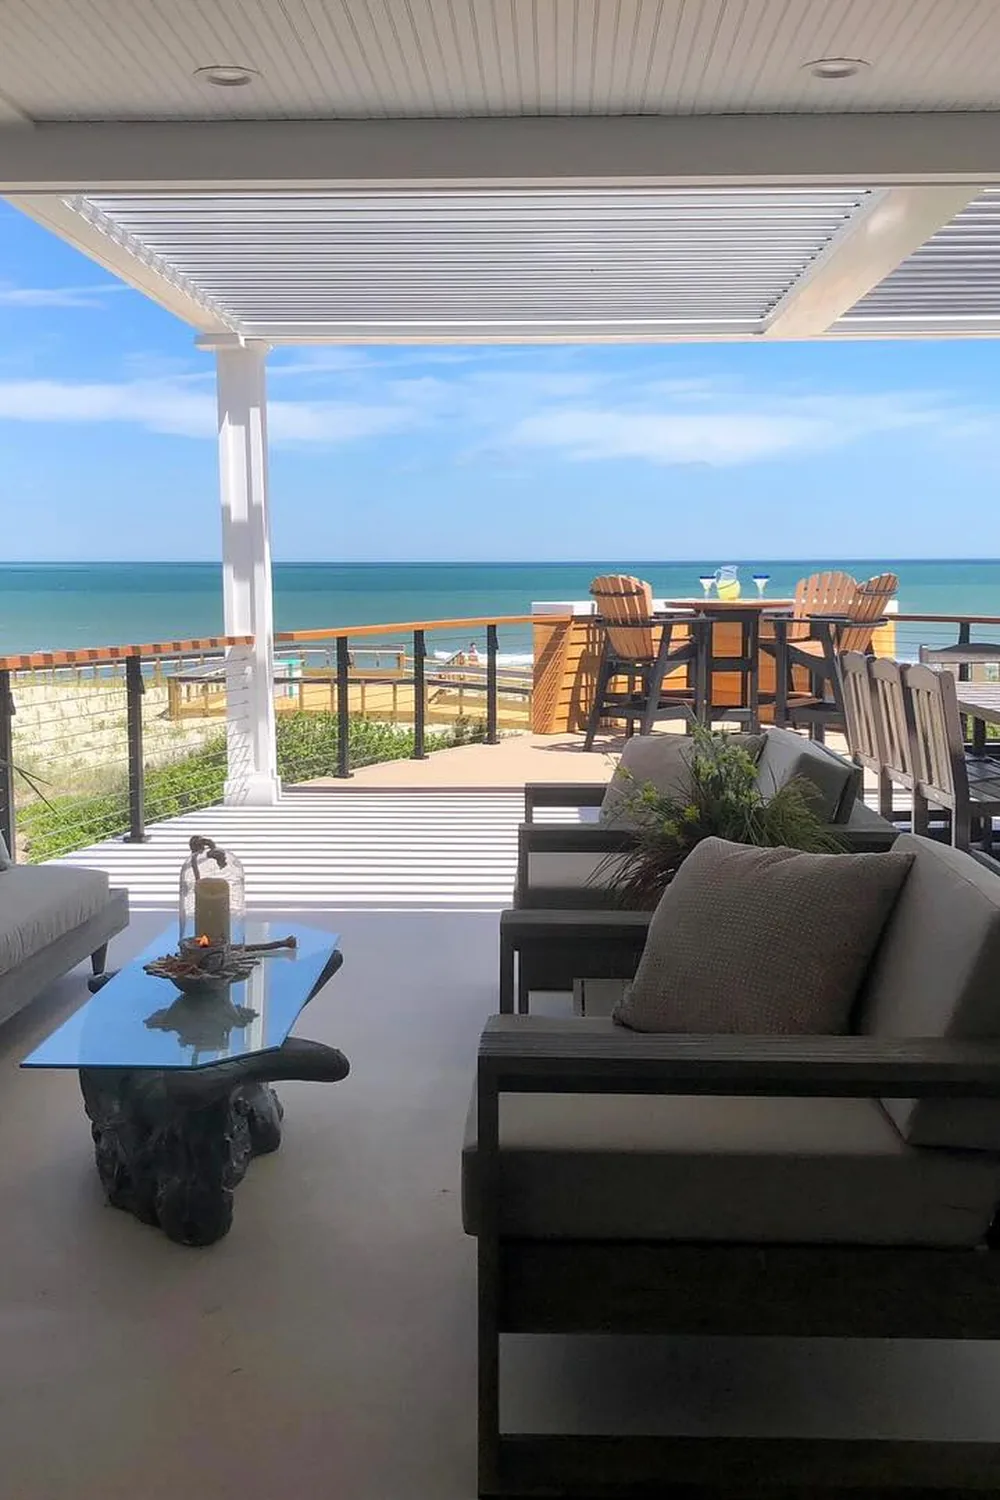
A white beadboard soffit with recessed lights makes this solid roof extension feel like part of the house. At the front edge, a louvered shade section lets you adjust the sun, so you can keep the ocean view while controlling glare.

If you live near the coast, ask your supplier about finishes suited to salt air. Keep the furniture low so it does not block the view, and use a glass coffee table to keep sightlines open. A cable railing, as shown, keeps the horizon in full view.

11. Stained Wood Ceiling
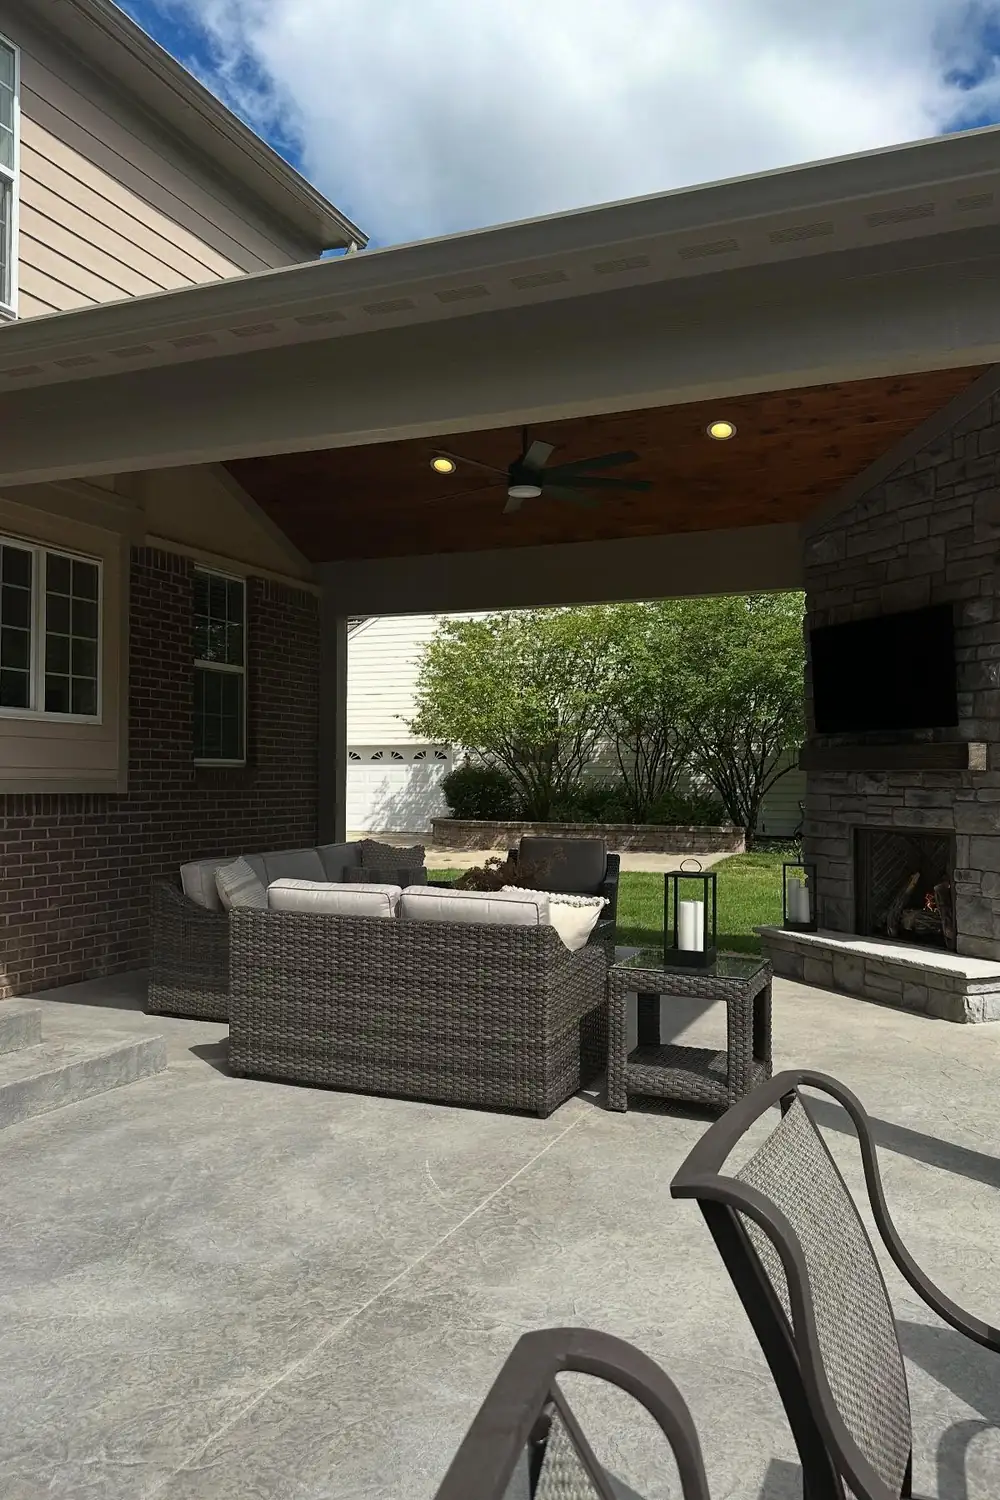
Stained Wood Ceiling
Photo by: @indy_grills

This roof ties neatly into the brick and siding of the house, and the stained wood ceiling adds warmth overhead. A ceiling fan and recessed lights make the space comfortable, while the stone fireplace with a mounted TV turns it into a true entertaining room.

Ask your builder to match the roof colour and trim to your home so it looks like it was always there. Stained concrete underfoot is a practical choice that cleans up easily. Place the sectional so it faces the fireplace, and keep a few dining chairs nearby for guests.

12. Veranda Plank Ceiling
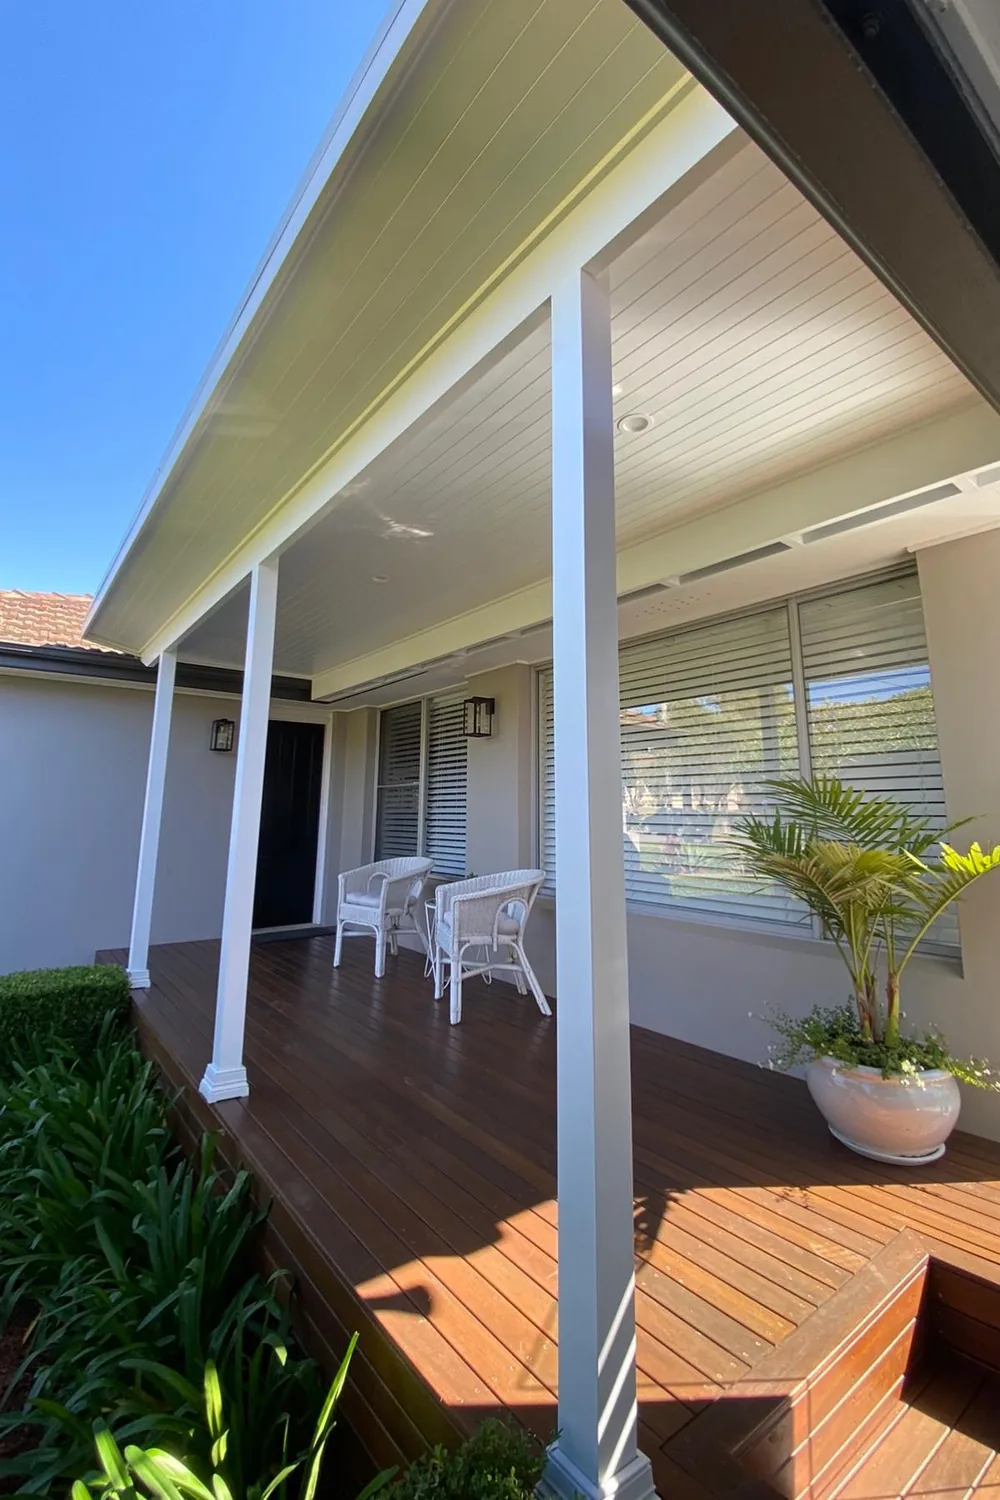
Veranda Plank Ceiling
Photo by: @northside_built

A wide, solid veranda roof gives this entry deck a calm, polished look. The white V-joint ceiling reflects light onto the glossy timber floor, and slim white posts keep the view open. It is attached to the rendered house, so it feels like part of the original design.

This is a lovely fit for a front or side entry. Ask for a lined soffit with a couple of downlights, and choose posts with simple bases for a classic finish. Two white cane chairs and one potted palm are all you need to make it feel welcoming.

13. Brick Home Gable
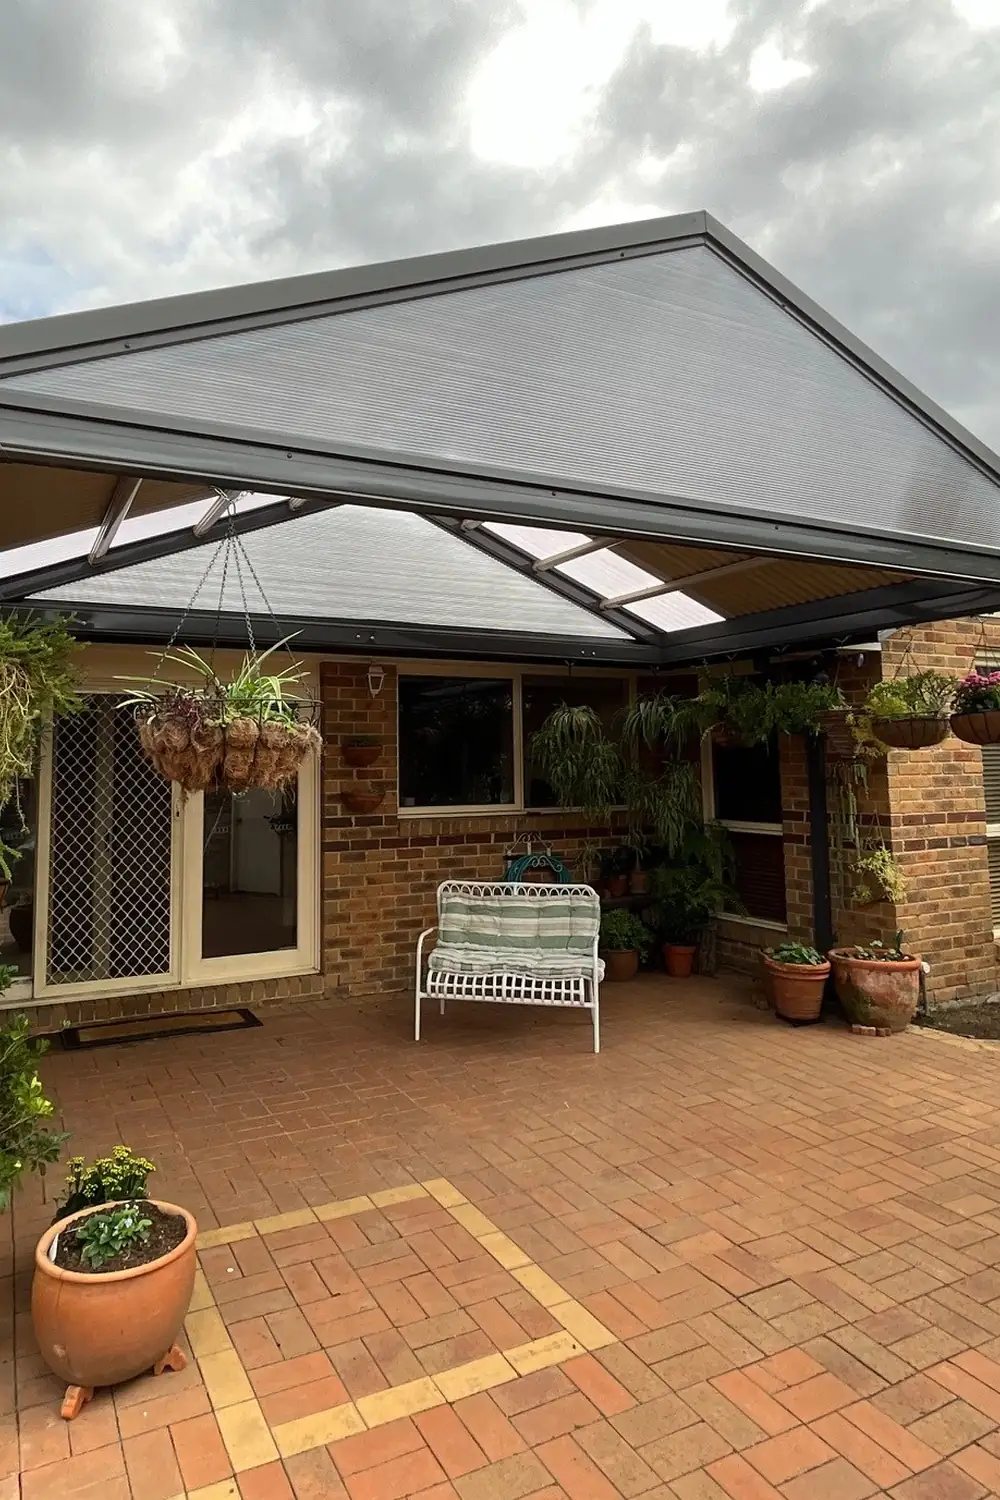
A dark metal gable roof sits well against warm brick, and the clear panels near the edge let daylight reach the back door and windows. The peaked shape feels tidy and balanced. Hanging baskets, potted plants and a white bench with a striped cushion make the paved patio feel like a real outdoor room, even under a cloudy sky.

To recreate it, ask your builder for a gable roof that ties into the existing roofline, with a few translucent sheets so the house stays bright. Pick a roof colour that echoes your window frames. On a budget, skip the furniture splurge and add a secondhand bench with a washable cushion and a few terracotta pots.

14. Cantilever Dining Cover
Cantilever Dining Cover
Photo by: @azsuncovers

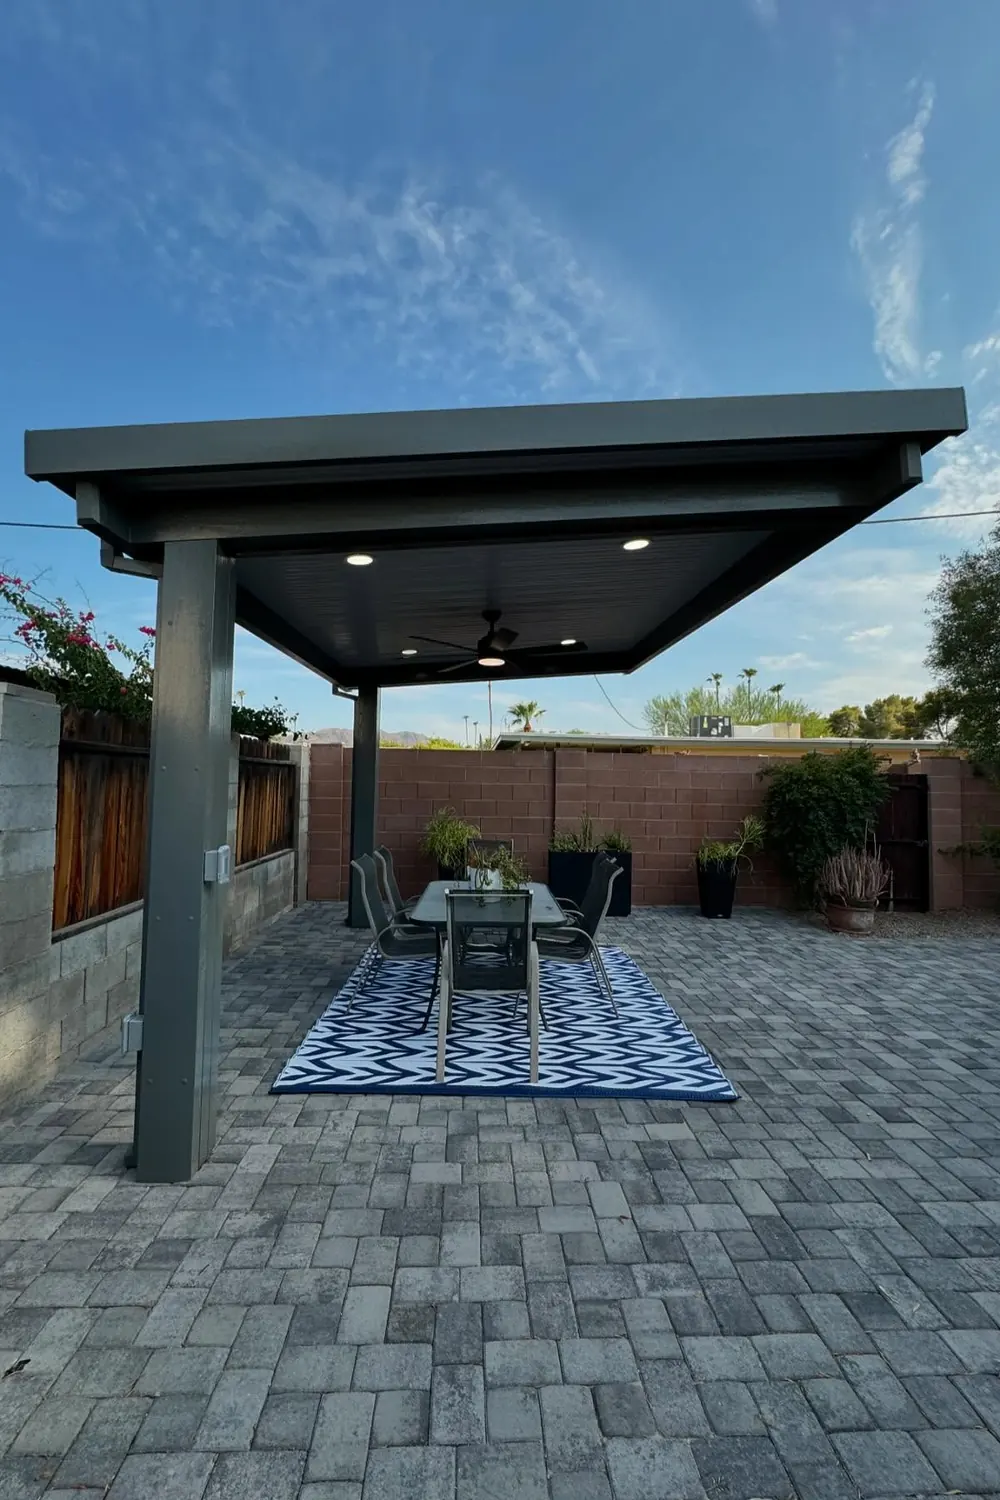
This flat solid roof is held up by just one visible post at the front, so nothing blocks the view across the paved yard. Recessed lights and a ceiling fan turn the space into a proper evening dining spot. The blue and white zigzag rug marks out the table zone and adds pattern against the grey pavers.

If you want this look, ask a vendor about a cantilever design and check that the footings suit your soil. A solid roof gives full shade, which is handy in hot, sunny climates. For a simple budget move, use an outdoor rug and a few tall black planters to define the space and soften the block walls.

15. Timber Polycarbonate Cover
Timber Polycarbonate Cover
Photo by: @405decks

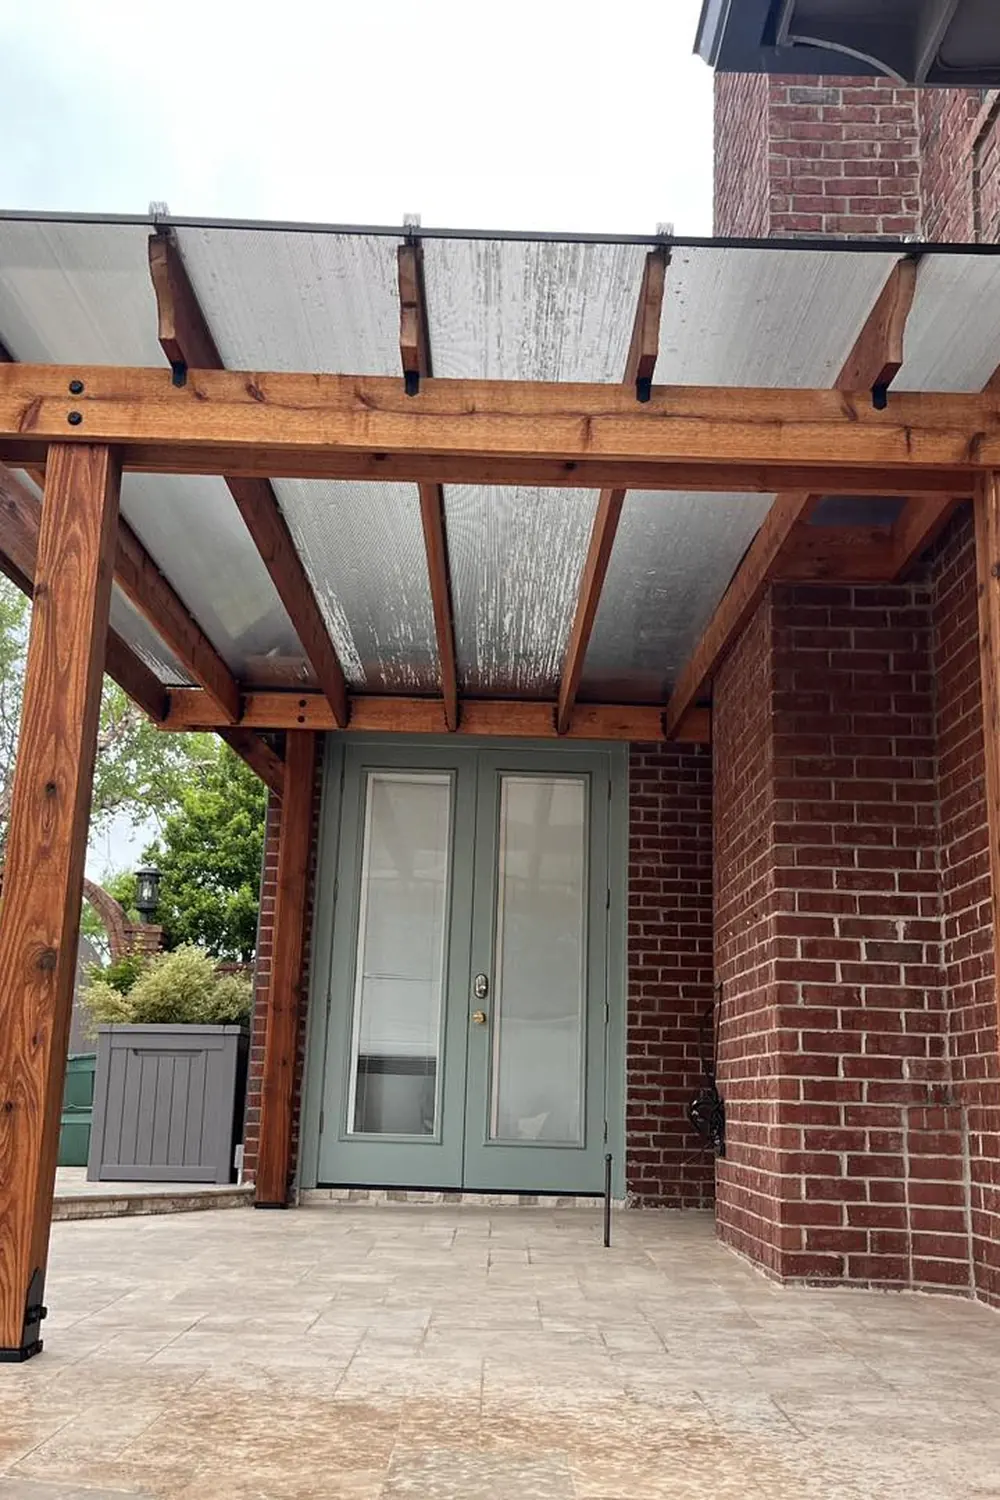
Warm timber beams and clear polycarbonate sheets give this red-brick house a light, open porch. The roof keeps rain off the sage green French doors while still letting daylight through. The cedar tone looks rich beside the brick, and the pale stamped concrete patio keeps everything feeling calm and simple.

Ask your builder for a timber frame with black metal brackets, and check that the roof is flashed properly where it meets the brick. Polycarbonate costs less than glass and is easier to fit. The space is empty here, so it suits you if you want a blank canvas. Start with a couple of chairs and a planter box.

Pick Your Favorite and Start Planning

Every patio can work harder for you with the right cover overhead. Whether you want soft shade, a cozy fire lounge, or a bright skylit gable, there is a style here that fits.

Save your favorite idea to your outdoor board and bring it to your next chat with a builder. A clear picture makes the whole project easier.
19 Stunning Stamped Concrete Patio with Fire Pit Ideas for Cozy Backyard Nights

You want a backyard spot for glowing flames, warm drinks, and late conversations. But the choices for stamp pattern, color, and pit style are almost endless.

Pick the wrong combo and the slab can look flat, fake, or at odds with your house. Concrete is a big commitment, so a bad guess stings.

That is why I pulled together 19 real layouts where a stamped concrete patio with fire pit looks rich, natural, and made for evenings outside. Each one shows how the pattern, the tone, and the pit work as a team.

Scroll through slate gray ashlar, golden flagstone, glowing seating walls, and gas and wood burning pits. Save the ones that feel like your yard.

1. Charcoal Stacked Block Pit on Light Grey Slab

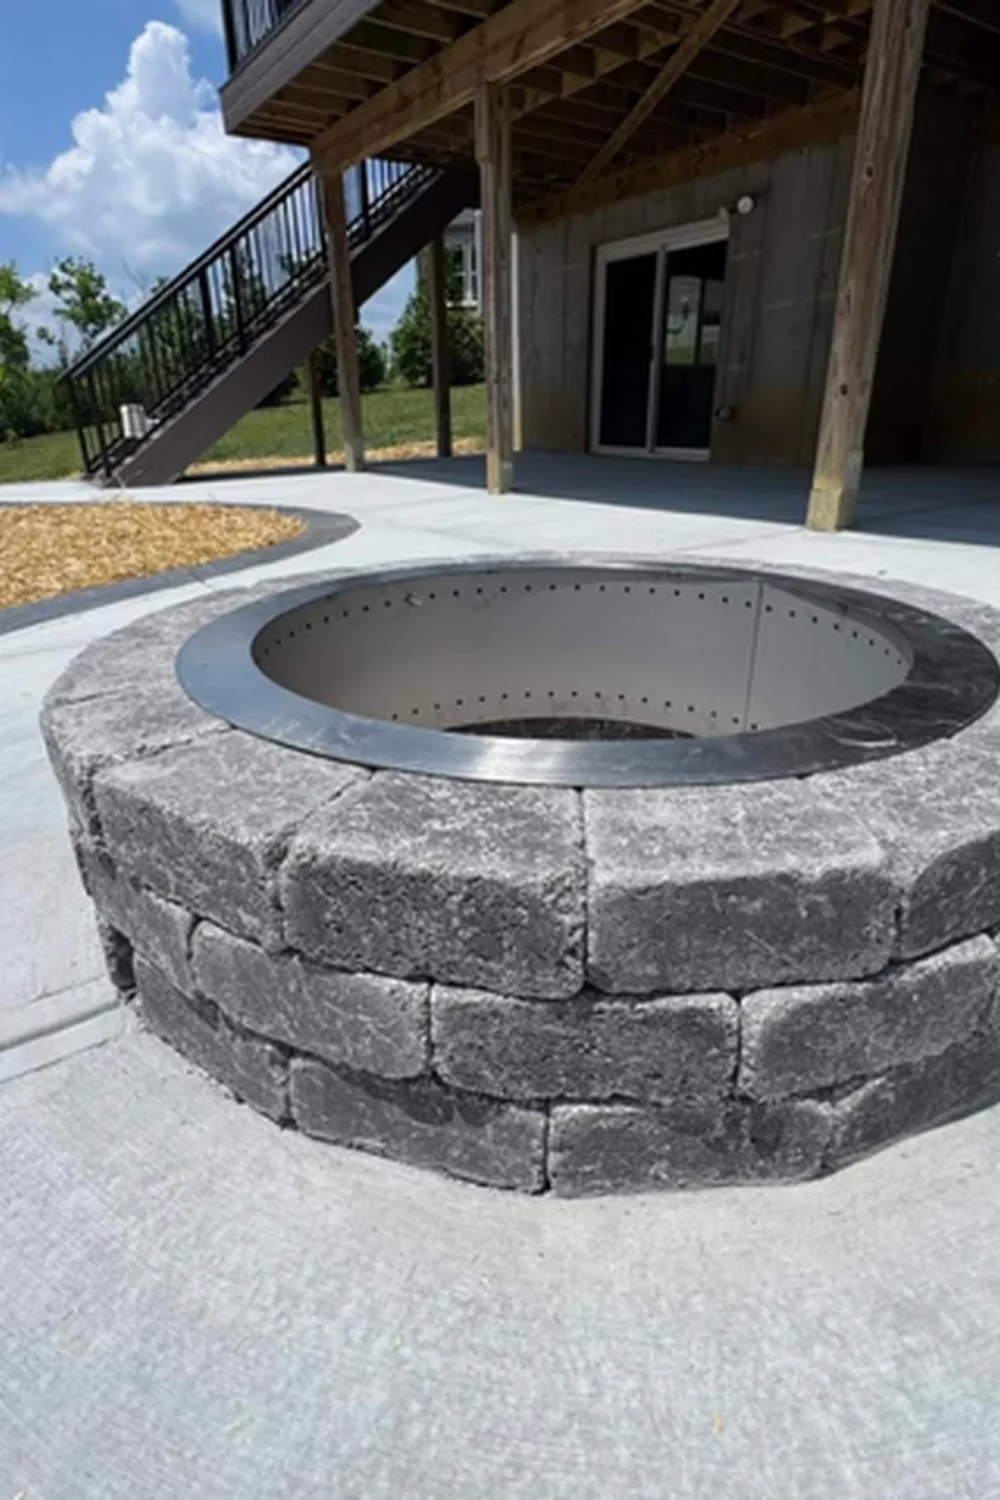
This one works because everything stays in the same cool grey family. The charcoal blocks sit on a pale stamped slab, so the pit looks planted there on purpose. A steel insert with rows of tiny holes lines the bowl, and a black rim ring finishes the top edge.

To recreate it, ask your contractor for a two or three course block ring with a steel liner sized to fit. Leave plenty of open slab around it so chairs can move freely. If your patio sits near a deck or overhang, check the clearance above the pit first. It suits anyone who wants a clean, low-fuss look.

2. Dark Grey Round Patio with Banded Stone Pit

A big circular slab in deep charcoal makes the fire pit feel like the center of the whole yard. The pit's lighter, banded stone pops against the dark surface, and the curved edge softens the strong lines of the tall black windows behind it. Open soil beds on each side are ready for planting.

Ask for an integral dark grey color with a slightly lighter release powder so the stamped texture shows. Curved edges need flexible forms, so mention the shape early when you get quotes. Plant tall grasses in those side beds to frame the circle. This look suits modern homes with dark siding.

3. Gas Fire Pit Inside Curved Ledger Stone Wall

Gas Fire Pit Inside Curved Ledger Stone Wall
Source: Square Deal

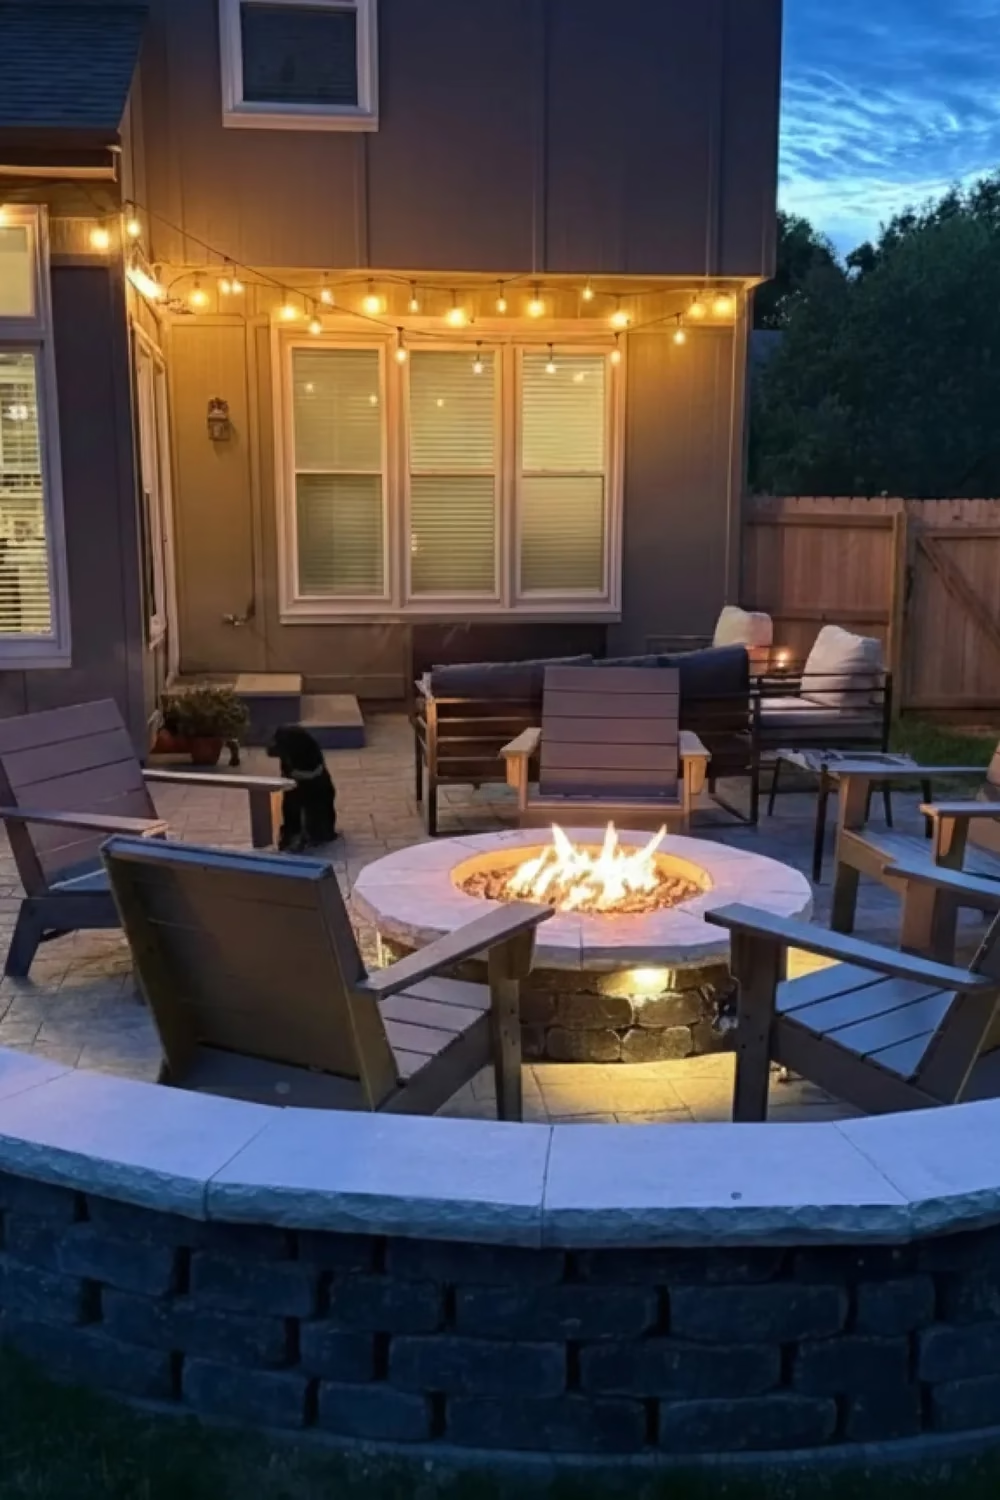
Evening is when this setup shines. A curved ledger stone wall with a pale cap hugs the seating area, small lights glow beneath the pit's cap, and string lights overhead add a second layer of warmth. Adirondack chairs and a patient dog complete the picture.

Ask your contractor to run the gas line before the concrete is poured, and request low voltage lights tucked under the cap stones. The patio shown is generous, but the same idea works on a much smaller footprint. For a budget swap, skip the wall lights and hang inexpensive string lights between the house and a post.

4. Warm Tan Flagstone Stamp Beside Stacked Stone Pit

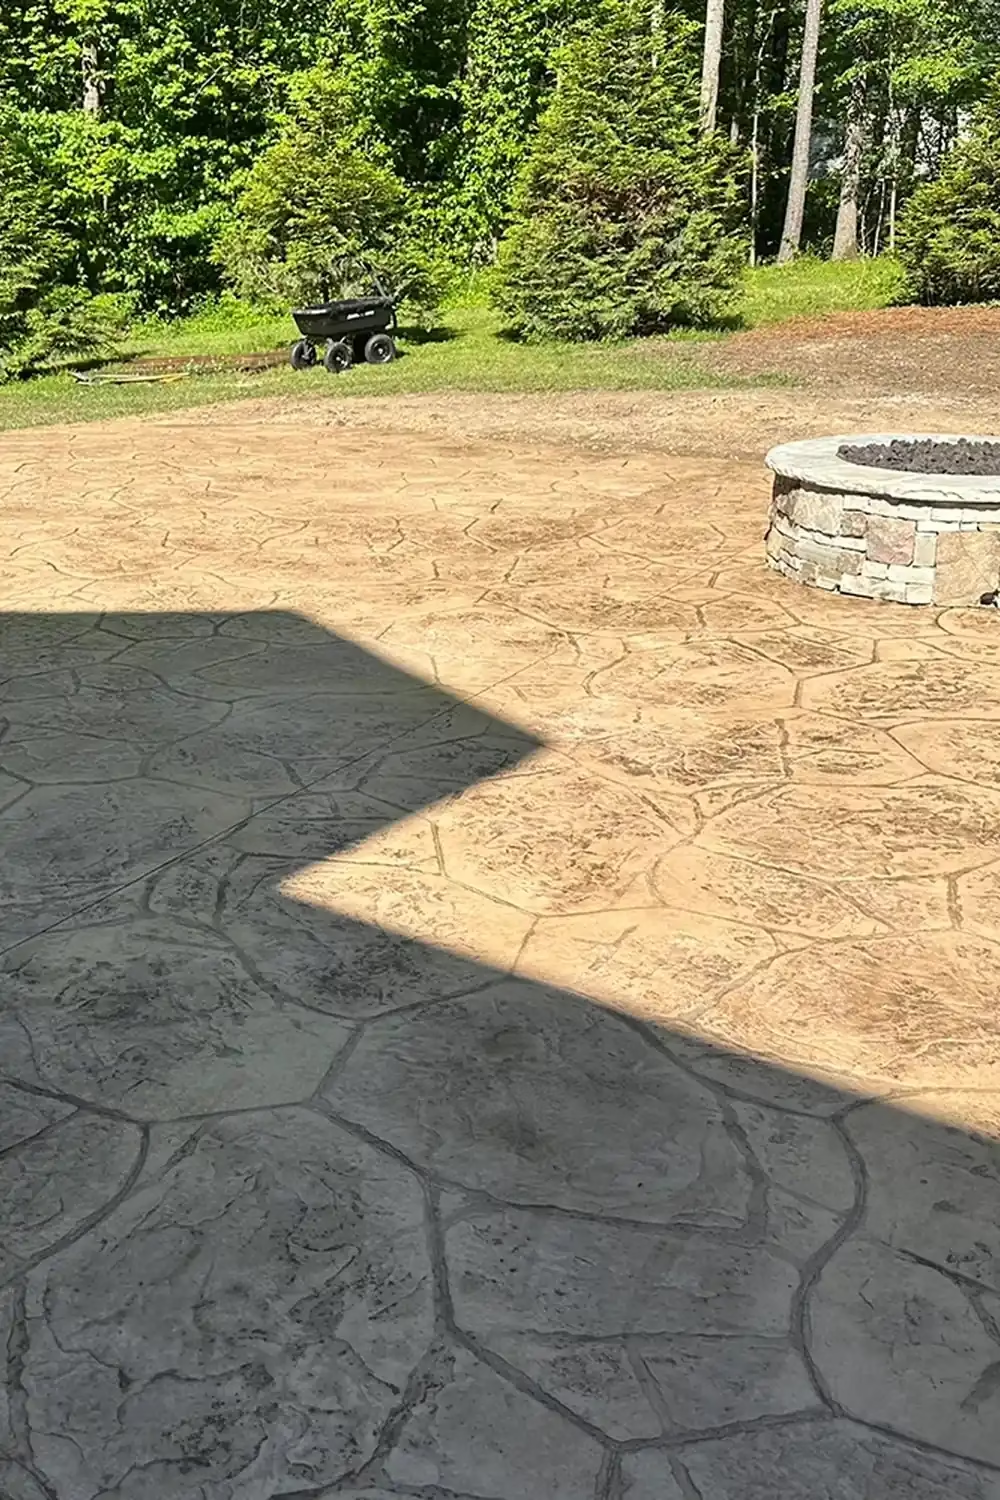
The irregular flagstone pattern in sandy tan feels like a natural stone terrace, and the stacked stone pit with its pale cap and dark fill picks up the same earthy tones. Against the green wall of trees, the warm color looks relaxed and inviting.

Ask for a stamp with random, varied stone shapes, then request a darker antiquing color so the joints read clearly. A good sealer helps keep that warm tone from fading in strong sun. Choose a stone veneer in browns and creams to match. This look suits wooded or country style yards.

5. Raised Round Platform with Curved Wicker Seating

Raised Round Platform with Curved Wicker Seating
Source: ZBL Concrete

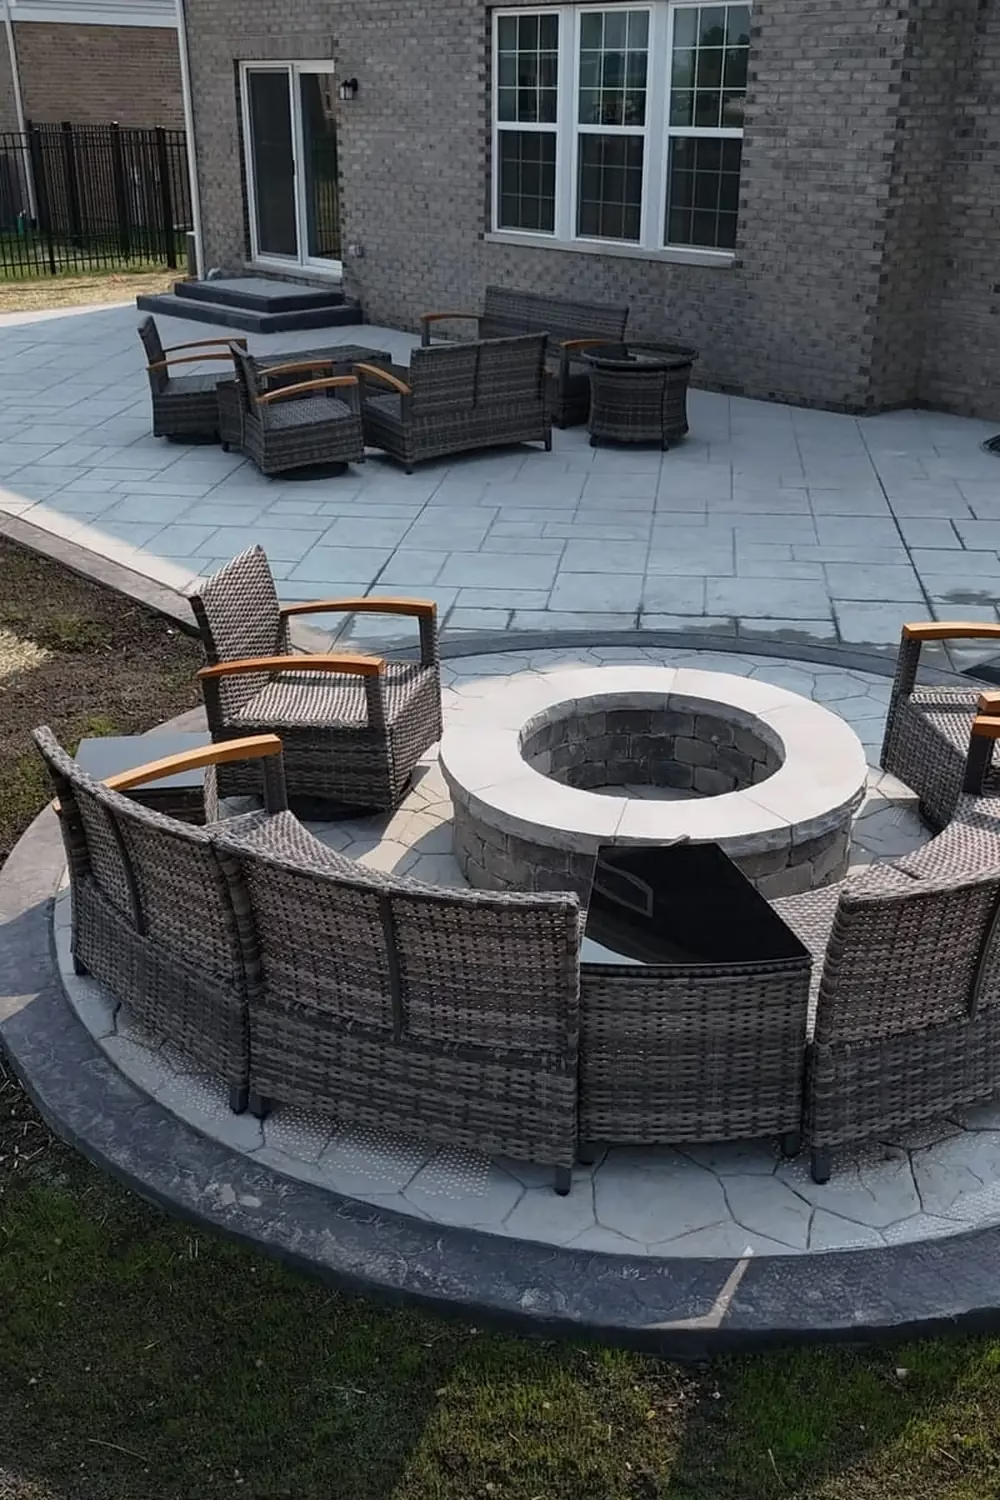
Two zones share one slab here. A rectangular slate pattern holds the dining and lounge furniture, while a raised round platform with a darker border cradles the fire pit. The step up gives the pit its own stage, and the curved sectional hugs the circle neatly.

Ask for a raised stamped ring with a contrasting border color and a different stamp pattern inside it. Measure the platform radius before buying a curved sectional so it sits flush. Swivel chairs on the open side make it easy to turn toward the fire or the house. This layout suits families who entertain.

6. Timber Covered Patio with Stone Fire Pit at Dusk

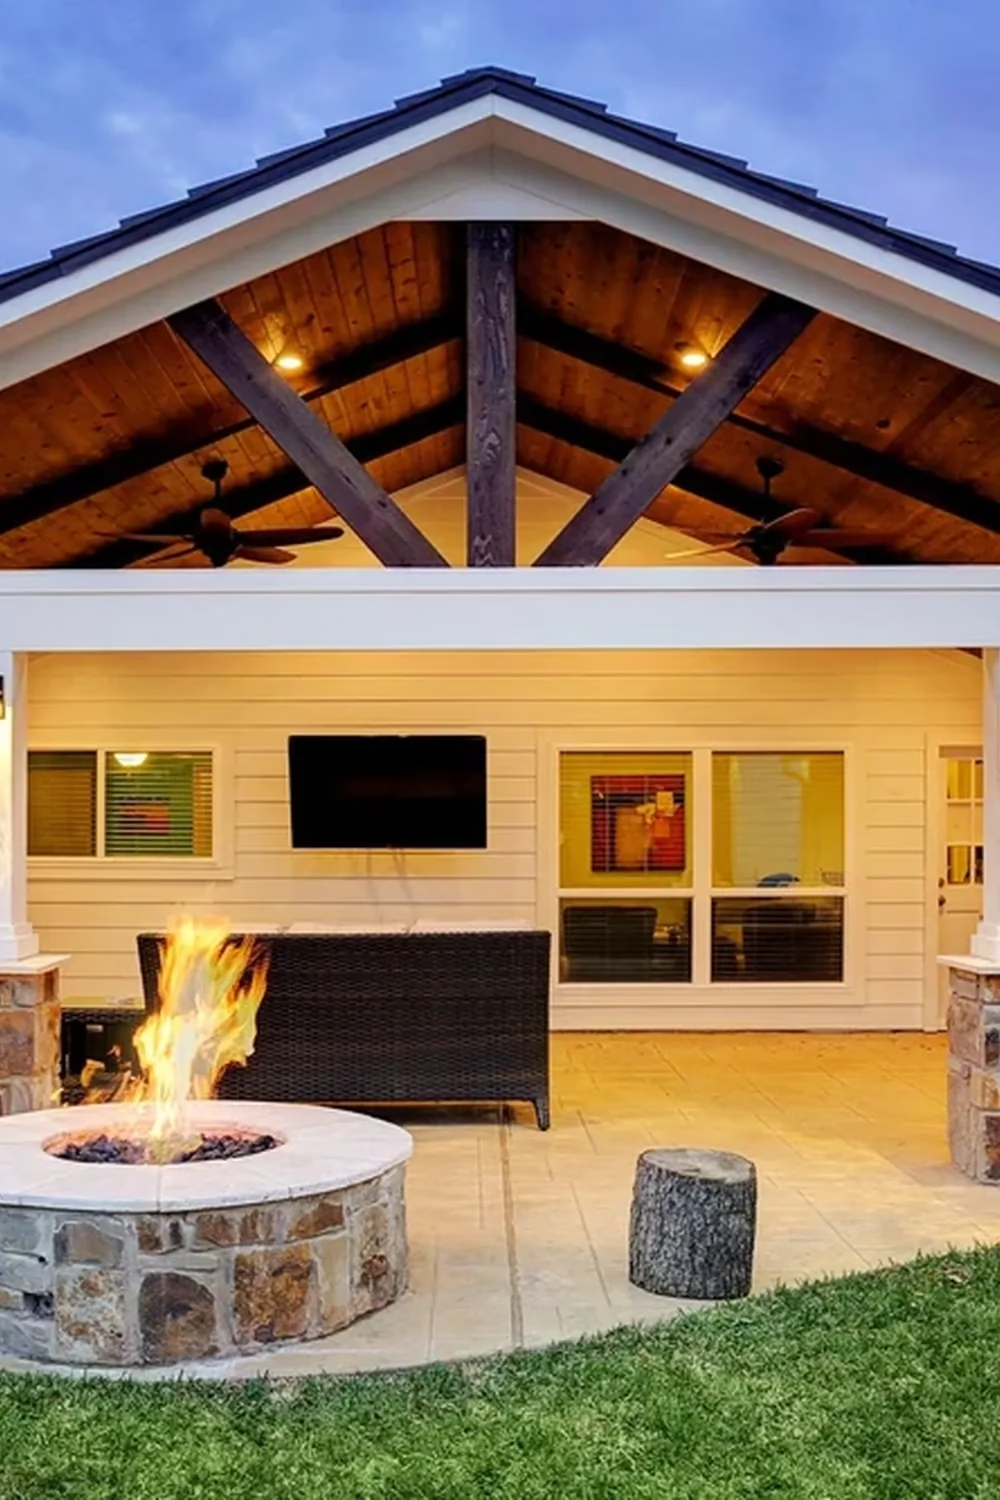
A gabled timber cover with crossed dark beams, a wood plank ceiling, and ceiling fans turns the patio into a true outdoor room. The stone clad columns repeat the stone on the round pit, which ties the whole scene together. A log stump stool adds a rustic touch.
Ask for a stamped finish in soft cream or sand so the wood overhead stays the star. Keep the fire pit out in the open beside the cover, not under it, and ask your builder about safe distances. For a budget swap, use a real log round as a side table instead of buying furniture.
7. Golden Stained Flagstone Patio with Pebble Ringed Pit

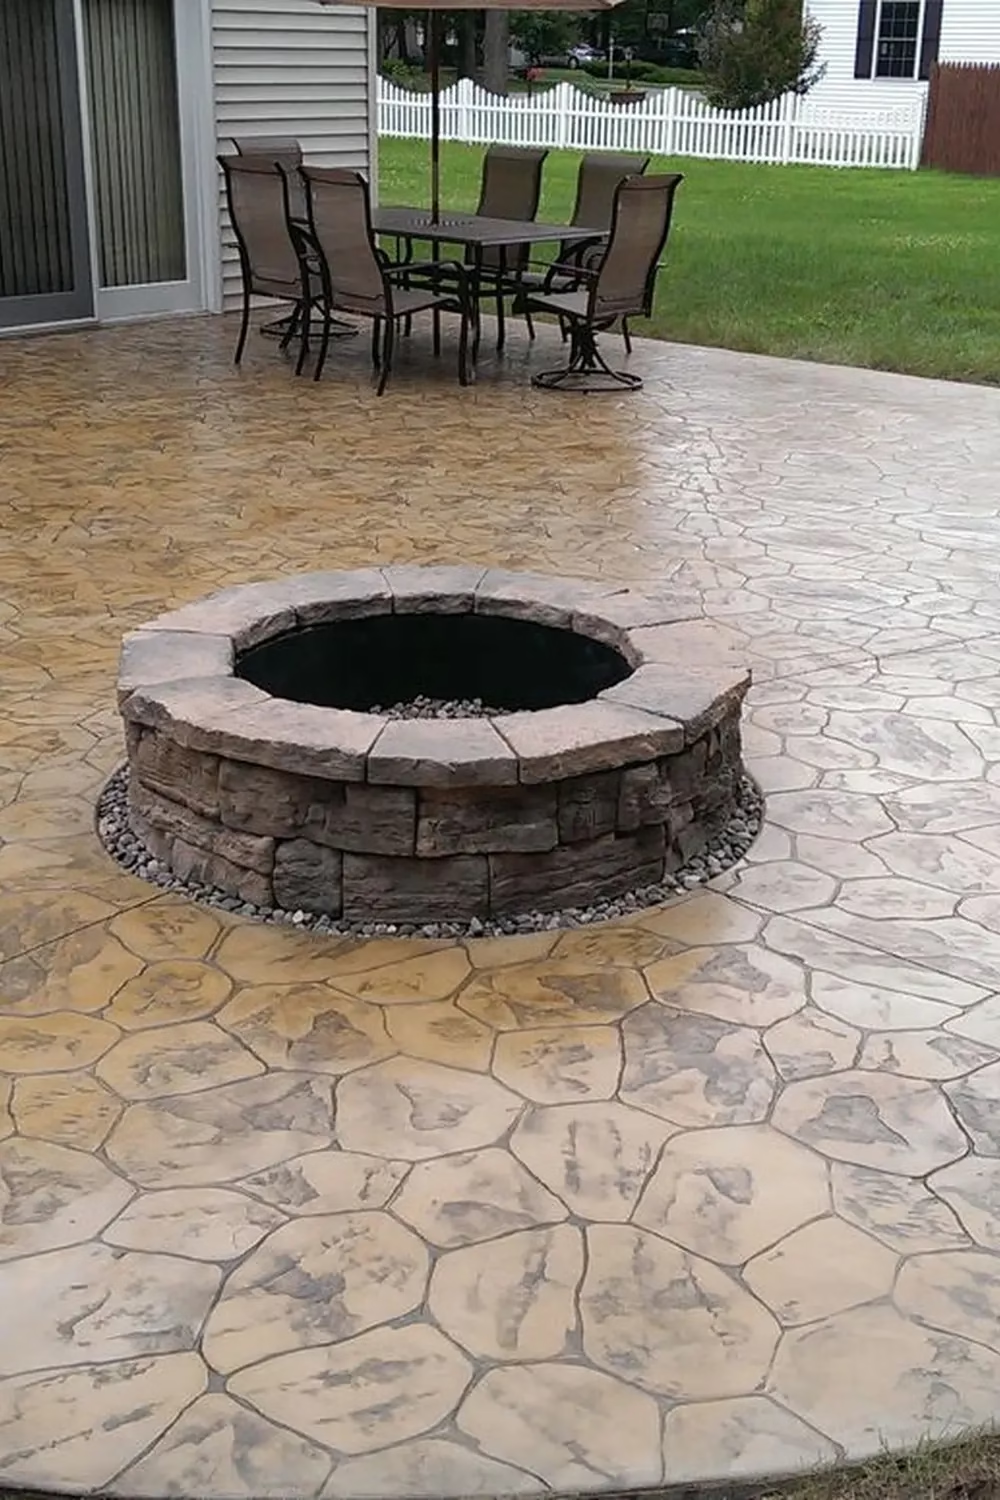
The mottled amber and cream tones here come from a stained finish, and they give the flagstone stamp a rich, aged look. The stone pit sits in a neat ring of river pebbles, which makes a clean border between the pit and the patio. A dining set sits nearby, so one slab handles meals and fires.

Ask your contractor for sample boards before choosing a stain, since results vary slightly from pour to pour. The pebble ring is an easy budget touch and helps hide edge gaps. This look suits anyone who loves warm, varied color rather than a flat grey.

8. Glowing Aqua Border Circling a Roaring Fire

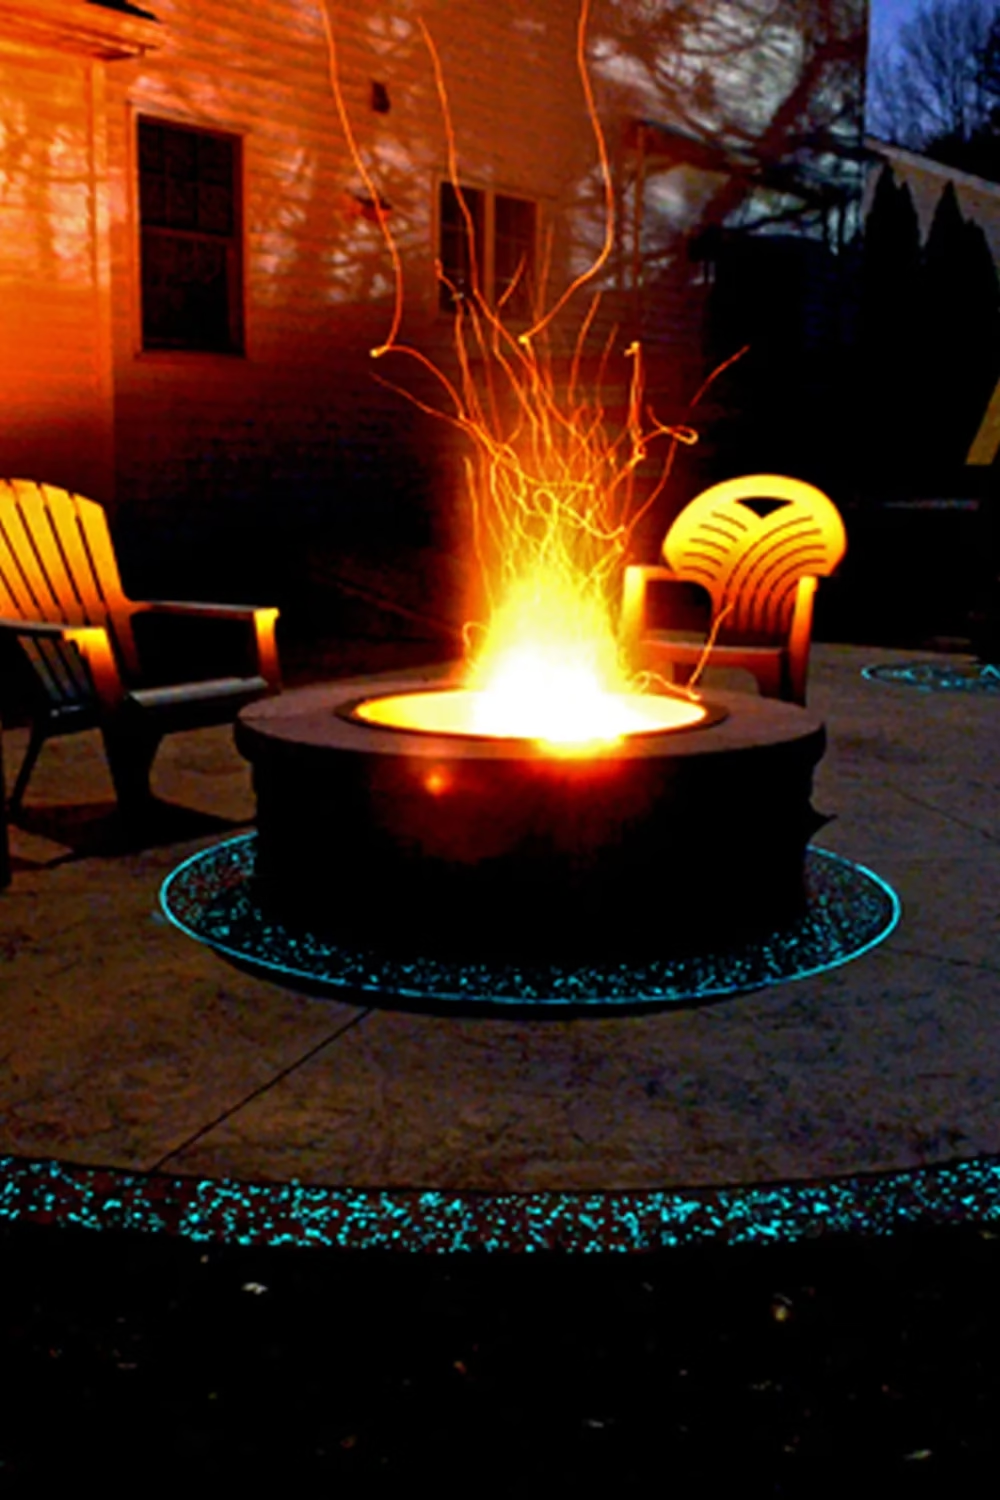
After dark, this patio puts on a show. A ring of aqua aggregate around the pit and a curved border along the patio edge glow softly against the black night, while sparks rise from the flames. The cool blue glow and warm orange fire make a striking contrast.

Ask a concrete pro about glow in the dark aggregate and how it is set into the border and the pit ring. It charges in daylight, so it works best in open, sunny spots. For a budget swap, line the edge with solar path lights. This idea is a hit with kids and party hosts.

9. Slate Gray Ashlar Patio with Lit Seating Wall

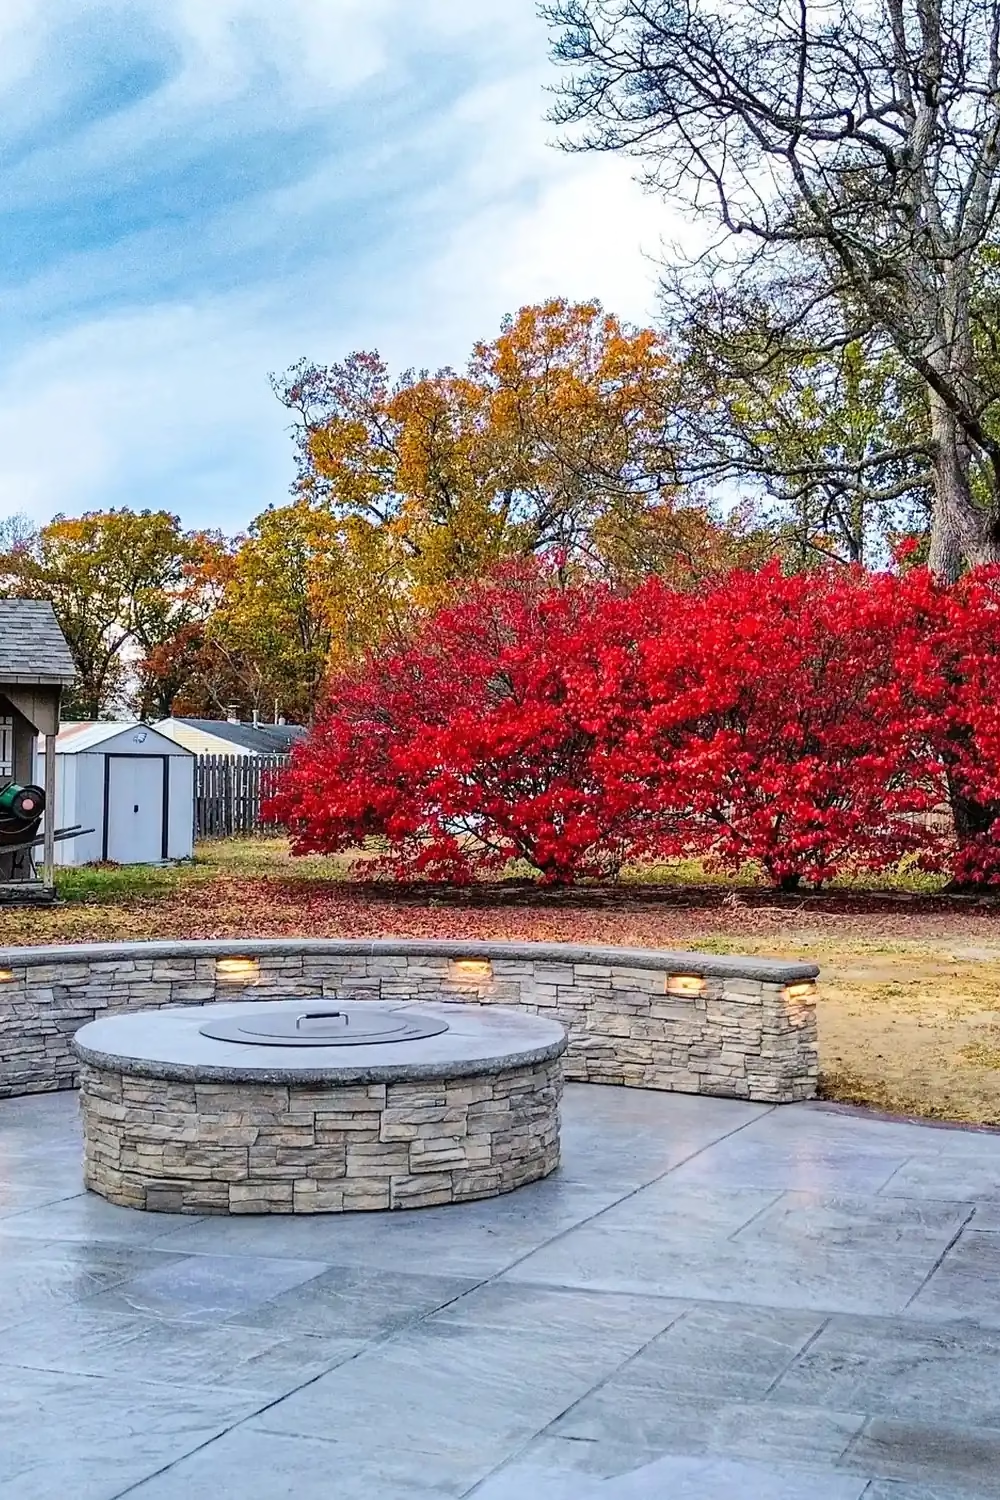
Large slate gray slabs give this patio a smooth, tailored feel, and the round stacked stone pit with a lid sits calmly in the middle. Behind it, a curved seating wall with small lights tucked under the cap frames the view of the fiery red bushes and fall trees.

Ask for a large format ashlar stamp in a mid grey, and a smokeless style pit if you want less drifting smoke. A fitted lid keeps the bowl tidy between fires. Request low voltage lights spaced evenly under the wall cap. This look suits open yards with a great backdrop.

10. Two Tier Curved Wall with Glowing Cap Lights

Two Tier Curved Wall with Glowing Cap Lights
Source: OnCall Home Co.

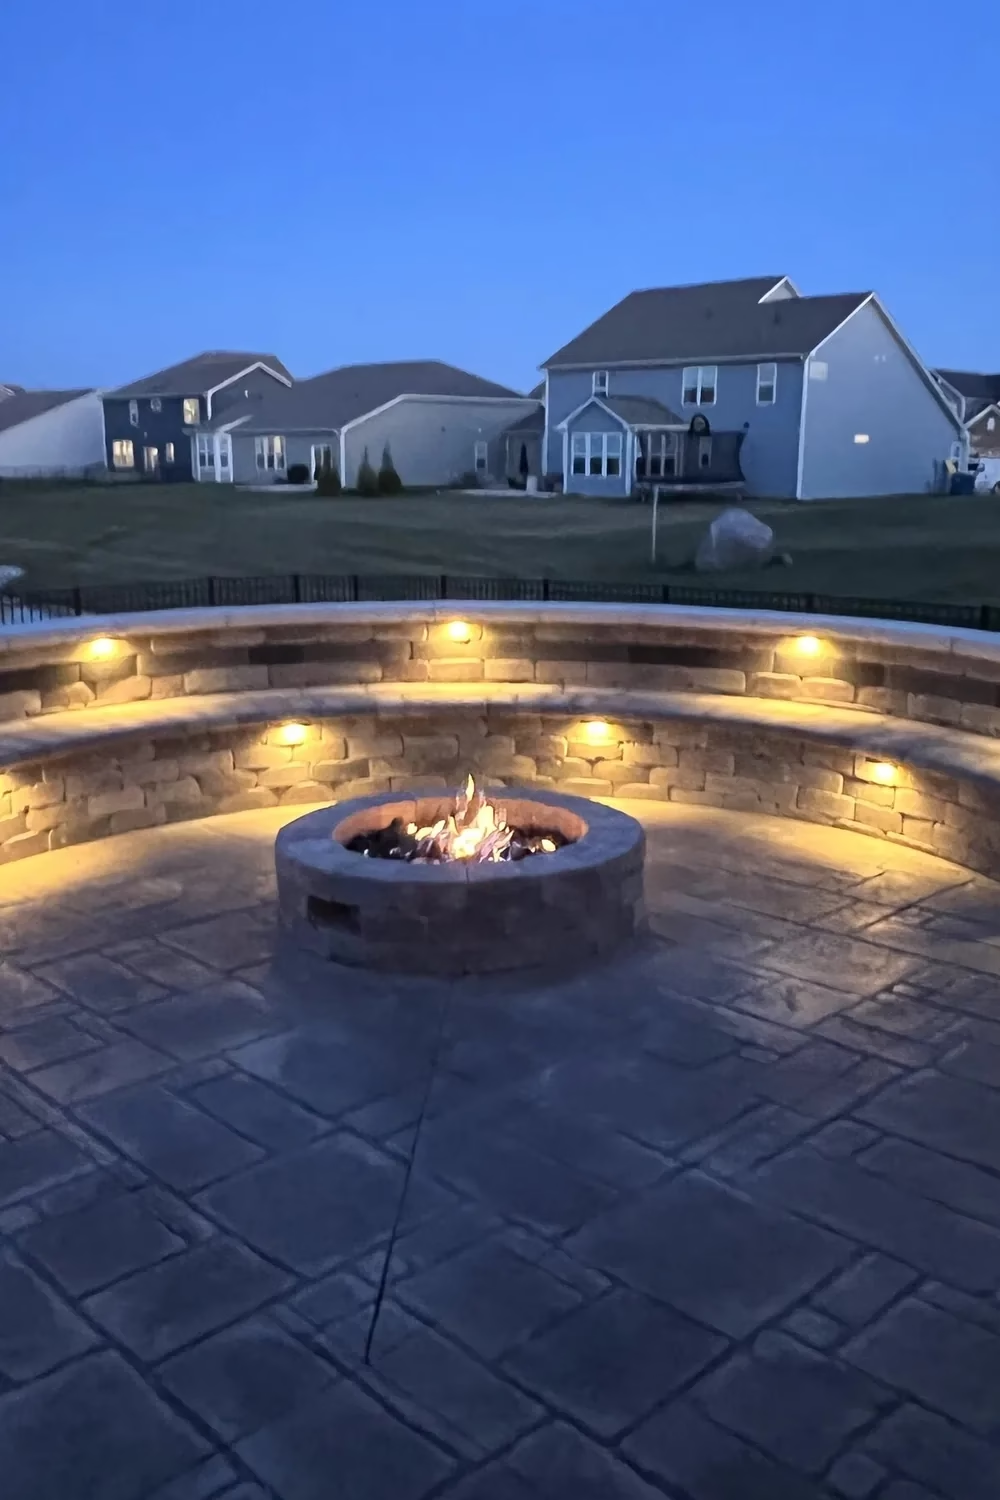
Two stacked curved walls make a built-in amphitheater around the flame. The lower tier works as a bench, the higher one as a backrest, and small lights under each cap wash the stone in amber. The stamped patio in a cut stone pattern keeps the floor quiet so the walls get the attention.

Ask your builder for a bench height that feels comfortable, usually around chair height, and request lights on both tiers. Add outdoor cushions for long evenings. It is a great way to seat a crowd without buying extra chairs, and it suits larger backyards.

11. Flagstone Seat Wall with Mixed Adirondack Chairs

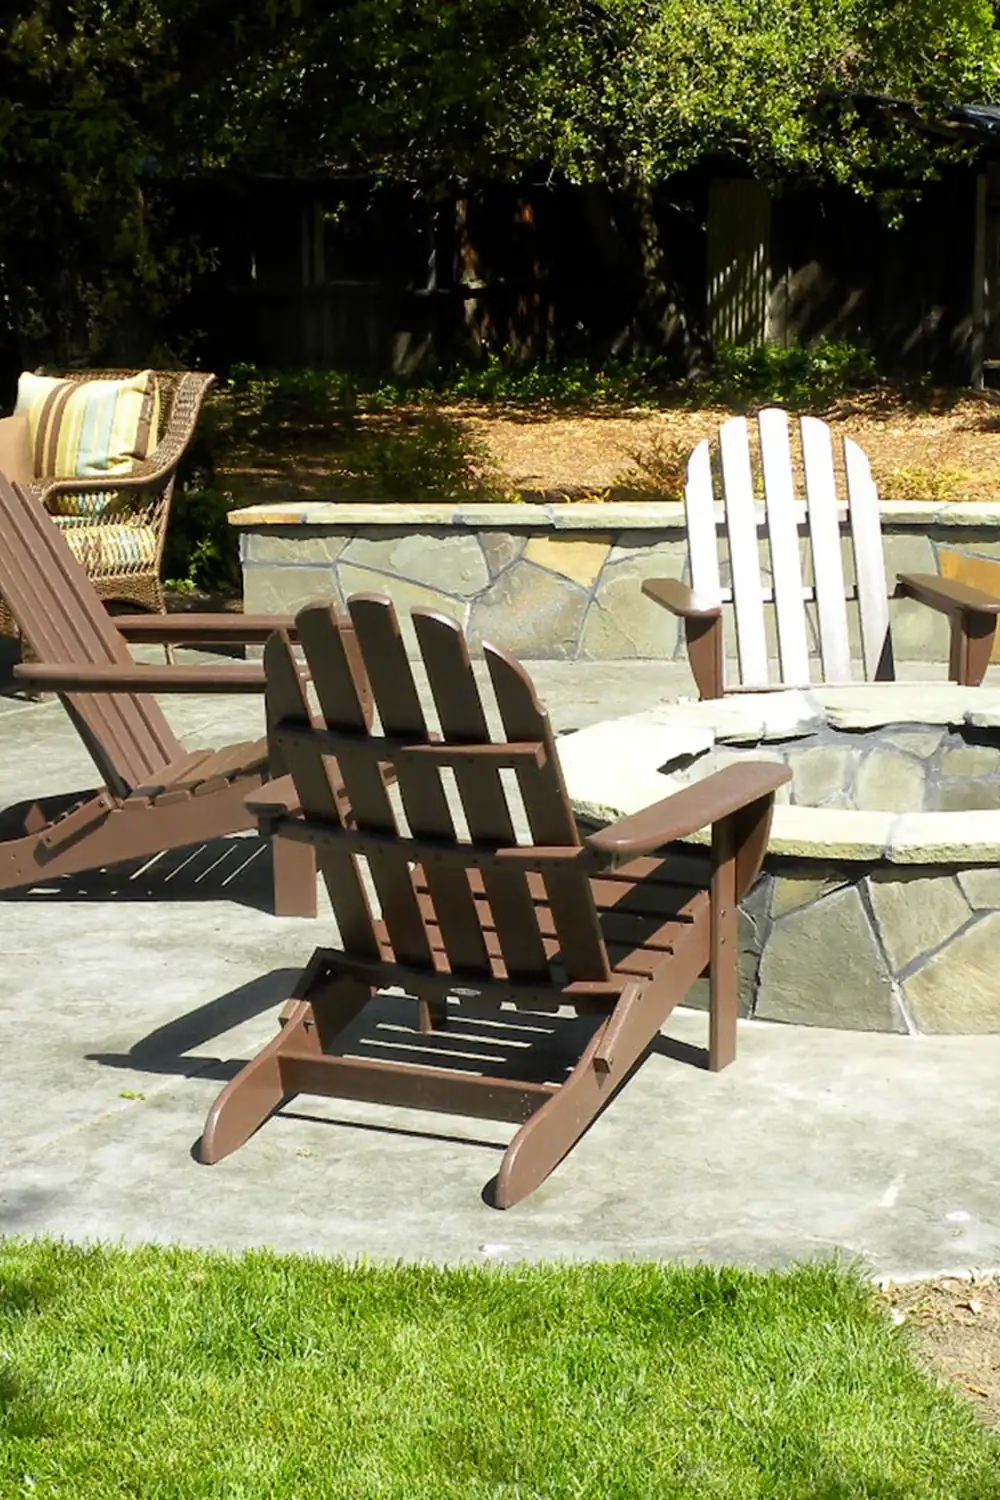
This garden lounge feels relaxed and layered. A low flagstone seat wall in soft sage and tan sits behind a matching stone pit, and a pale stamped patio ties them together. Brown and white Adirondack chairs and a wicker loveseat with a striped cushion add casual charm.

Ask for a stamp and wall stone that echo each other so the patio feels natural. Mixing chair colors keeps it from looking too matched. If real flagstone costs too much, ask about stone veneer over a block wall. This look suits leafy, cottage style yards.

12. Chiseled Stone Rim on Textured Grey Patio

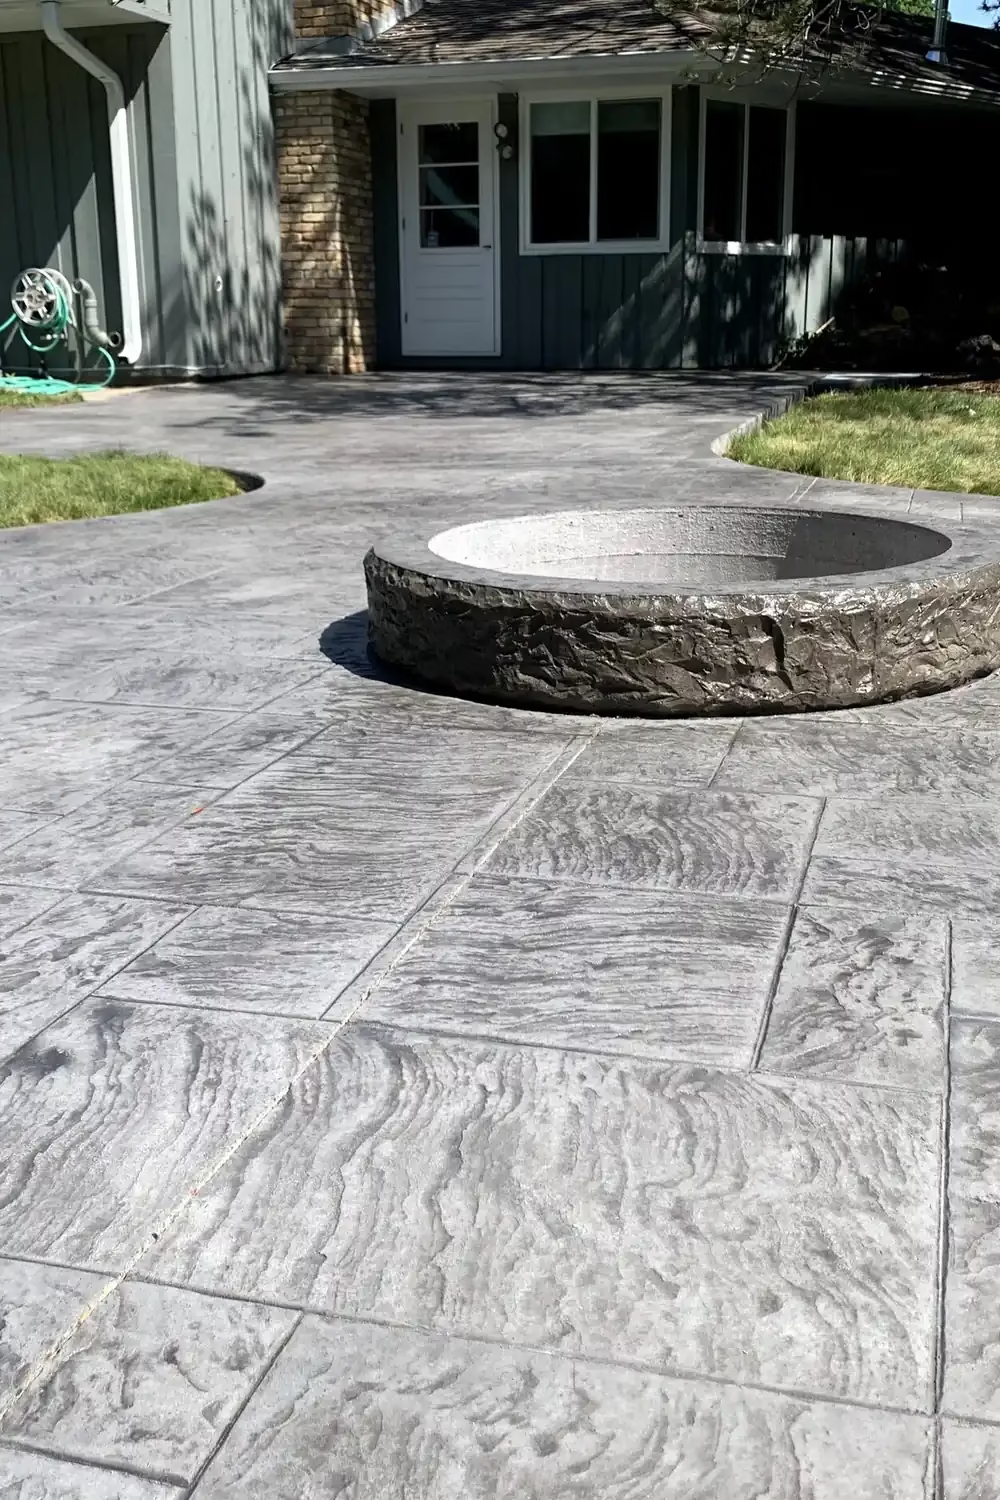
A rugged, chiseled rim gives this fire pit a boulder-like presence, and the swirling, wood grain texture of the grey stamped slabs adds depth without any extra color. The patio curves gently around the lawn, so the whole space feels soft and organic.

Ask your contractor about a cast or carved stone rim and a large format textured stamp in a single grey tone. Keep furniture simple so the textures stand out. It is a good fit for modern homes, and a simple one color slab is usually easier on the budget.

13. Dark Capped Round Pit on Fieldstone Stamped Patio

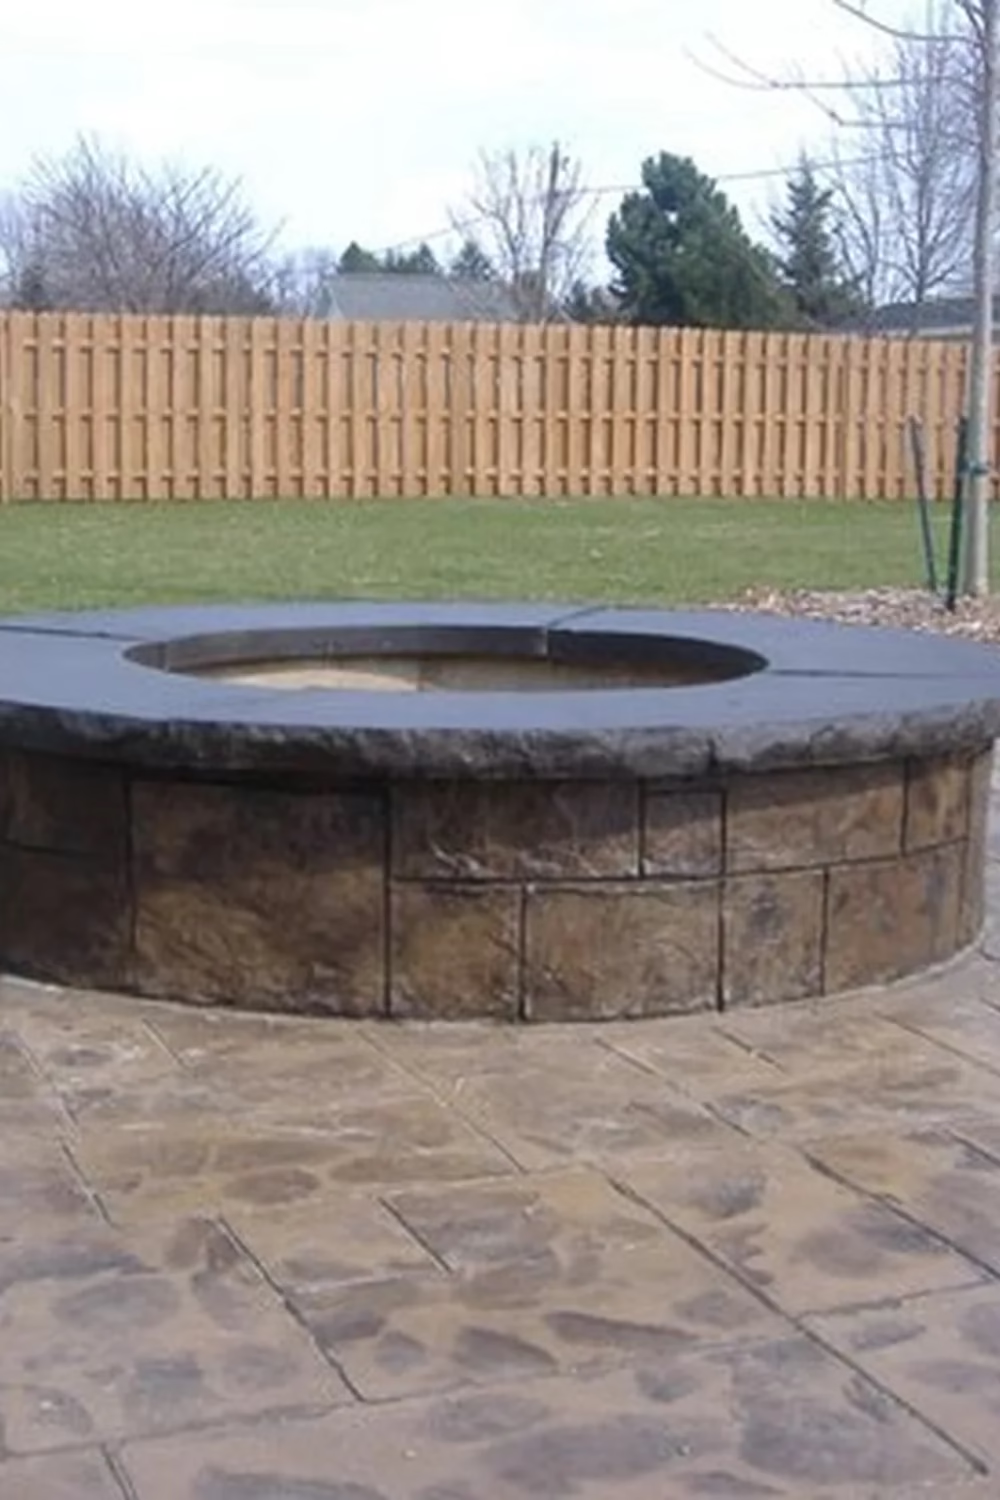
This round pit works because of its contrast. A smooth, dark grey cap with a rough chiseled edge sits on a wall of warm brown blocks, and the stamped patio below repeats those earthy tones. The wood privacy fence and green lawn behind it keep the whole scene calm and natural.

To get the look, ask your installer for a fieldstone stamp with a darker release color, plus a segmented concrete cap. Seams in the cap let it move with the seasons. If you want to save money, keep the wall plain and put the budget into the stamped surface. This suits families who want a simple, sturdy pit in a fenced yard.

14. Sprawling Blue Grey Ashlar Pattern Around Stacked Pit

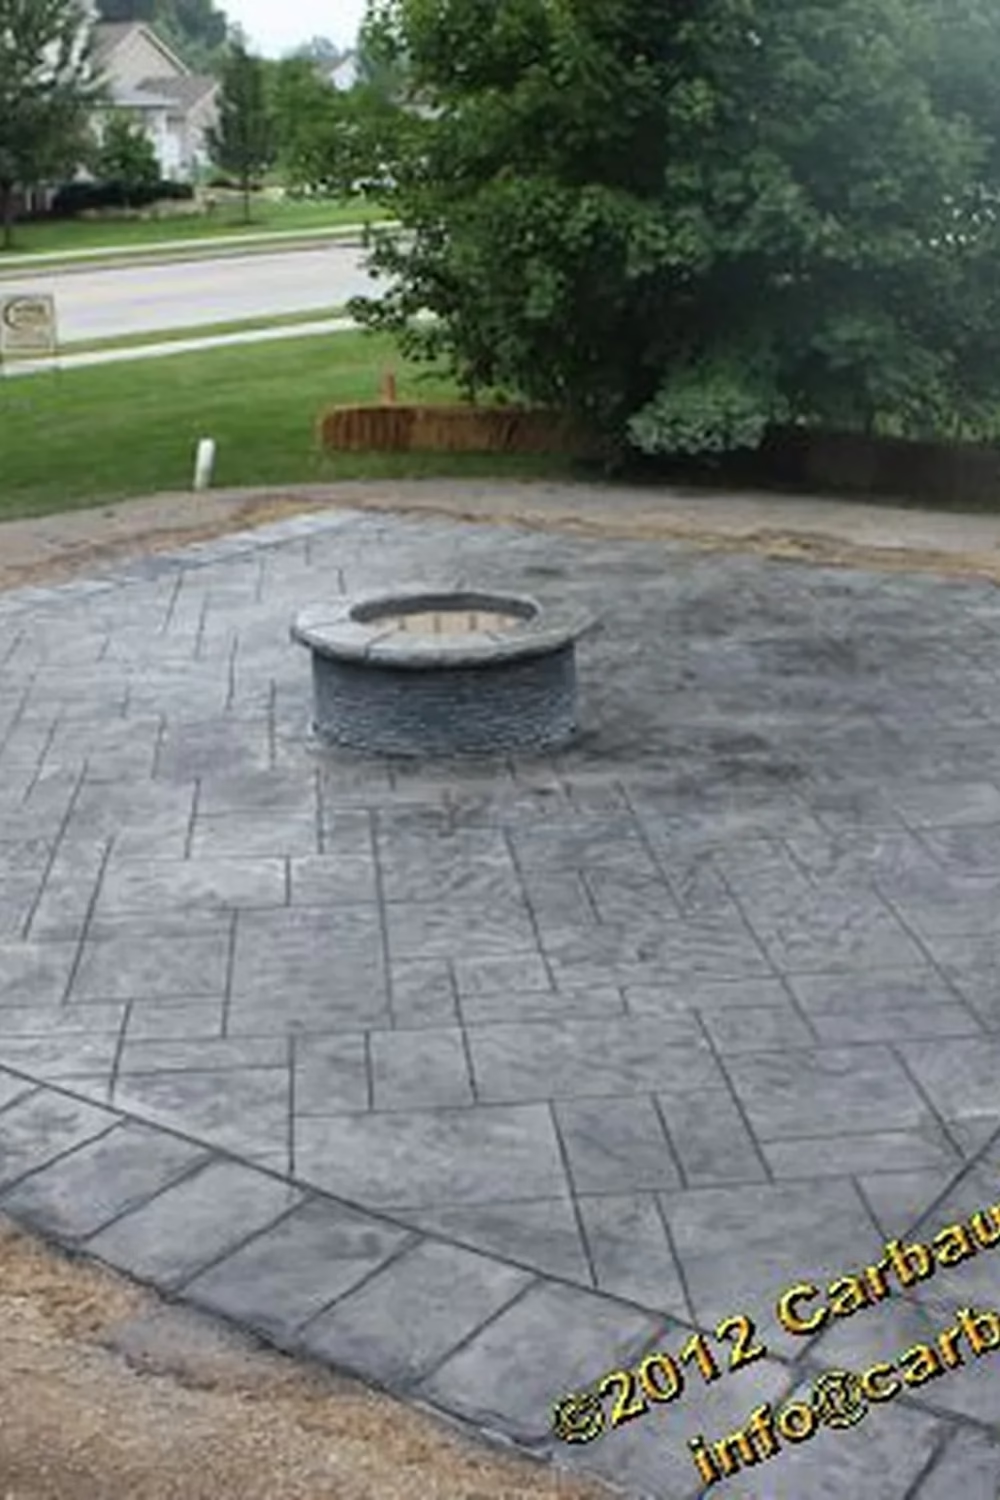
A big, angled patio in cool blue grey lets a small stacked stone pit take center stage. The ashlar pattern mixes large and small rectangles, so the slab looks like cut stone instead of one flat pour. A wide border with a different slate texture frames the edges and gives the whole space a finished look.

When you talk to a contractor, ask for a border stamp that differs from the field pattern, and a slightly darker tint on the border. Place the pit near the middle so chairs can circle it on all sides. This look suits open yards where the patio needs to feel big without looking empty.

15. Flush Steel Ring on Free Form Tan Patio

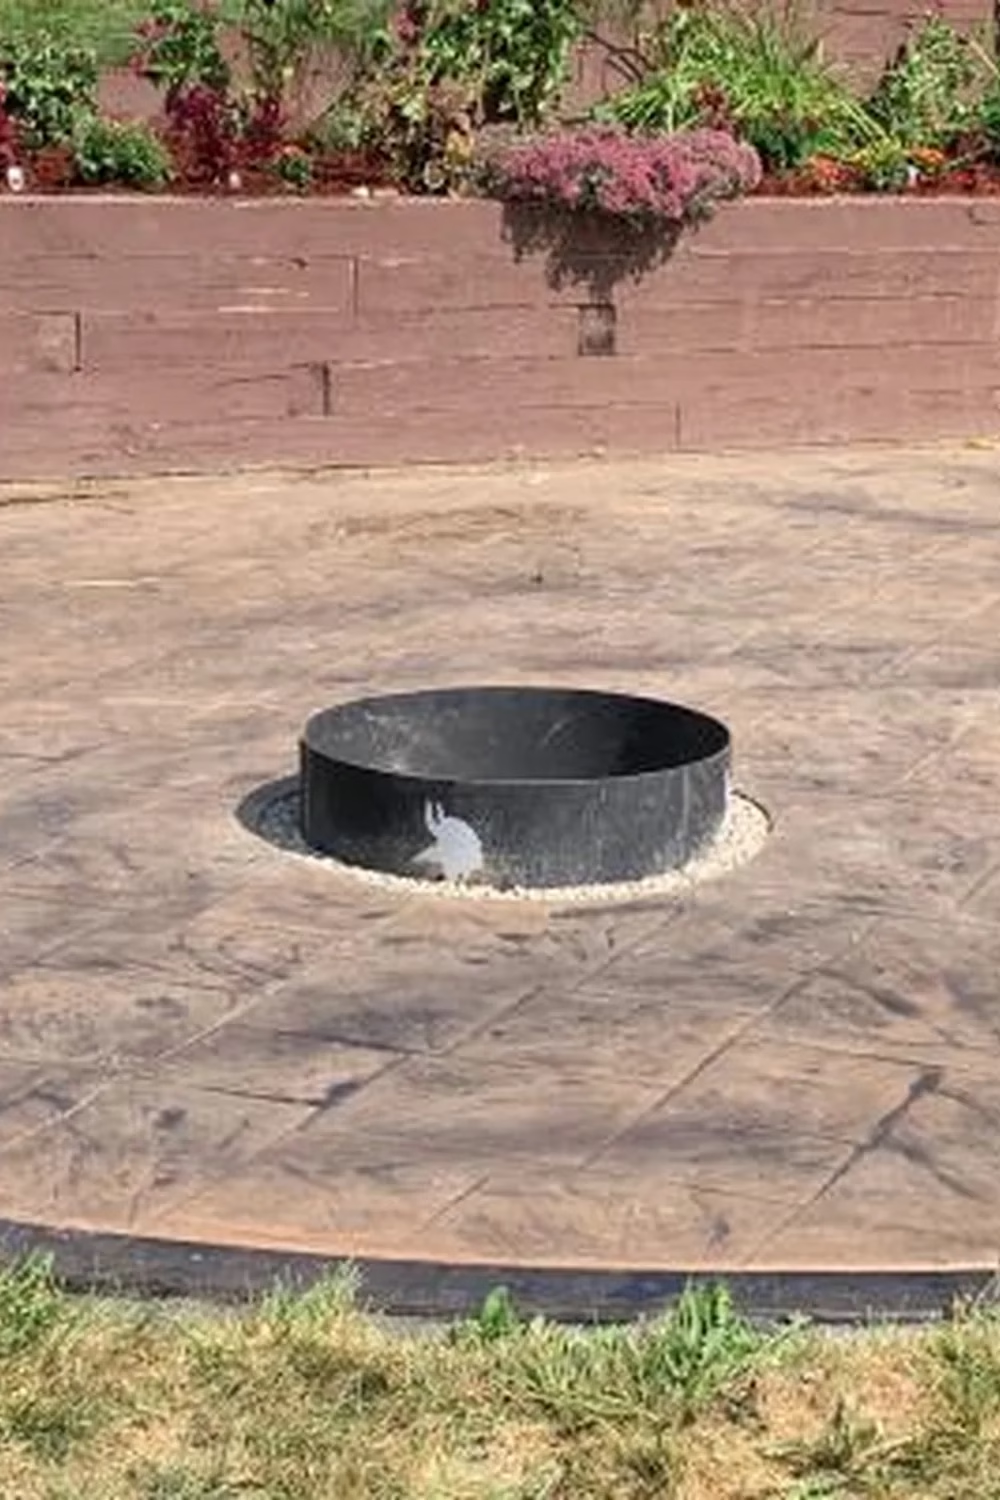
Here the fire ring sits flush in the slab, ringed by a thin band of white pebbles. A free-form tan stamp with a darker curved border gives the patio a soft, organic outline. Behind it, a timber-look retaining wall and a bed of purple and green plantings add color without crowding the seating area.

This is one of the easiest ways to add a fire feature. Ask your installer to leave a round opening in the pour and set a steel ring inside it. Add a pebble collar to protect the concrete edge and make cleanup simple. It suits anyone who wants low-profile fire and plenty of open floor space.

16. Long Curving Grey Patio Leading to Distant Pit

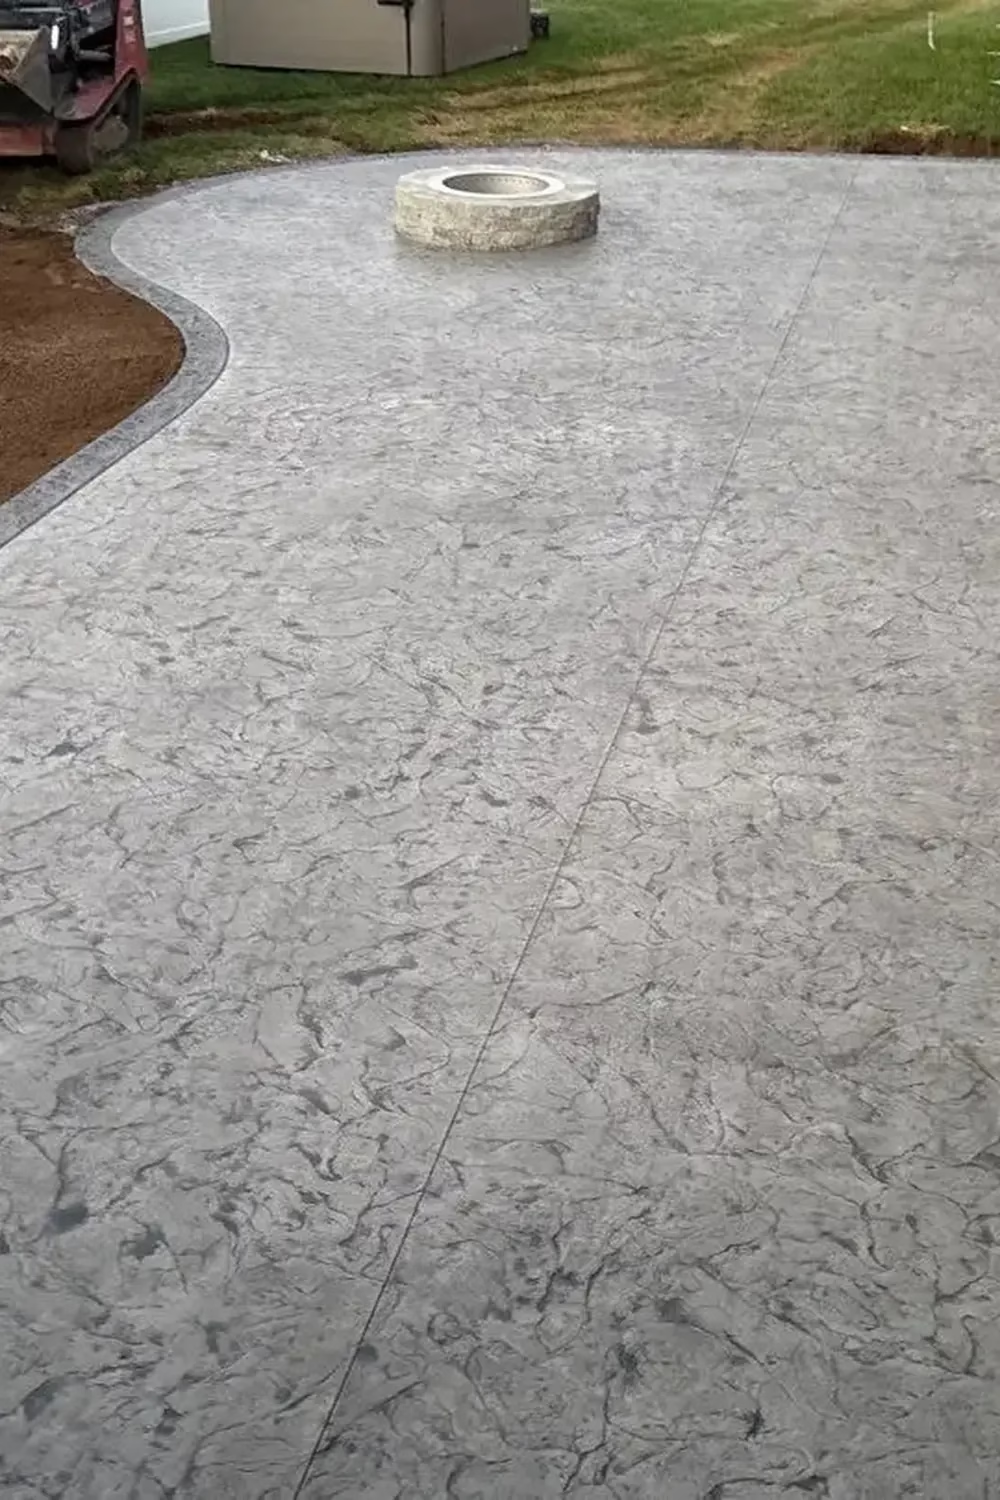
A narrow side yard can still feel like a destination. This soft grey patio stretches back in a gentle curve, edged with a darker stamped band, and ends at a light stone pit. The marbled texture hides small marks and stays quiet, so the eye follows the path straight to the fire.

To recreate it, ask for a random stone stamp with one clean control joint (the thin line running down the slab) to guard against cracking. Keep the pit at the far end so the walk feels like an invitation. This layout suits long, slim yards where a square patio will not fit.

17. Stone Pit with Black Rock Fill Near Home Corner

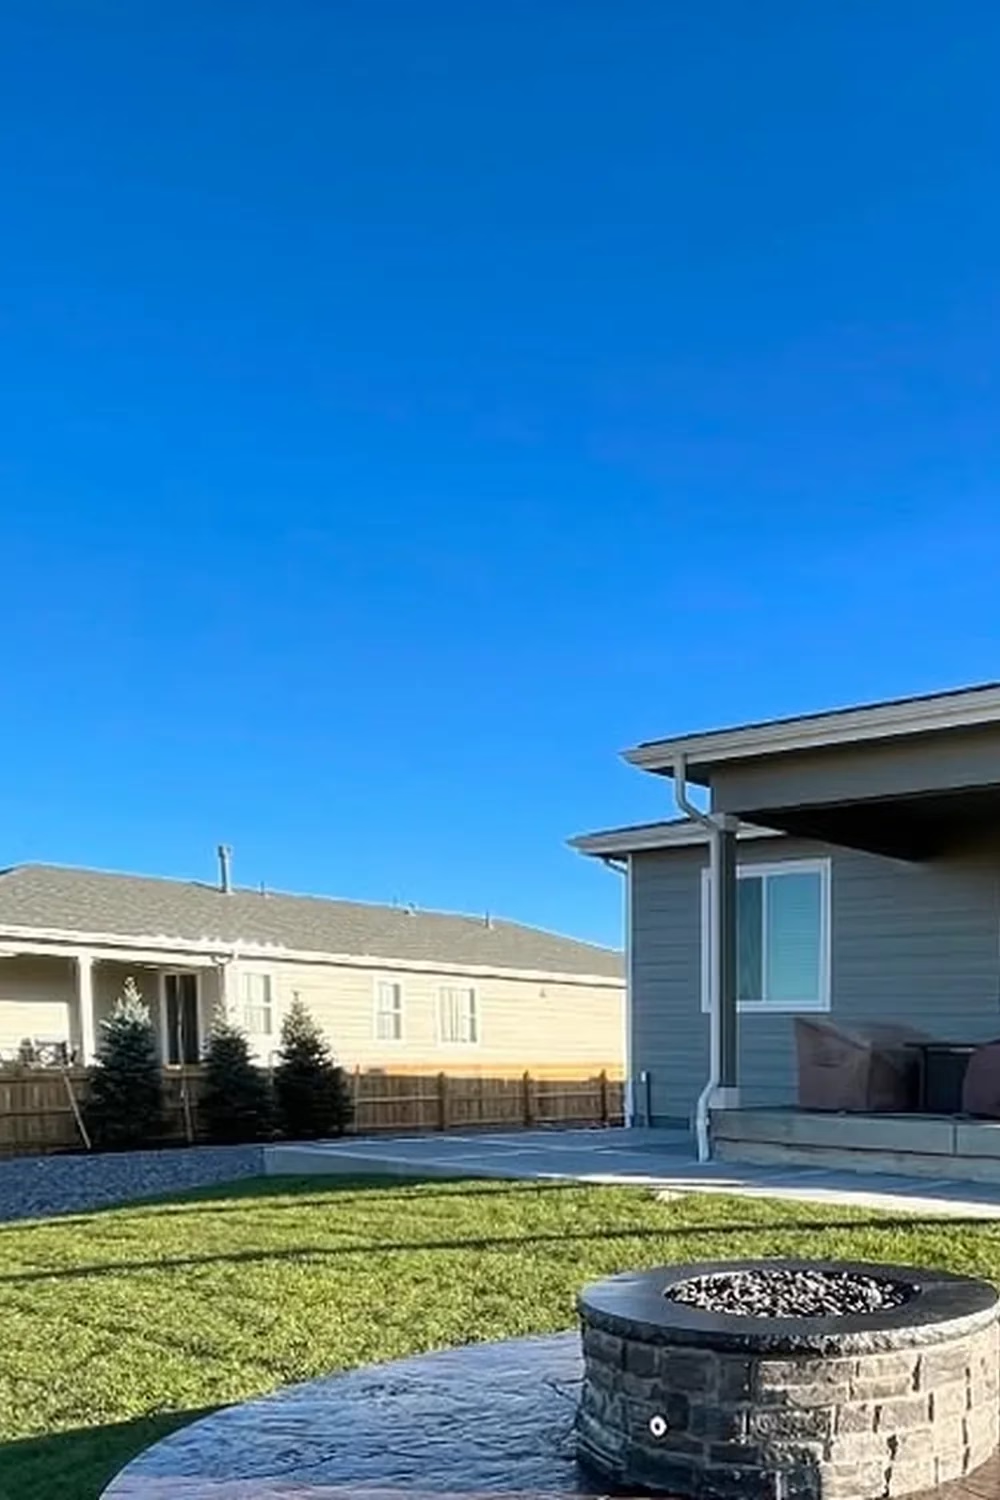
This patio wraps around the corner of the house, so the seating by the back door and the fire area feel like one connected space. The pit in front is stacked in grey and tan stone, topped with a dark cap, and filled with black rock. Against a bright blue sky and fresh green lawn, the dark tones look sharp.

If your yard has an L-shaped layout, ask your contractor to pour the patio in one continuous shape instead of two separate slabs. Pick a cap color that matches the stamped surface so the pit looks built in. A custom stone pit costs more than a kit, so a plain ring is a fair swap.

18. Circular Pad with Banded Edge Meeting Square Slab

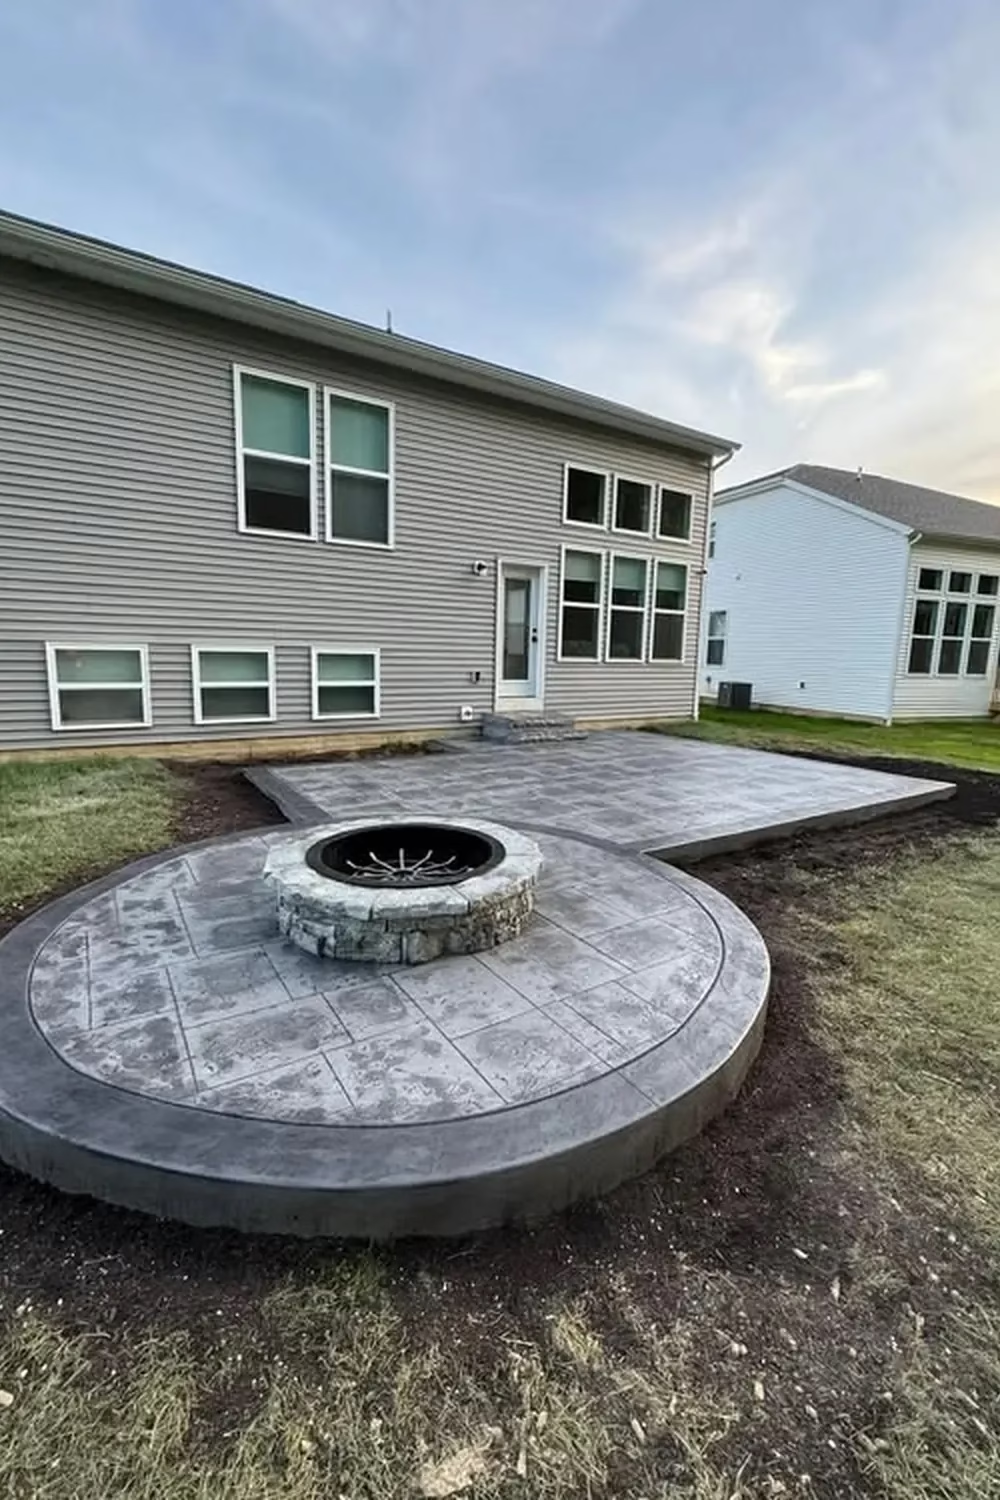
A round fire pad grows out of a rectangular patio like a keyhole, and the shape is the star. The circle has a darker banded border and a raised edge, with a light stone pit and a steel insert at its center. Grey stamped tiles inside the ring echo the stamped slab beside it.

To get this look, ask for a raised form with a contrasting border stamp and a smooth edge band. Keep the circle large enough for chairs to fit around the pit. Soil grading and some mulch around the edge help the slab look settled. It suits modern homes with plain back walls that need a strong focal point.

19. Rust Toned Slate Veneer Gas Pit with Bluestone Top

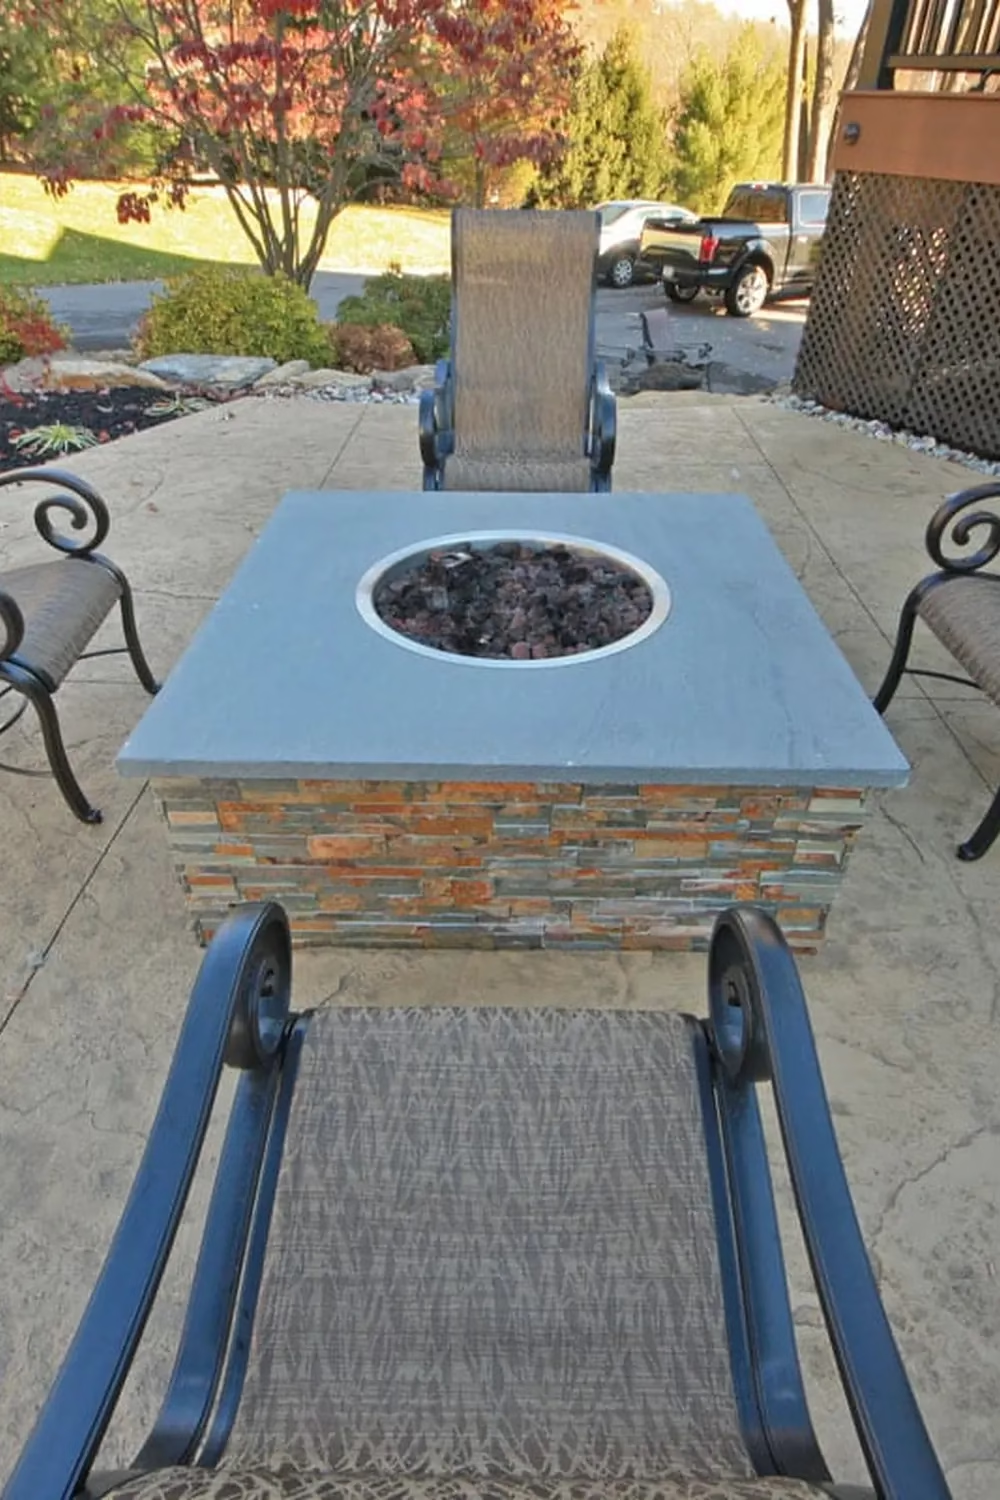
Color does the work in this square pit. The stacked slate veneer shows streaks of rust, orange, and green, and a smooth blue grey stone top sits above it. A round steel burner is filled with dark lava rock. Scrolled black chairs with sling seats pull up close, and the soft sand tone of the stamped patio lets the pit glow.

Ask your installer for a gas line with electronic ignition so you can light it with a switch, with no smoke or ash. Keep at least a few feet of clear patio around the pit for chairs. This look suits tidy, entertaining-friendly yards, especially where the patio has two levels.

Pick Your Favorite and Start Planning

Every patio here proves that stamped concrete can borrow the look of natural stone and still stay practical. Notice which color tones and pit shapes you keep returning to, because that is your style talking.

Save your top two or three ideas to a board and bring them to your concrete contractor. Showing real photos makes it much easier to get the pattern, color, and fire feature you picture.

16 Genius Sewing Room Storage Ideas to Tame Your Fabric and Thread Chaos

You know the fabric is in there somewhere, but the scissors have gone missing again, and a spool just rolled under the table.

Every minute spent digging is a minute you are not sewing. Scraps pile up, rulers hide, and the whole room starts to feel like a chore.

The fix is not a bigger room. It is a handful of sewing room storage ideas that give every ruler, spool, and scrap its own spot.

Below are 16 Sewing Room Storage Ideas, from neon rulers on a pegboard to rainbow fabric in wooden cubbies and a magnetic strip for scissors. Pick the one that fits your space and budget, and start there.

Popular Sewing Room Storage Ideas

1. White Pegboard Holding Neon Rulers on Hooks

White Pegboard Holding Neon Rulers on Hooks
Source: Bosworth Life

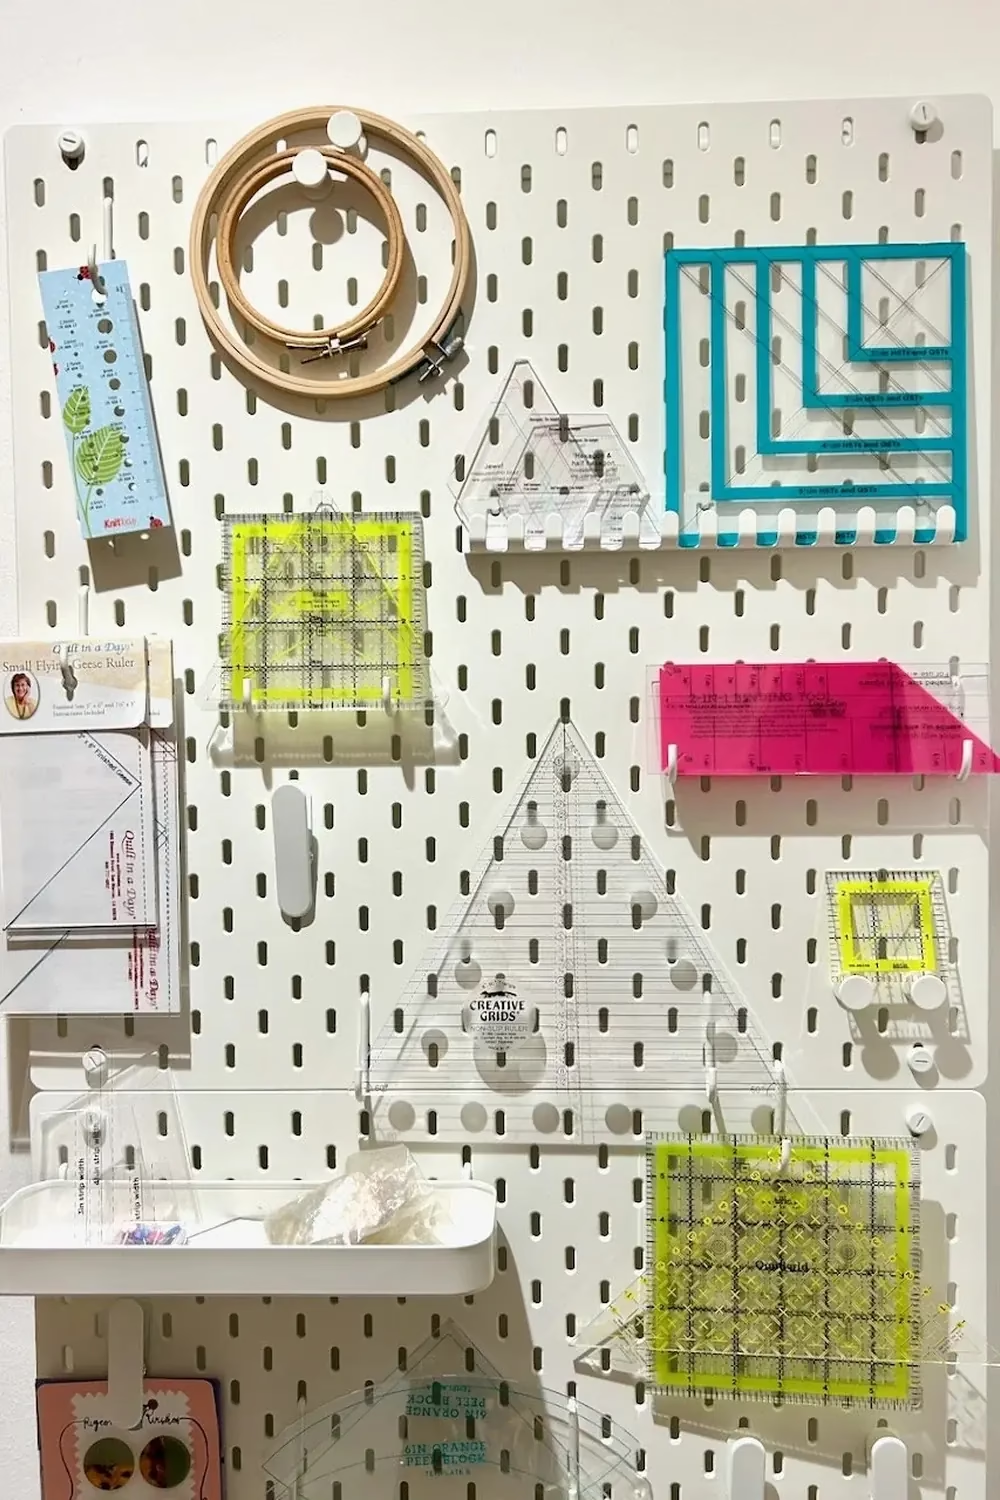
A white pegboard makes bright quilting rulers look like wall art. Lime, turquoise and hot pink acrylic stand out against the plain background. Each template sits on its own hook or clip, so you can spot the one you need in a second. Wooden embroidery hoops hang at the top, and a small shelf tray catches loose bits below.

To recreate it, mount a slotted pegboard inside a closet or cupboard door. Ask for small hooks, clips and a shallow tray in the same white finish. Hang rulers by shape so triangles stay together. On a budget, a single board with a handful of hooks does the job.

2. Handmade Cherry Wood Thread Rack With Dowels

Handmade Cherry Wood Thread Rack With Dowels
Source: chrunck dot com

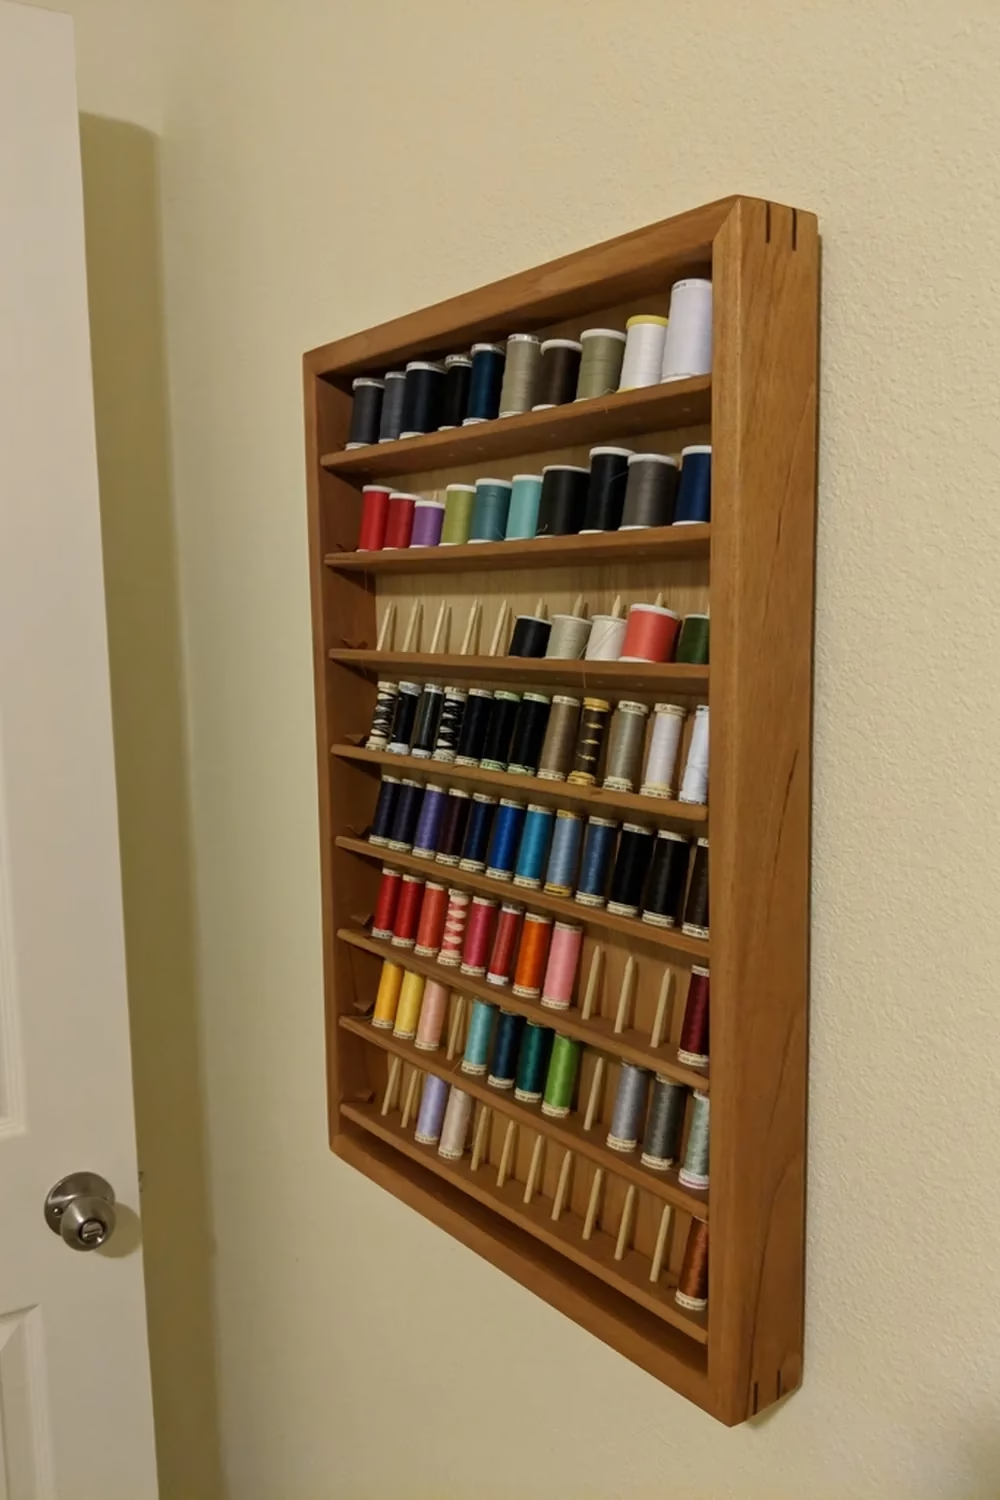
This warm wooden frame turns a blank wall into a thread library. Rows of spools sit on slim dowels, and the shelves tilt out so you can reach every color without digging. The thread is grouped by shade, so a quick glance tells you what you have. Dovetail style corners show off the craftsmanship.

Ask a local woodworker to build one with dowels spaced for your spool size and a depth that clears the wall. Aim for around 90 spools if you buy a lot of thread. On a budget, glue dowels into a shallow shadow box and mount it with sturdy wall anchors.

3. Full Pegboard Wall of Rulers in Attic Corner

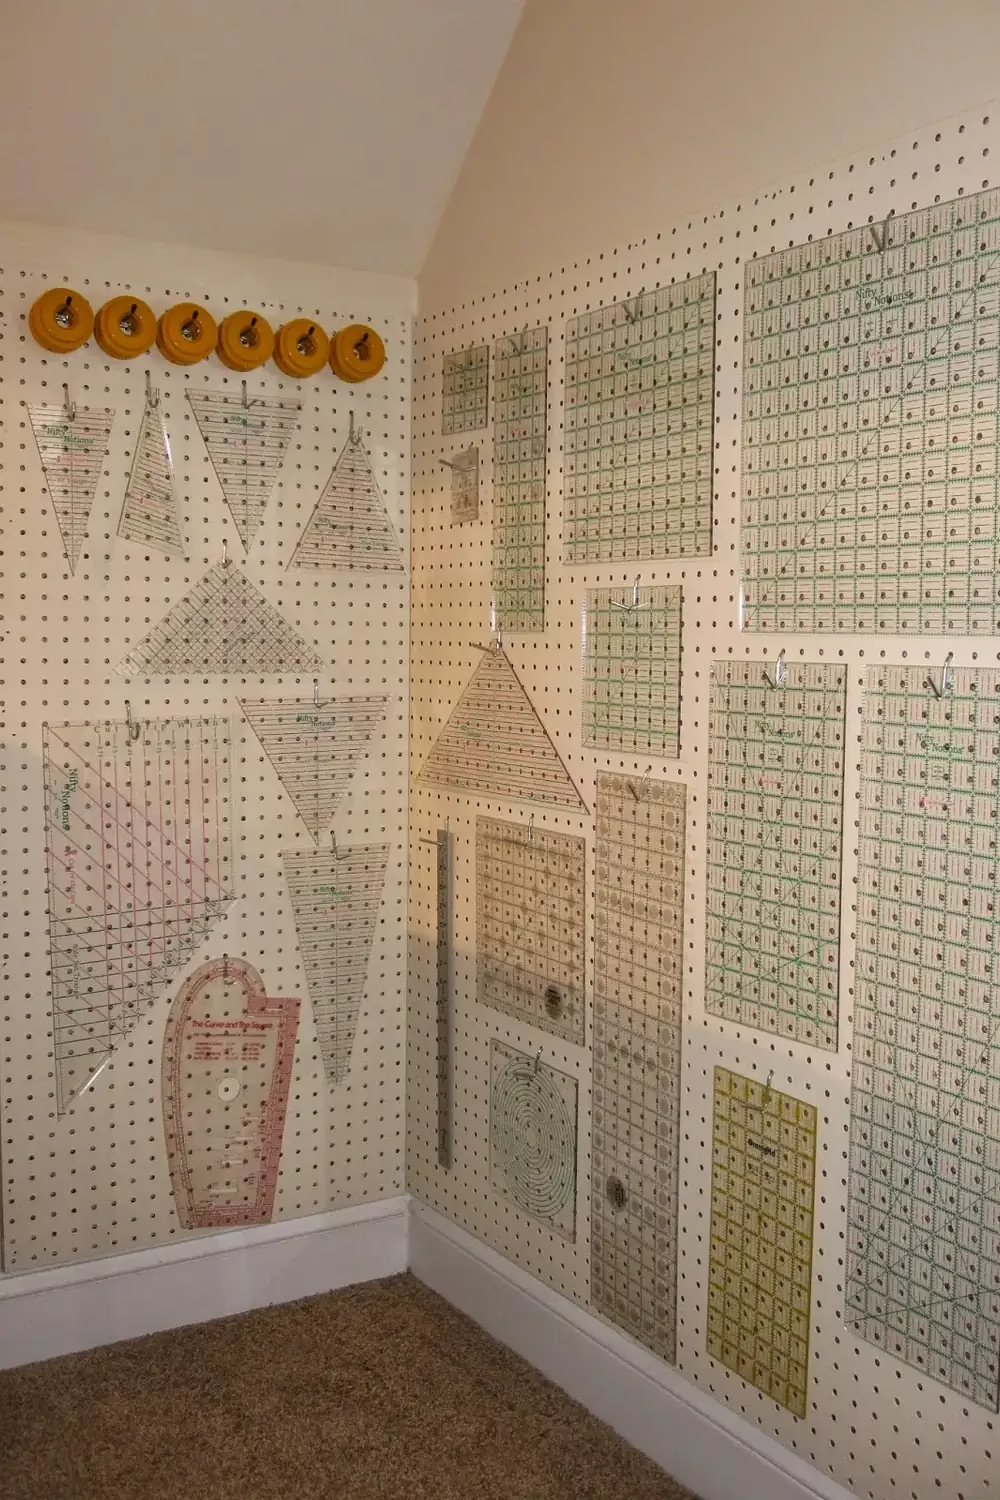
Here pegboard covers two walls of a sloped ceiling corner, and every ruler gets its own spot. Triangles and wedges hang on the left, while large squares and long rectangles fill the right. A row of round yellow pattern weights sits along the top. Hanging them by shape and size makes it easy to see what is missing.

Use metal hooks that slip through the holes in each ruler. Paint the board a light color so clear acrylic stays easy to read. Place it right beside your cutting station so rulers travel only a step. Hardware store panels are a budget friendly way to cover a big wall.

4. Labelled Pattern Box With Shiny Silver Lid

Labelled Pattern Box With Shiny Silver Lid
Source: Sirina Designs

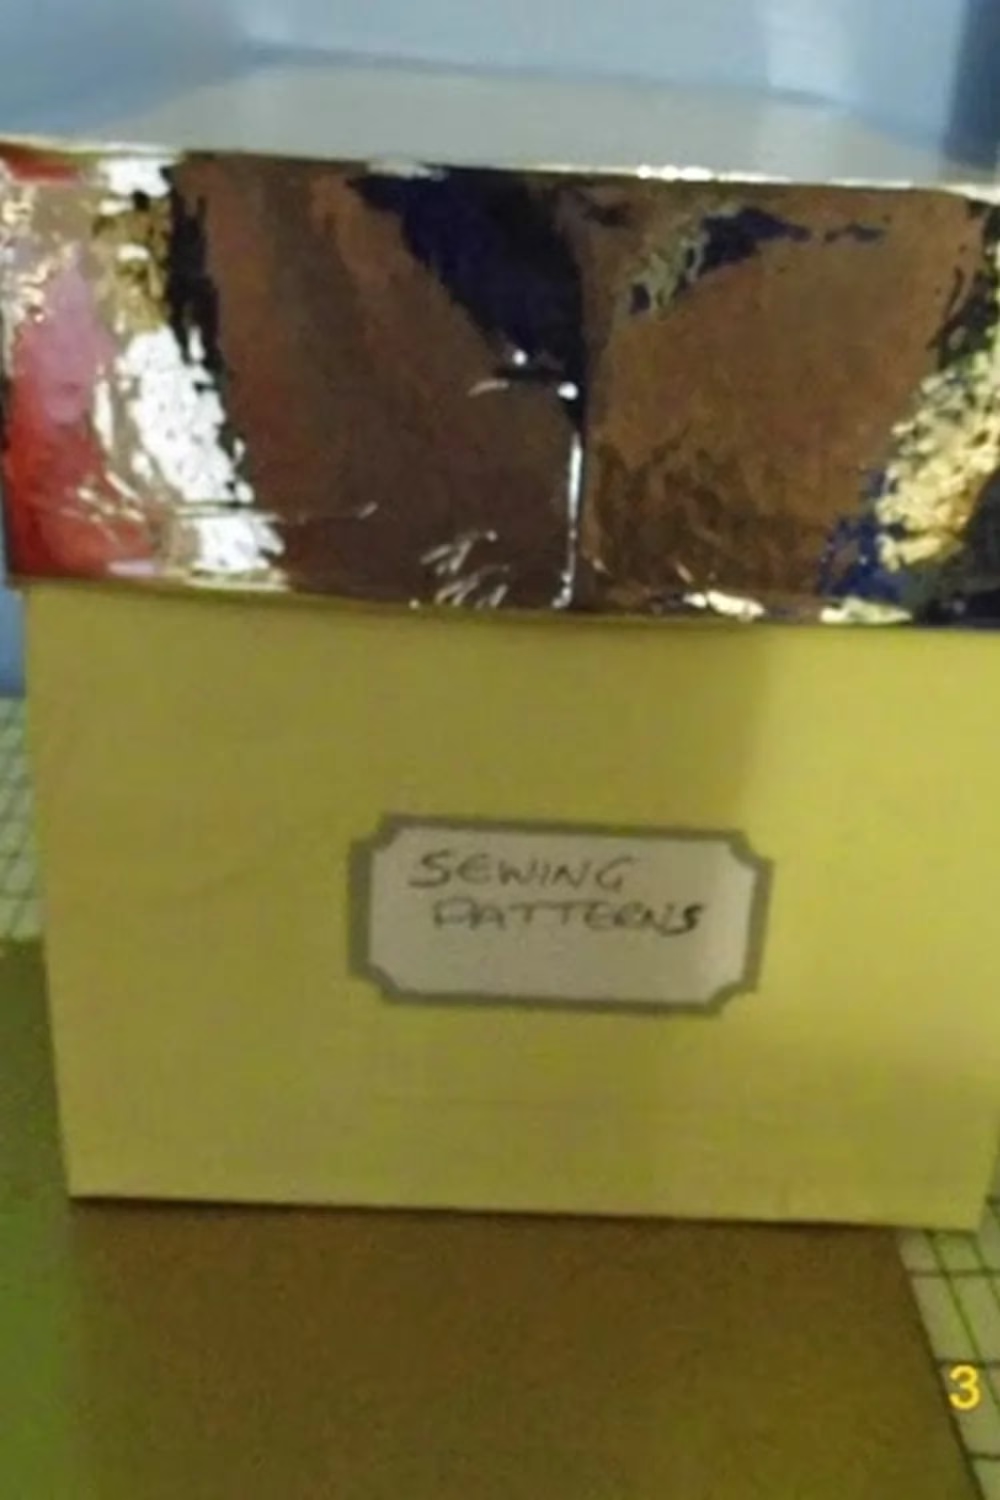
A plain box with a handwritten label can tame a pile of tissue patterns. This pale green one has a shiny silver lid and a neat framed tag that reads Sewing Patterns. Inside, each pattern lives in its own envelope, with category tabs to help you find things fast. It tucks neatly onto a shelf.

To copy the idea, slip each pattern into a labelled envelope and note the size and pieces on the front. Add tabs for dresses, tops, pants and bags. Cover a sturdy shoebox with wrapping paper for a cheap version. Pair it with an envelope binder if you like flipping through.

5. Rainbow Fabric Stacks in Wooden Cubbies

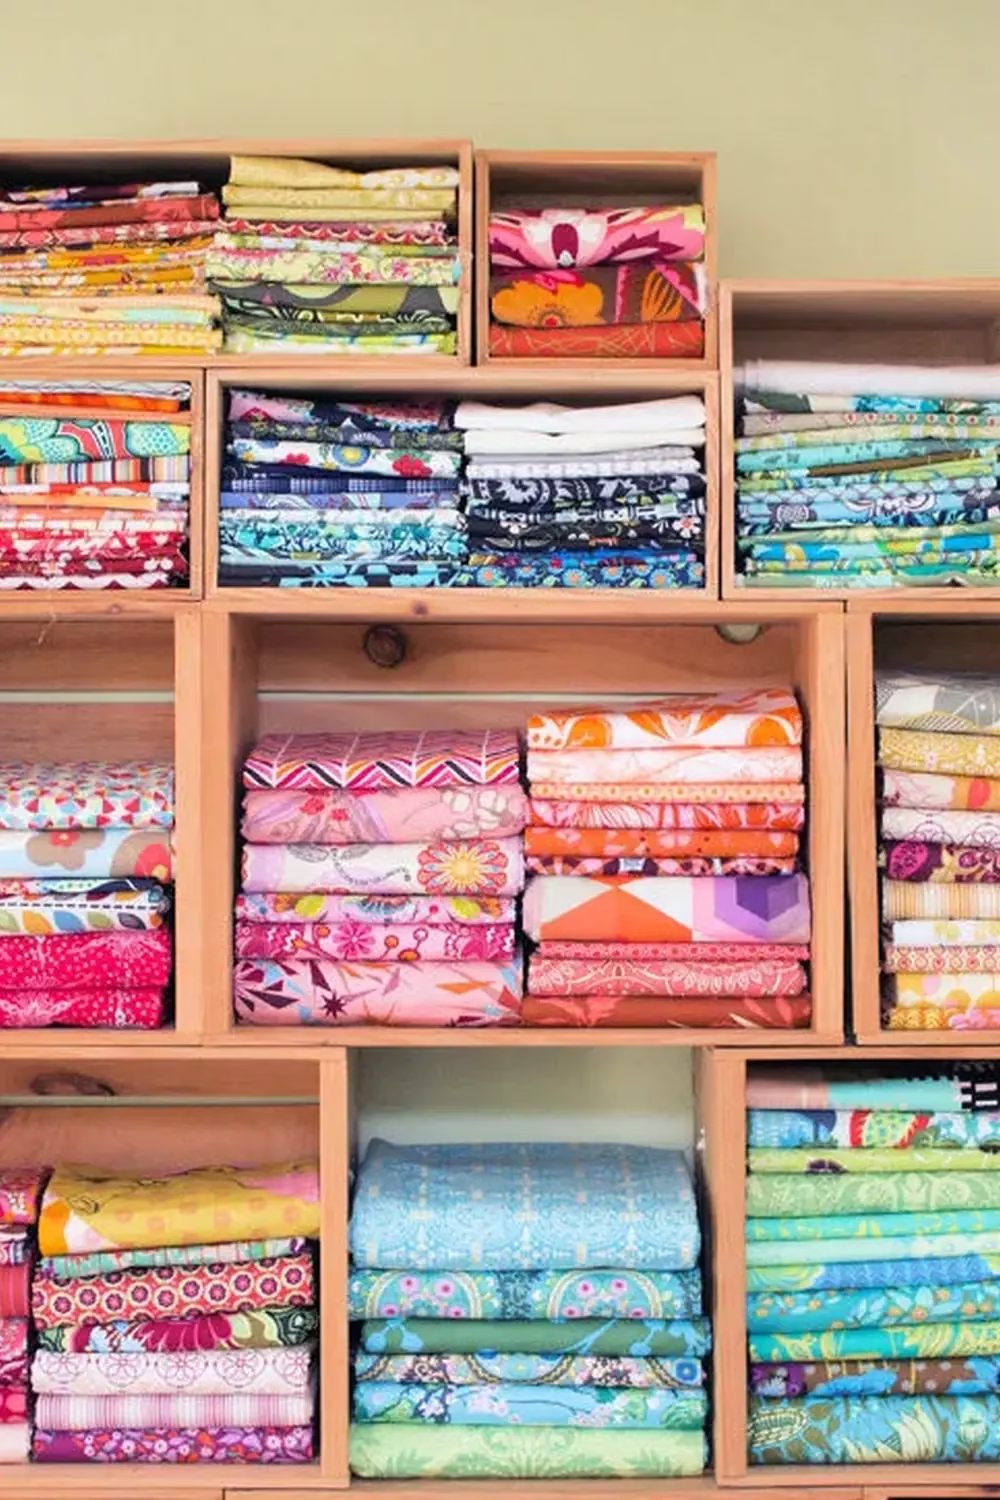
Folded yardage becomes a color wall when it sits in open wooden cubbies. Pinks, oranges and reds fill the center boxes, while blues and greens gather on the right. Every stack is the same width, so the shelves look tidy and calm. Prints stay visible from the side, which makes browsing fun.

The trick is to fold each piece around a cardboard template cut to fit your cubby. Slide the cardboard out and stack the folded fabric neatly. Sort by color family so you can find a match quickly. Stackable wooden crates make an affordable alternative to built in shelves.

6. Rolling White Cutting Table With Drawers and Baskets

Rolling White Cutting Table With Drawers and Baskets
Source: A Bright Corner

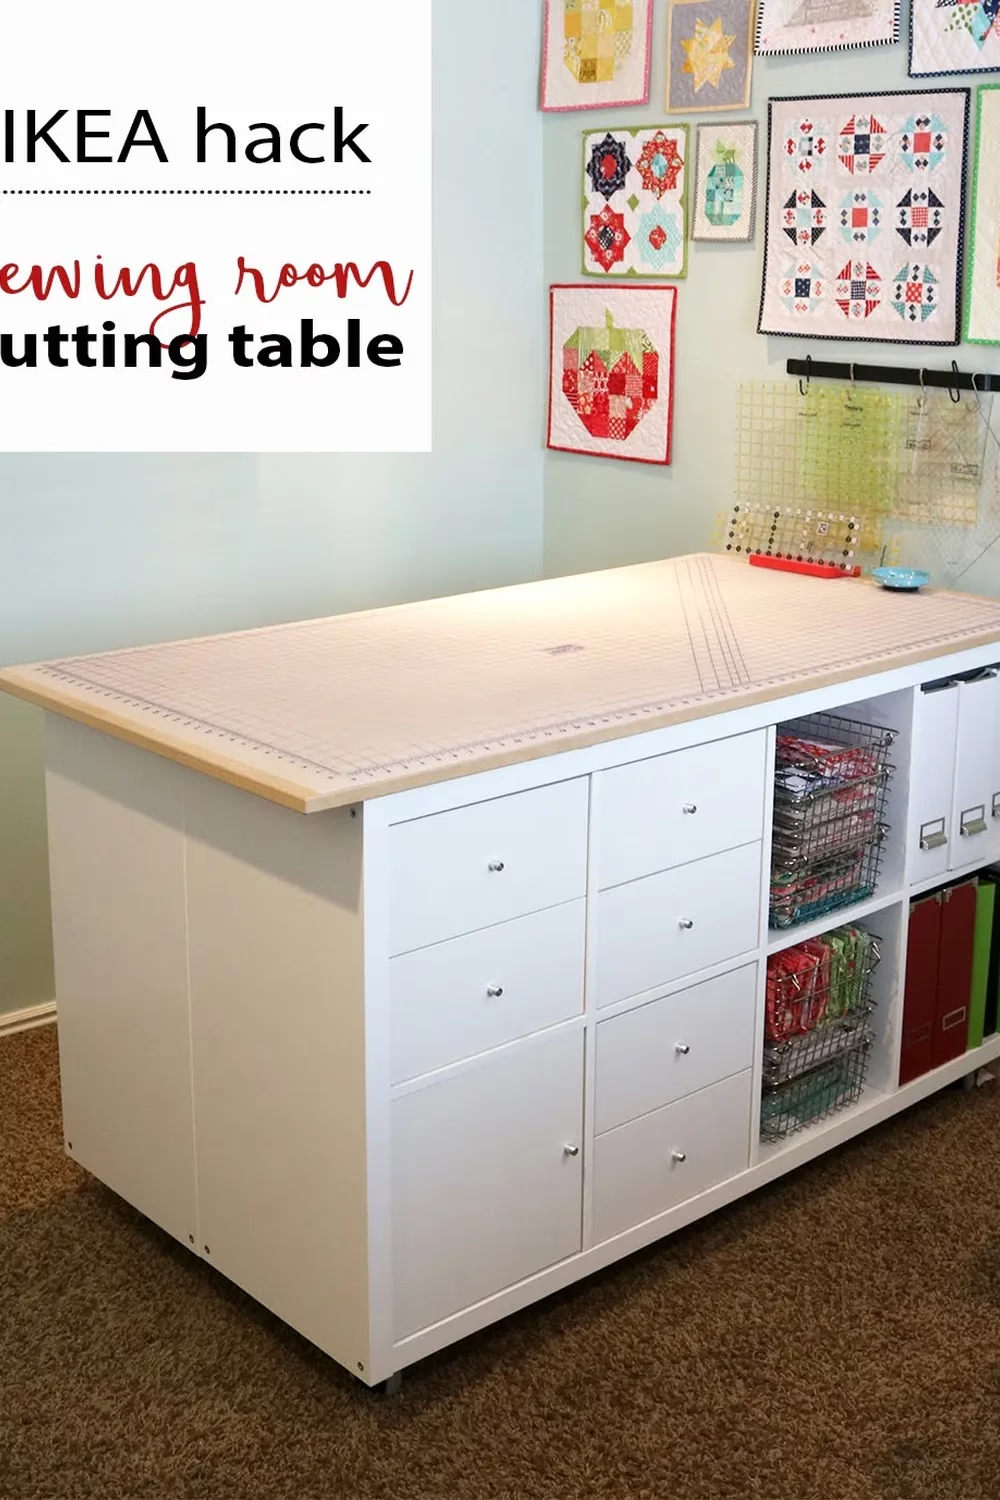
This cutting table pairs two white cube shelving units with a wood edged top and a large gridded mat. Drawers and doors hide supplies on one side, while wire baskets full of fabric sit in open cubes. A rail on the wall holds hanging rulers, and framed mini quilts add color above. Casters let you roll it where you need it.

To build something similar, join two cube units and add a flat top cut to overhang. Choose a height that suits your hips, so cutting does not hurt your back. Fill the cubes with bins, binders and baskets. Lock the wheels when you cut.

7. Upright Fabric Bolts in a Soft Color Gradient

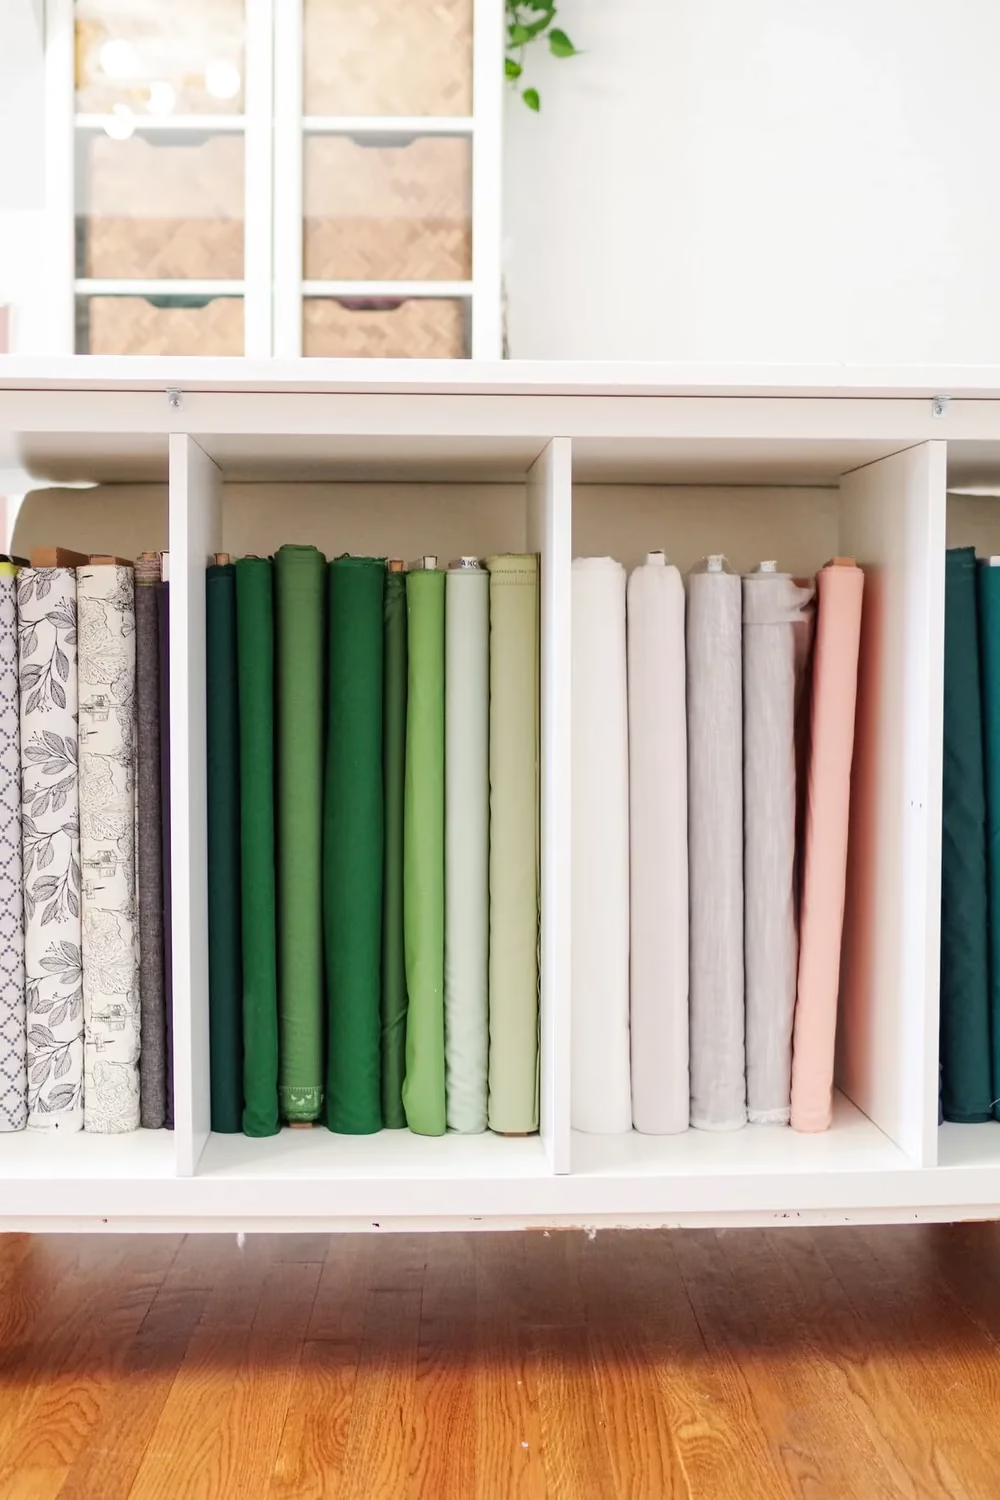
Standing fabric on end like books shows off every color at once. These bolts shift from deep emerald to pale mint, then move into whites, soft grays and a blush pink. Black and white florals sit at the far left. The white cubbies keep the look clean and let the fabric be the star.

Wrap yardage around flat boards, then stand them upright in tall cubes so you can slide any one out. Group colors in a gradient to make your stash easier to scan. This table has a fabric side and batting storage, all on locking wheels, so it stays steady while you cut.

8. Color Sorted Scrap Bins Lined Along the Wall

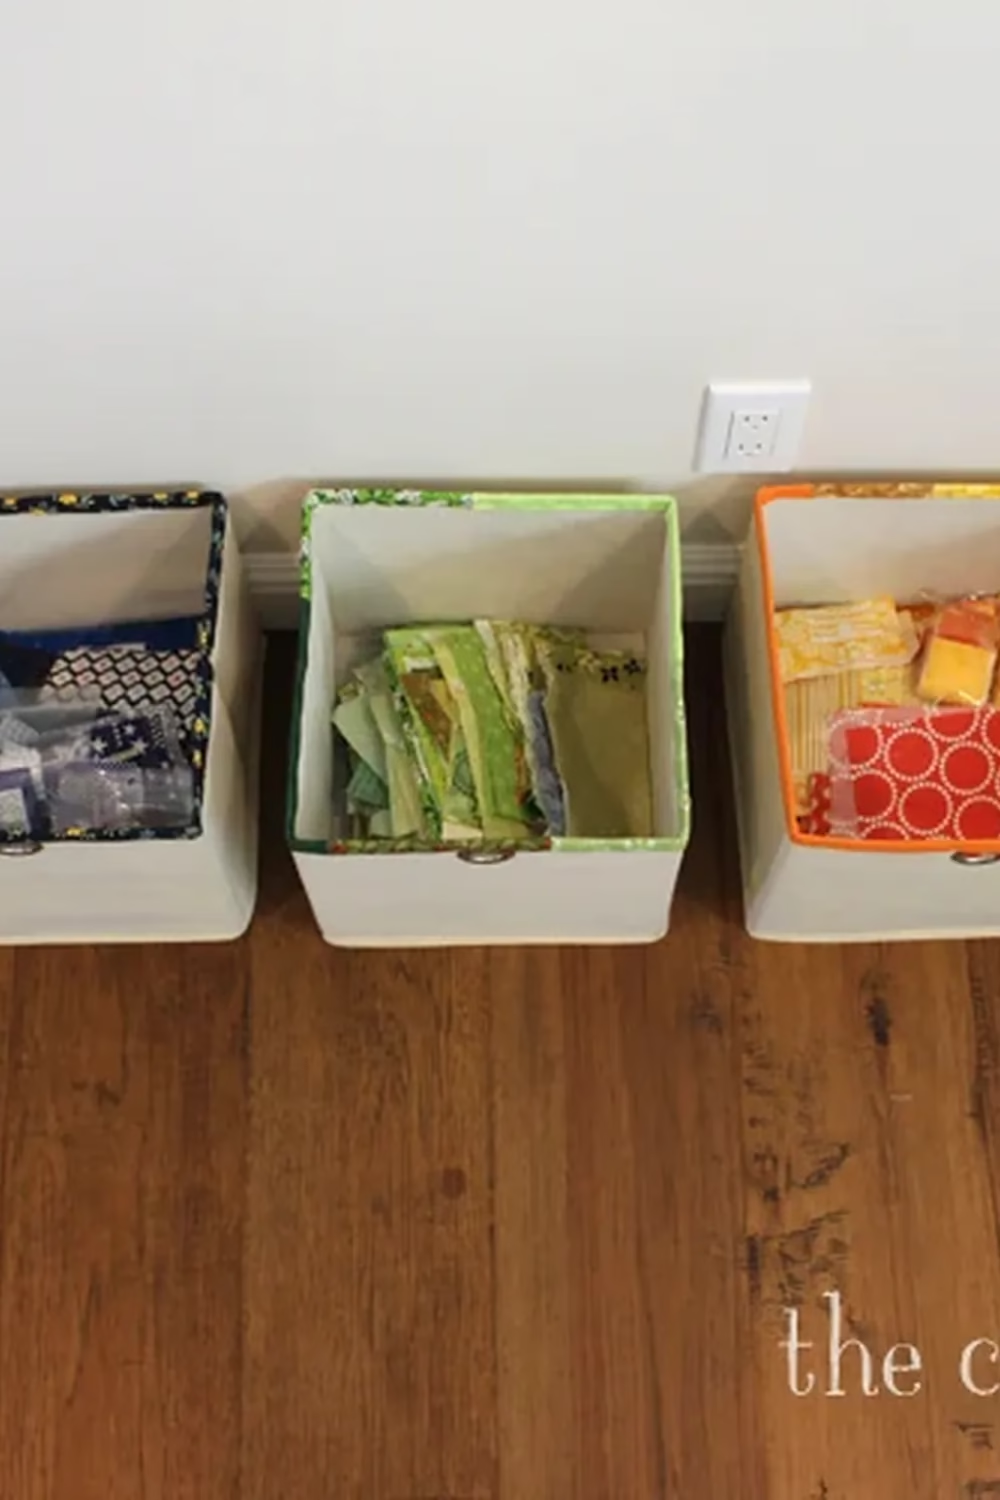
Scraps are easier to love when each color has its own home. These cream fabric bins have trim in navy, lime green and orange, so you can tell what is inside before you look. Green strips stand tidy in the middle bin, and yellow and red pieces fill the one beside it. Metal grommet handles make the bins easy to pull out.

Sort leftovers by color as you finish each project. Trim the bin rims with matching fabric for a quick label you can see from across the room. Plain open cubes work well if you want a budget version. Keep them along a wall so they stay out of your way.

9. Aqua Three Tier Cart Stocked With Notions

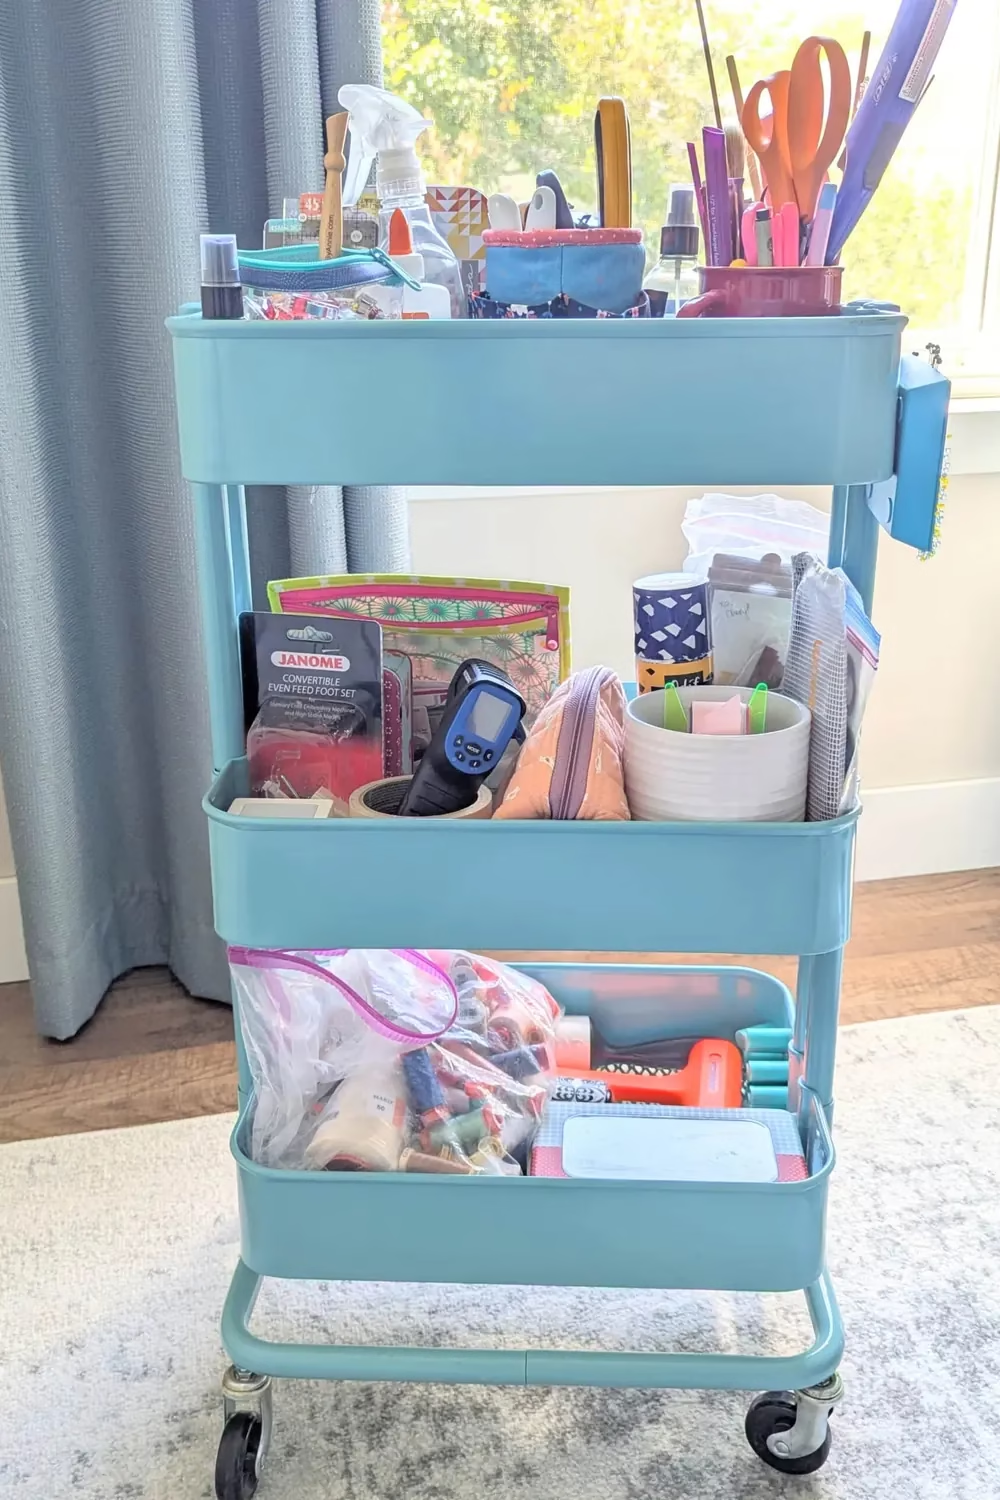
A bright aqua cart keeps everyday tools right beside your machine. The top tier holds scissors in a mug, spray bottles, glue and a pin pouch. Zip bags, tape and a small cup fill the middle. A clear bag of thread spools sits on the bottom. Everything is within reach without crowding your table.

Give each tier a job, such as cutting tools on top, small bits in the middle and bulky items below. Use zip pouches and cups to keep tiny pieces from rolling around. A hook on the side can hold a small bag. Roll it to your machine or your ironing board as needed.

10. Clear Plastic Drawers Sorting Thread by Color

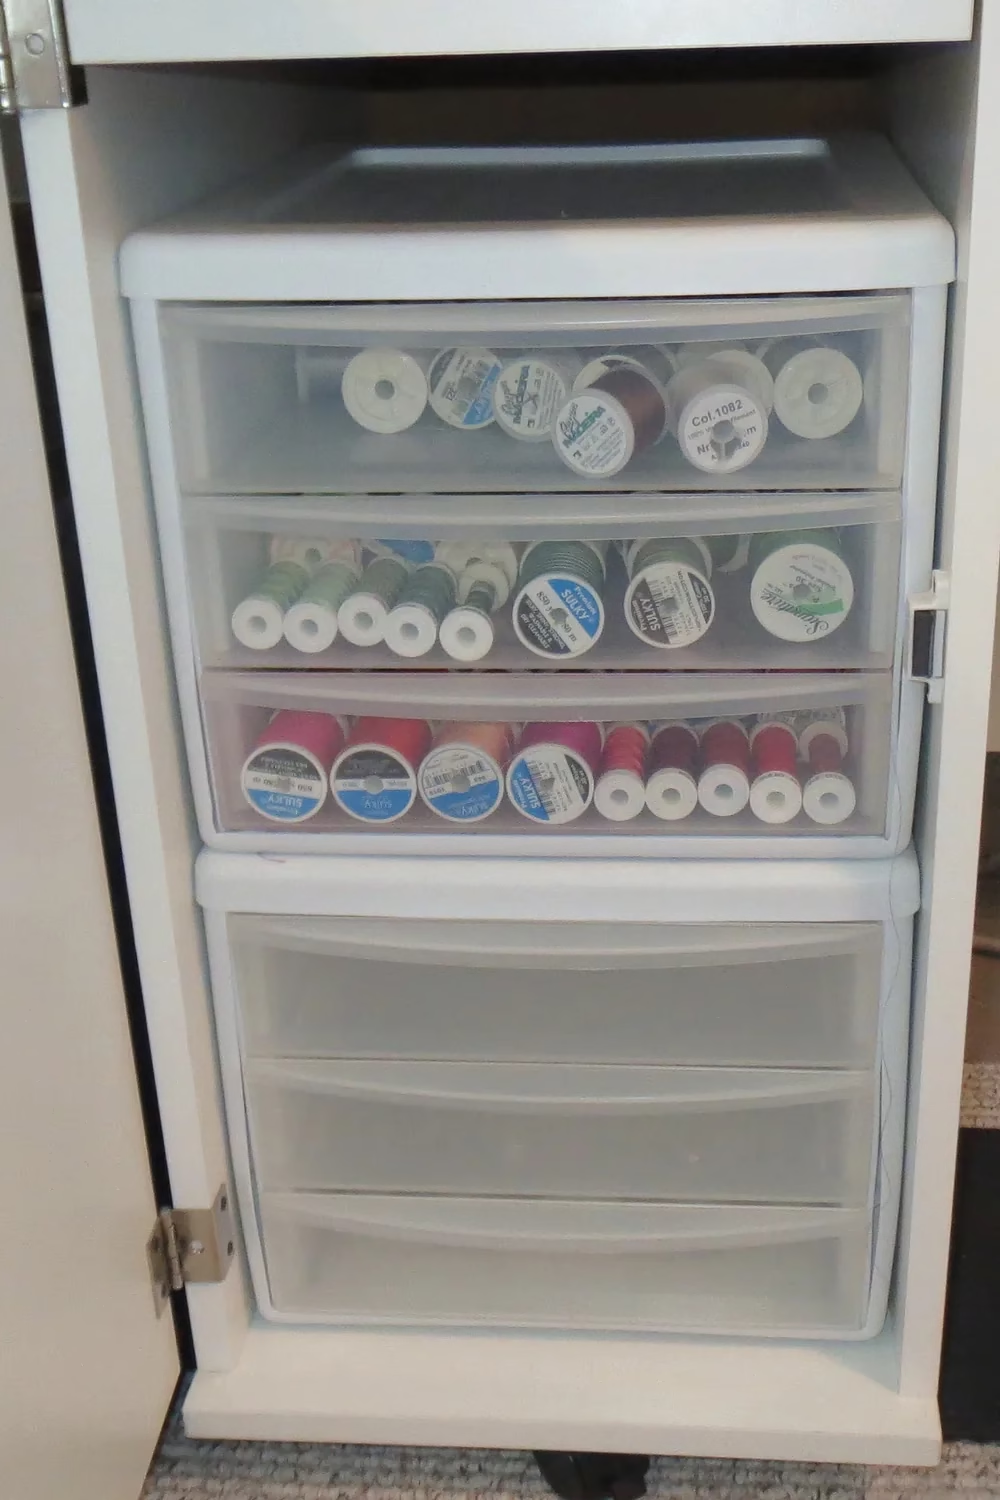
See-through drawers make thread simple to sort and easy to find. In this cabinet, the top drawer holds whites and neutrals, the next holds greens, and the third holds reds and pinks. Spools lie on their sides, so labels face up. A second stack waits empty below, ready for your collection to grow.

To copy it, buy a small stack of clear plastic drawers and fit them inside a cupboard or on a shelf. Sort thread by color family or by brand. Keep one drawer for spare bobbins. These drawers are a low cost option compared with custom wooden cabinets.

11. Four White Bookcases Filled With Folded Fabric

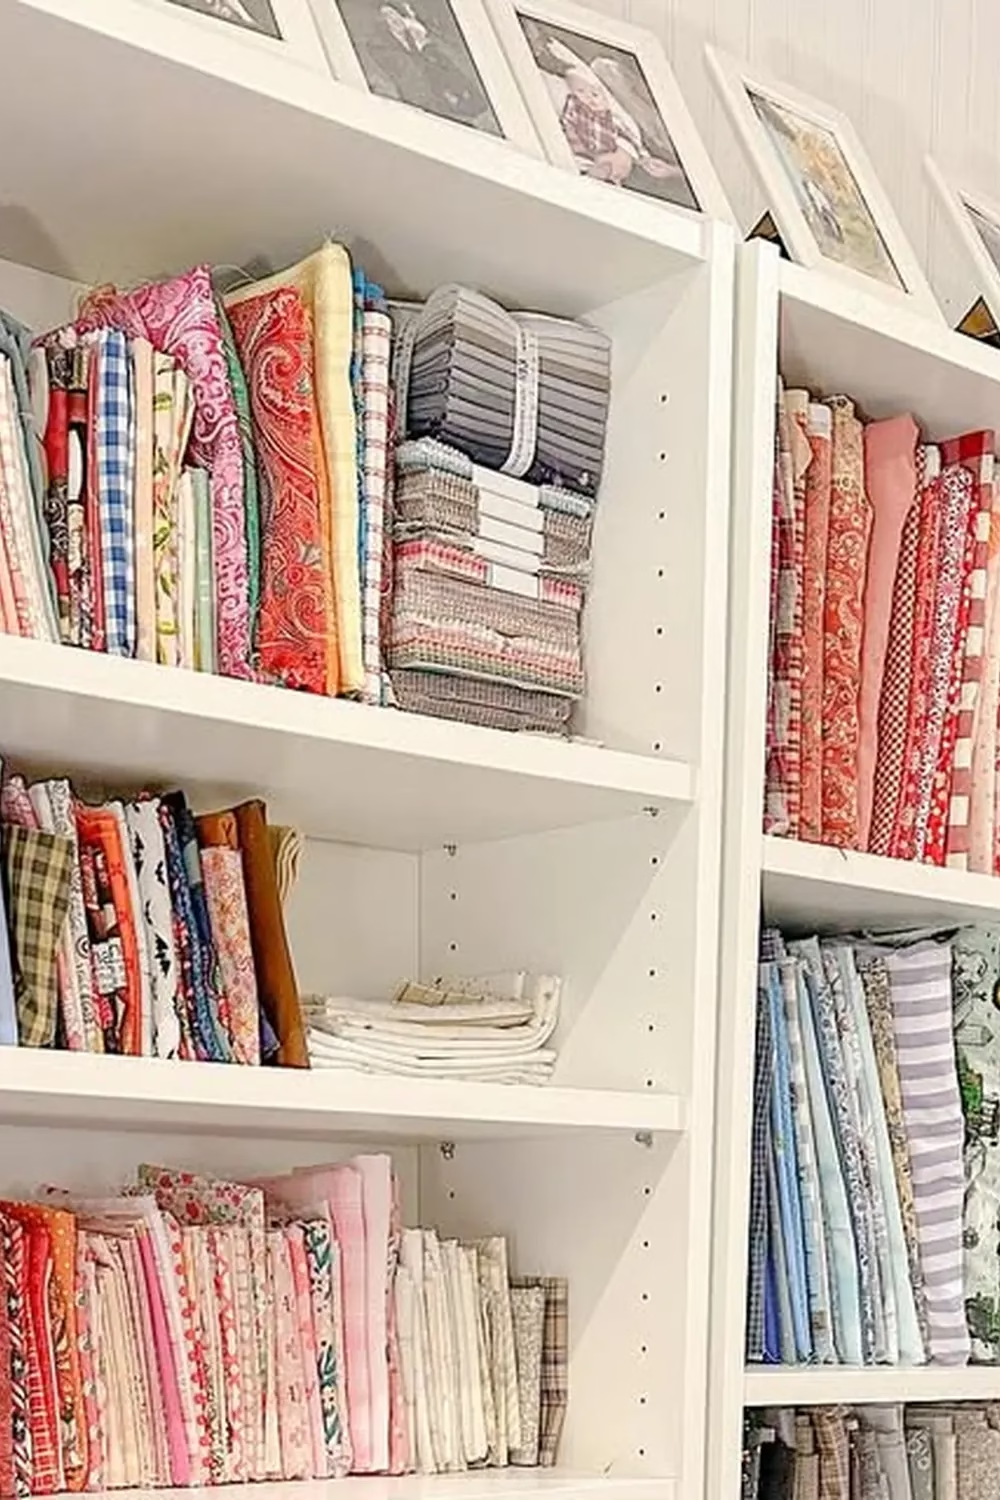
A wall of white bookcases gives fabric the same treatment as a library. Folds face out like book spines, and colors group together, with pinks and reds in one bookcase and blues and lavenders in another. Stacks of pre cut strips sit in tidy piles. Framed photos along the top add a personal touch.

Use tall bookcases with adjustable shelves so you can fit the depth of your folded fabric. Sort by color first, then by type if you like. Standing the folds up makes each piece visible without pulling out the stack. Secondhand bookcases painted white make a budget friendly option.

12. Rolled Fat Quarters Standing in Clear Bins

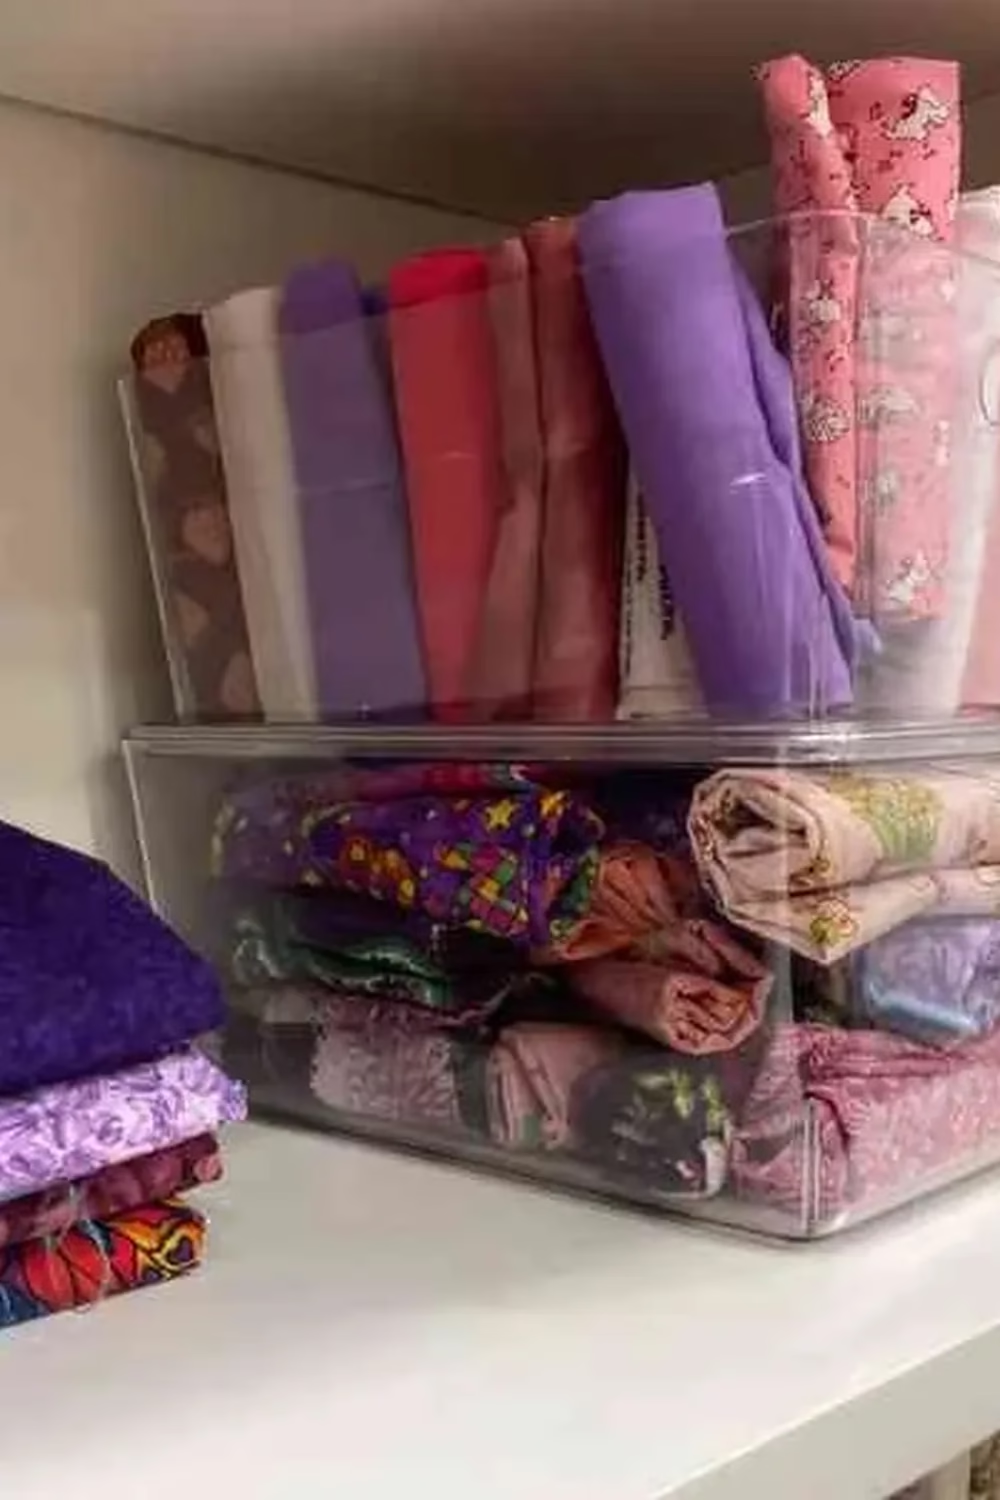
Rolling fat quarters turns a messy pile into neat little bundles. Here they stand upright in a clear bin, with purples, pinks and creams side by side. Another bin below holds folded pieces in similar shades. The clear sides let you see the colors without opening a thing.

Roll each piece tightly and add a rubber band or fabric tie so it stays put. Stand them in a low bin on a shelf so you can flip through them like files. Sort by color to speed up scrap quilt planning. Any clear kitchen or bathroom bin works well here.

13. Pink Bandana Pocket on Round Cork Hoop

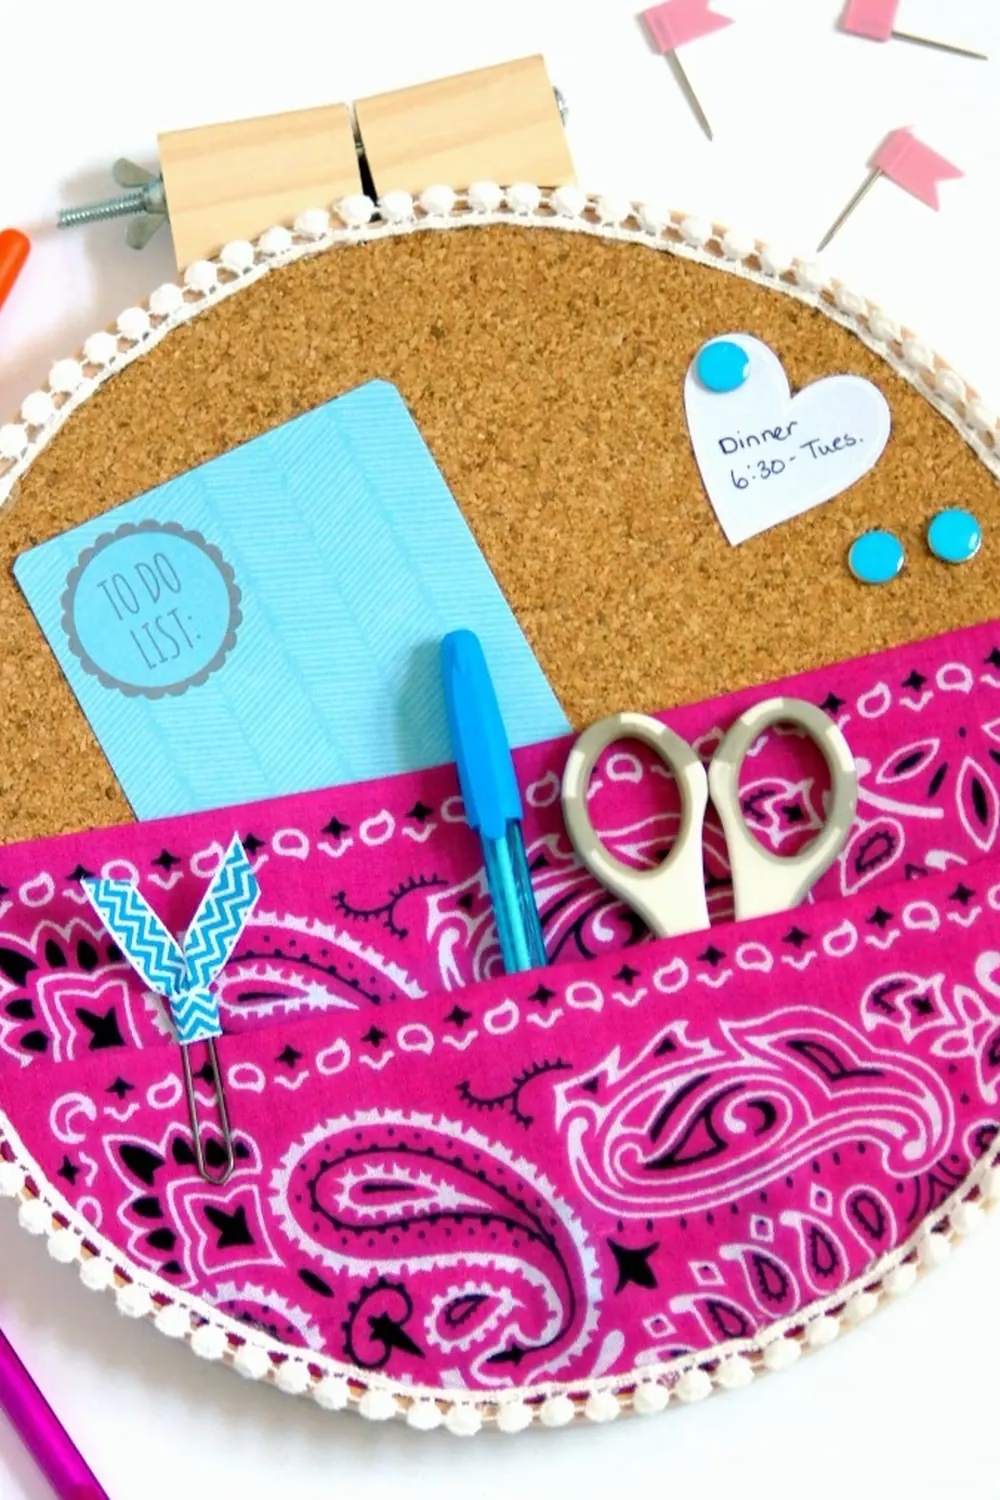
A round cork center with a hot pink paisley pocket makes this hoop as cute as it is useful. The cream pom pom trim softens the edge, and the blue pushpins and heart note add a playful pop. Scissors, a pen, and a paper clip sit right where you can grab them.

To recreate it, press cork into a wooden embroidery hoop and stitch or glue a folded bandana piece across the lower half to form pockets. Add trim around the rim. Any sturdy cotton works if you can’t find a bandana. This suits small sewing nooks and desks with no spare surface.

14. Pull-Out Fabric Boxes With Leather Tab Handles

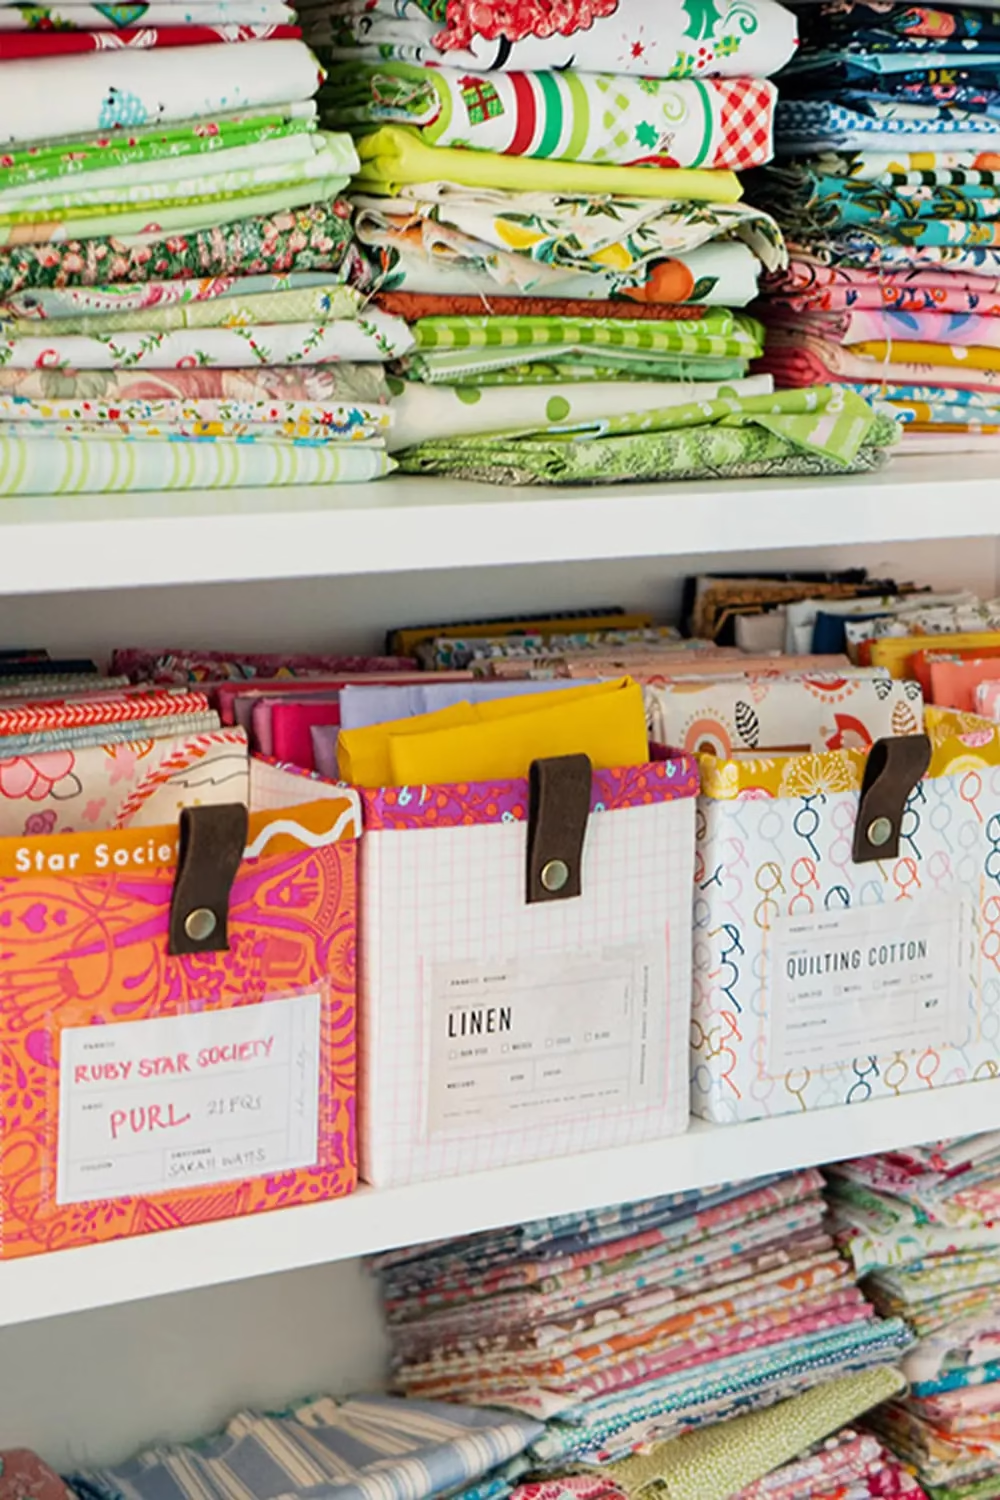
These sewn boxes turn a plain white shelf into pull-out drawers for fat quarters. Each one is made from a bold print, like orange and pink swirls, a pink grid, or colorful loops. Brown leather tabs with brass snaps make them easy to slide out, and the clear label windows tell you what is inside.

Size the boxes to fit your shelf depth so they sit snug and neat. A sewn box pattern is the easiest route, and stiff interfacing keeps the sides upright. Slip a printed card into each label pocket and swap it as your stash changes. For a budget swap, use faux leather or sturdy ribbon for the tabs.

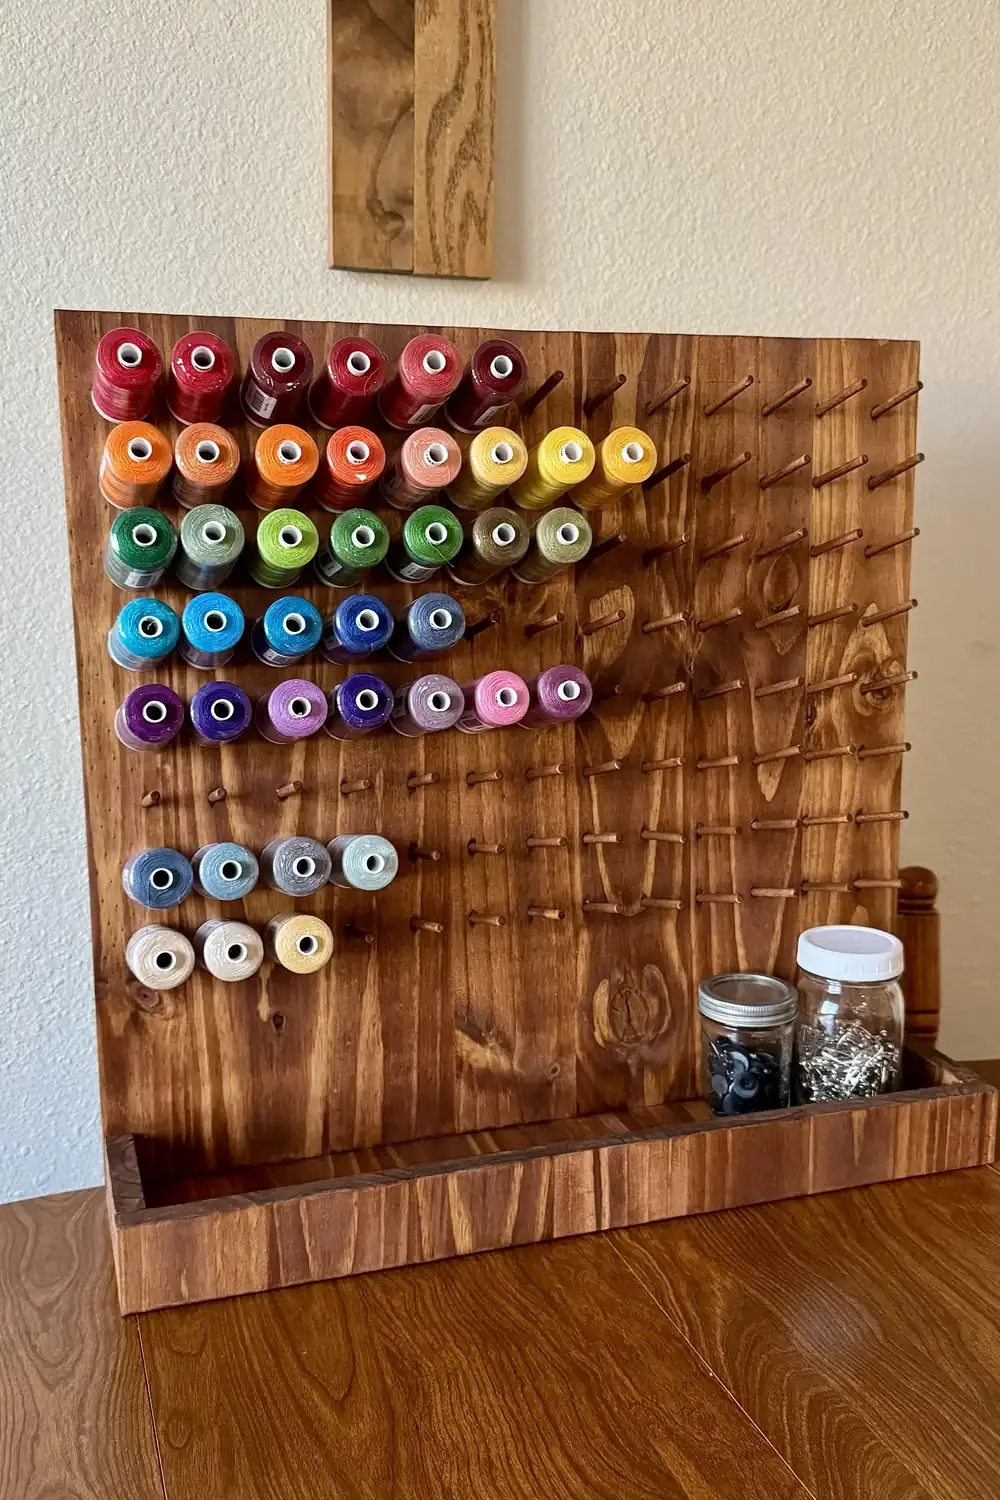
15. Freestanding Stained Wood Pegboard for Thread Spools

Rows of thread spools sorted from red to orange, green, blue, and purple look like a rainbow against the warm stained wood. Short dowel pegs fill the whole board, so there is plenty of room to grow. A shallow tray along the bottom holds jars of buttons and safety pins.

If you like to build, ask a home improvement store to cut a wood panel and a few boards for the tray base. Drill evenly spaced holes, glue in dowels, and finish with stain. Keep your colors in rows so you can find a shade at a glance. This works well for anyone with large cones of thread.

16. Magnetic Strip Holding Scissors and Seam Ripper

Magnetic Strip Holding Scissors and Seam Ripper
Source: Melly Sews

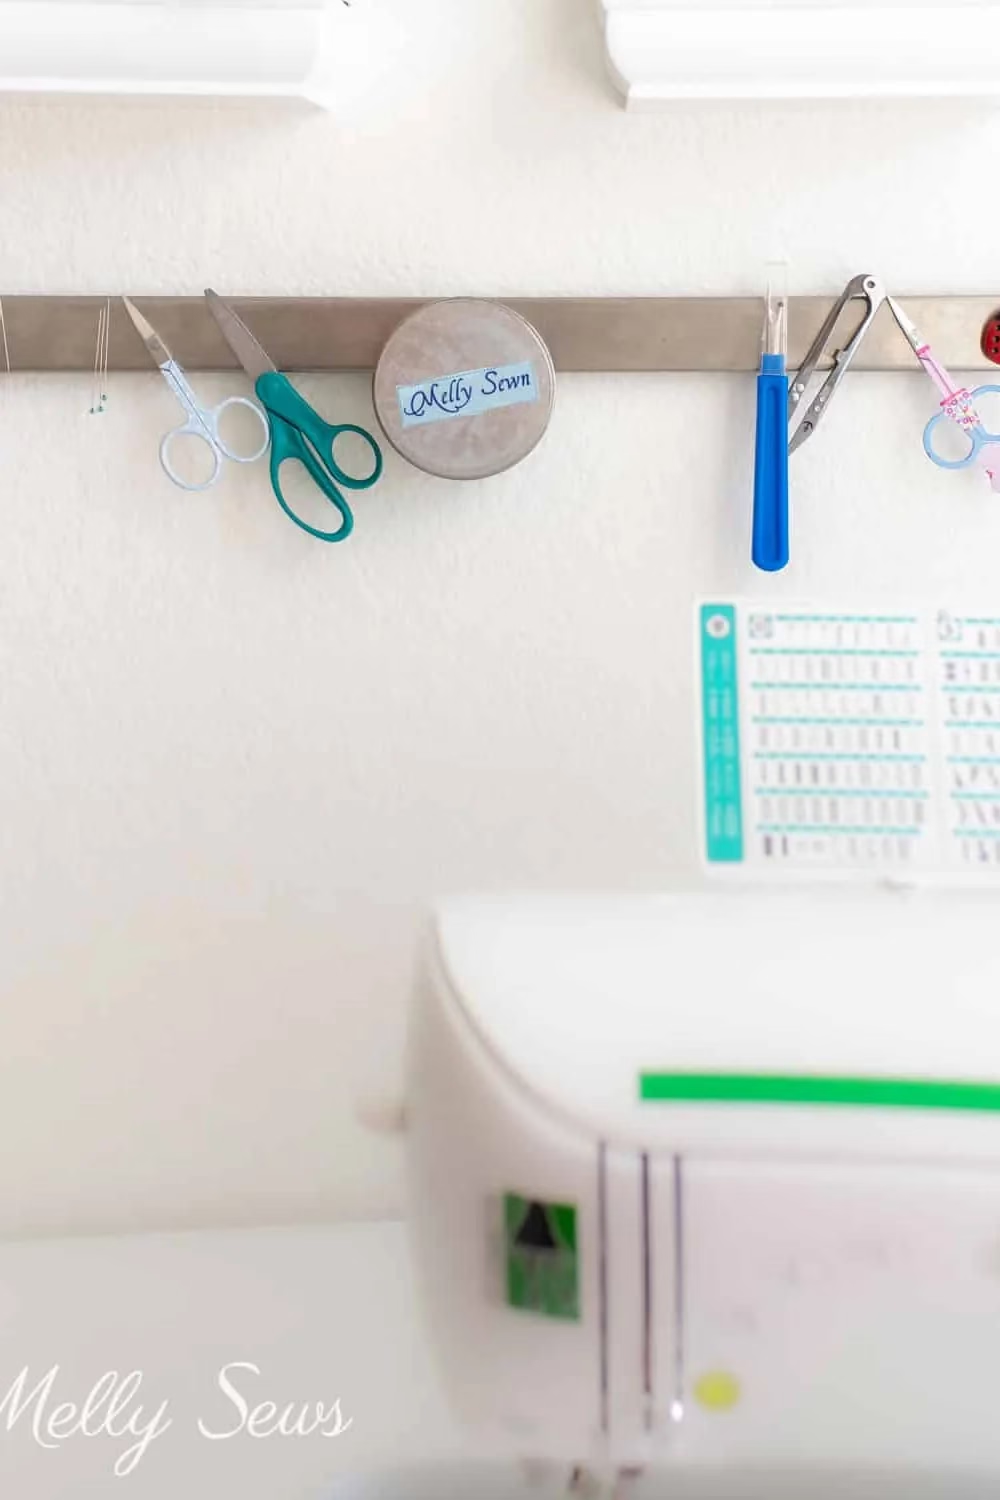
A slim metal strip mounted above the machine keeps your sharpest tools in plain view. Small embroidery scissors, teal shears, a blue handled seam ripper, and thread snips all cling on, with a round tin and a few pins joining them. Nothing gets lost in a drawer, and your hand finds each tool fast.

A magnetic knife strip from a kitchen shop does the job. Mount it with screws, or use strong adhesive if you rent. Place it just out of the way of your head and the machine. Keep the strip high and out of reach if small children share your space.

Final Words

You do not have to redo the whole room in a weekend. Choose one spot that bugs you most, whether it is the thread, the scraps, or the tools, and try the idea that suits it best.

Save your favorites to a Pinterest board so you can come back when you are ready to shop or build. A tidier sewing space is closer than you think.

18 Charming Vintage Sewing Room Ideas to Make Your Craft Space Feel Timeless

A modern sewing machine on a bare folding table never feels like a place to make something special.

Add tangled spools, no storage, and a blank wall, and your craft corner starts to feel like a chore instead of a retreat.

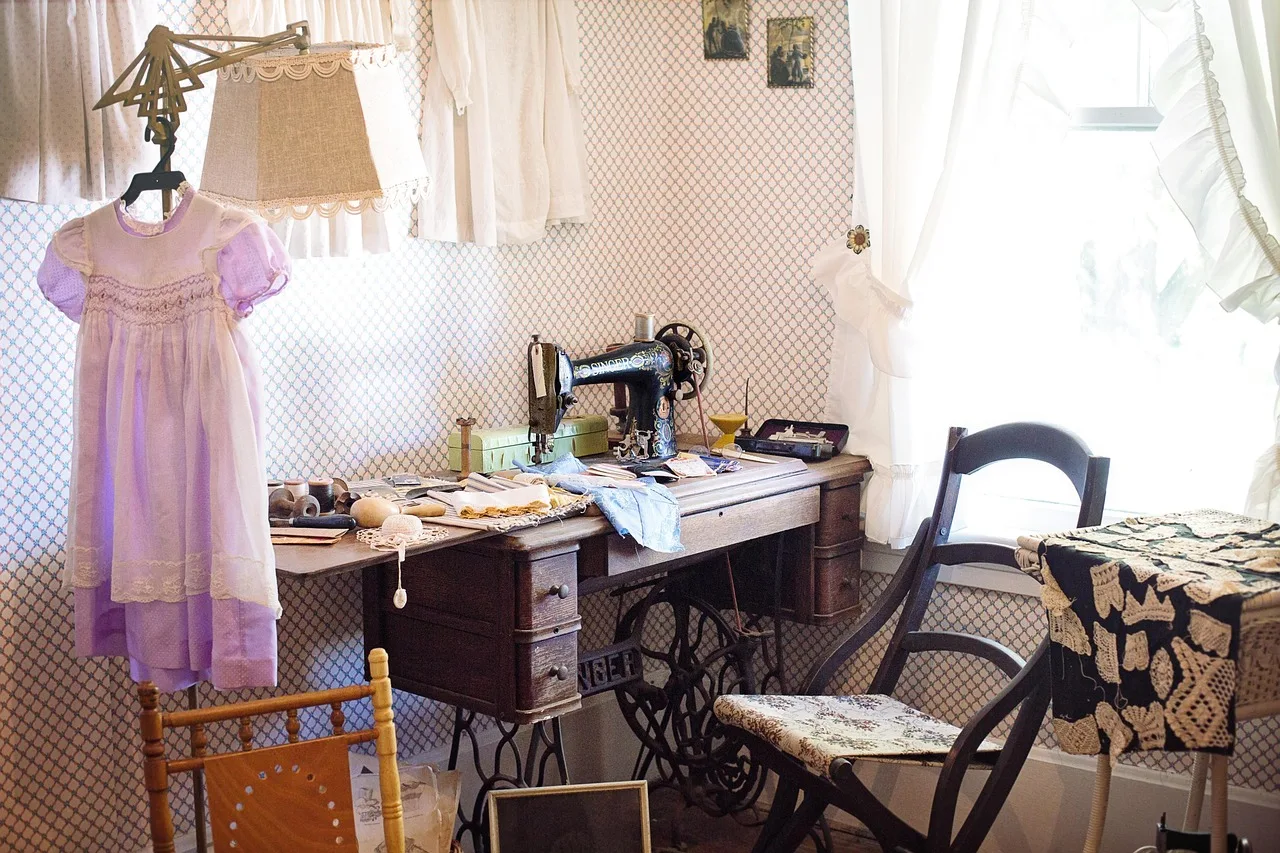
Here are 18 vintage sewing room ideas packed with vintage sewing room ideas you can borrow today. Each one shows how old machines, quilts, and a few well-chosen finds can add warmth without a big budget.

Scroll through for treadle bases, painted walls, button jars, and clever shelves. Pick the details that fit your space and start planning.

1. Treadle Machines Under a Pastel Nine-Patch Quilt

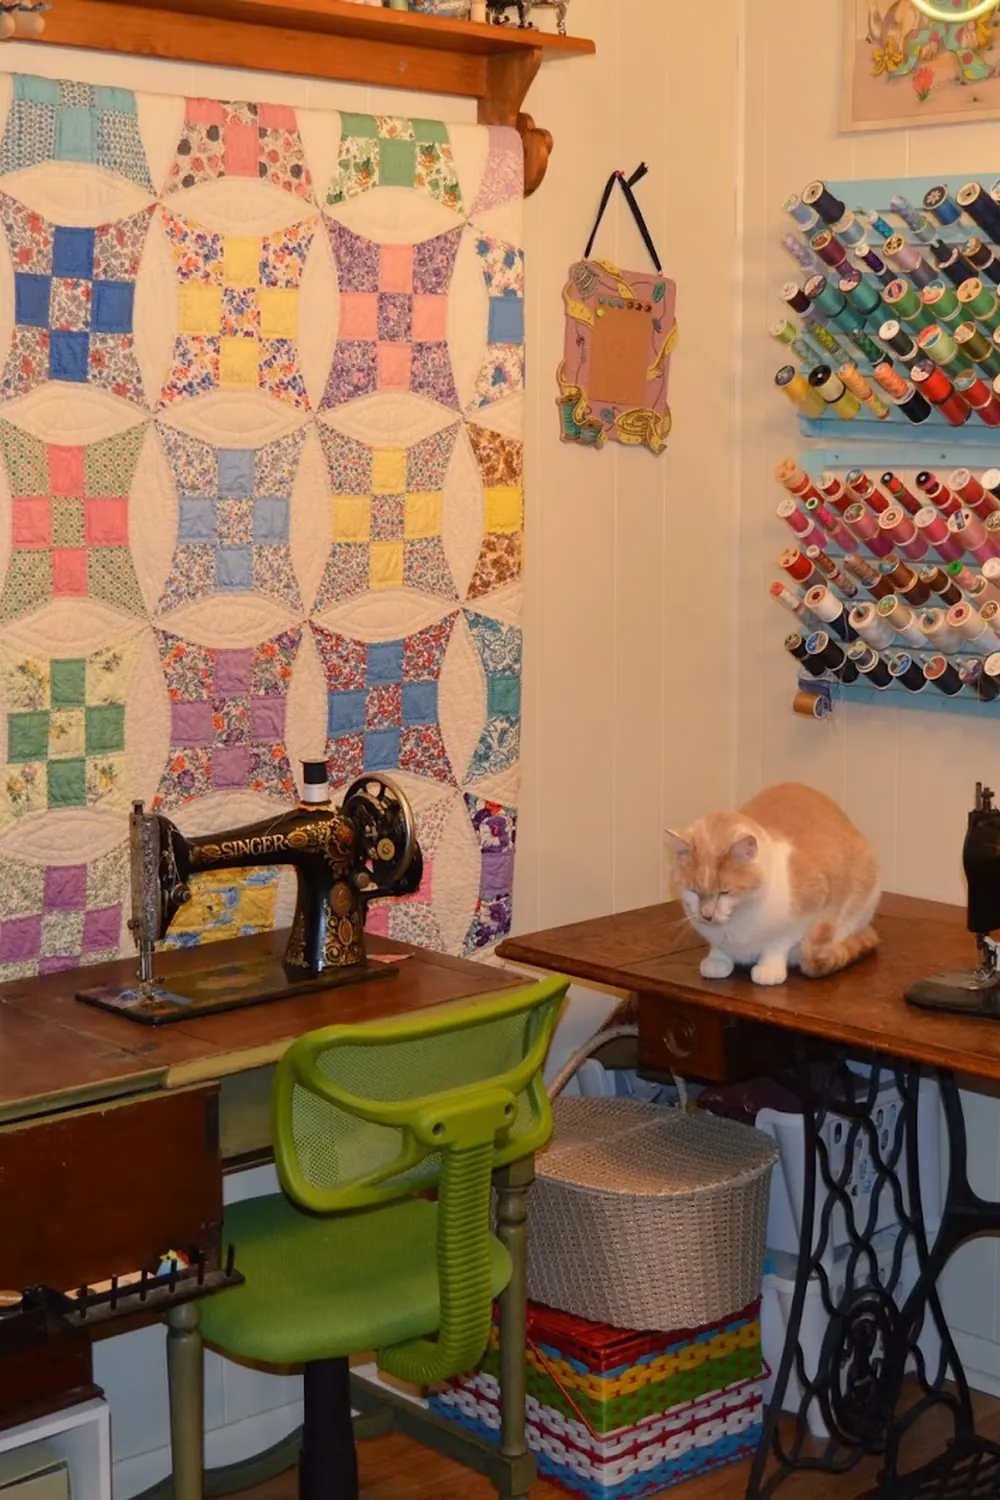
Two black treadle machines sit at right angles, and a big pastel quilt hangs behind them like a piece of art. The soft yellows, pinks and blues repeat in the thread racks, the striped basket and the lime green chair. That repeated color is why a busy corner still feels cheerful.

To recreate it, hang a quilt on a wooden rail above your machine and pick one bold chair to pull the palette together. Mount thread on a painted pegboard strip for color on the wall. If real treadle tables are out of budget, a secondhand wooden desk gives a similar look.

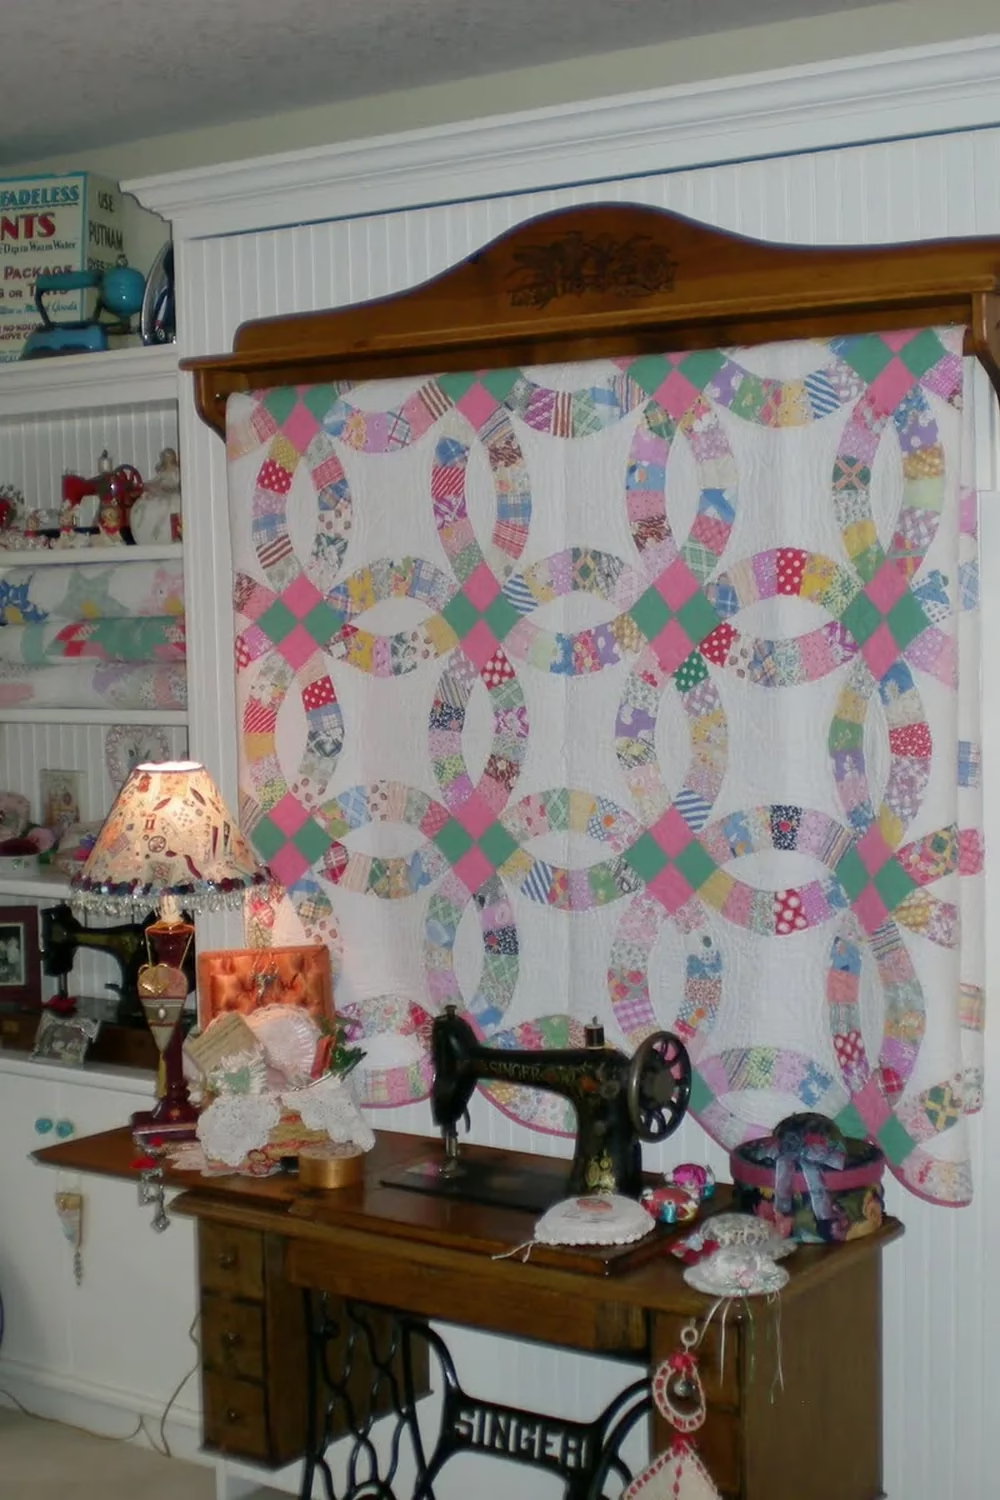
2. Wedding Ring Quilt on a Carved Wooden Rail

Wedding Ring Quilt on a Carved Wooden Rail
Source: La Bella Vie

A pink and green wedding ring quilt hangs from a carved wooden rail over a treadle table, and the white beadboard wall lets every patch stand out. The fringed lampshade, lace doilies and little pincushions on the table keep the whole look soft and layered.

You can copy this with a quilt rack or a wide shelf with pegs, since a rail lets you swap quilts with the seasons. Keep the wall behind it plain and white. Add a lamp with a pretty shade for glow. It suits anyone who loves heirloom textiles but wants a tidy display.

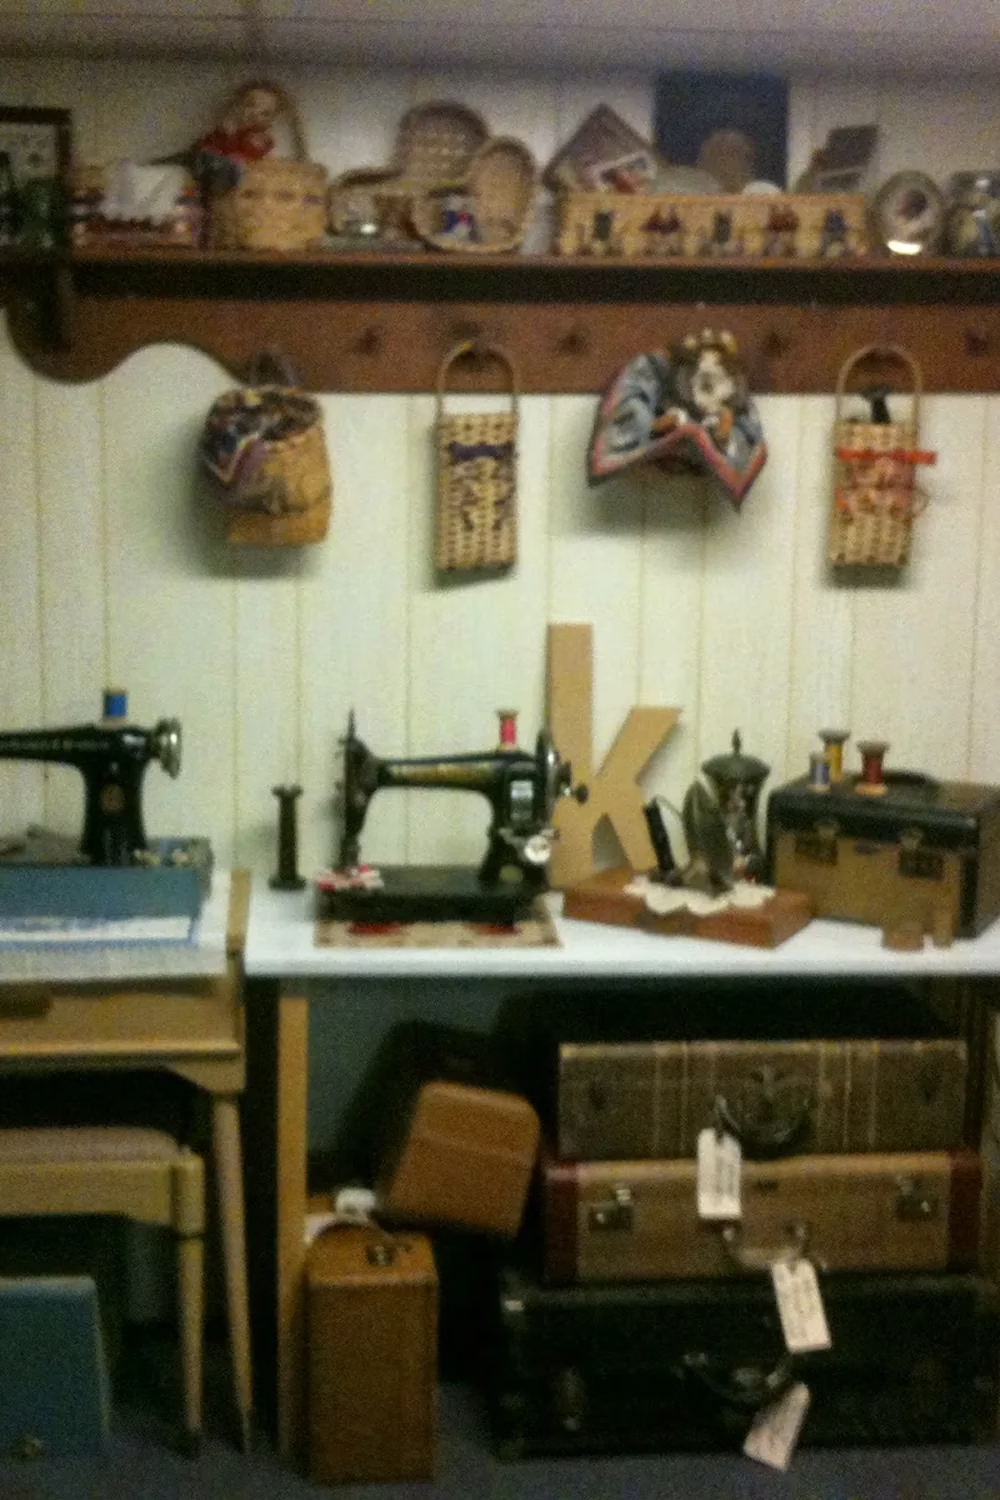
3. Twin Antique Machines on a Painted Workbench

Two black machines sit side by side on a white-topped workbench, with a big wooden letter K and old spools of thread tucked in beside them. Above, a peg rail holds small woven baskets and a shelf of more baskets, which adds warm texture against the pale paneled wall.

Stack old suitcases underneath for hidden storage that also looks like decor. Look for leather trunks and train cases at thrift shops and flea markets. Hang small baskets from pegs to hold notions, scissors or works in progress. This works well for collectors with more than one machine to show off.

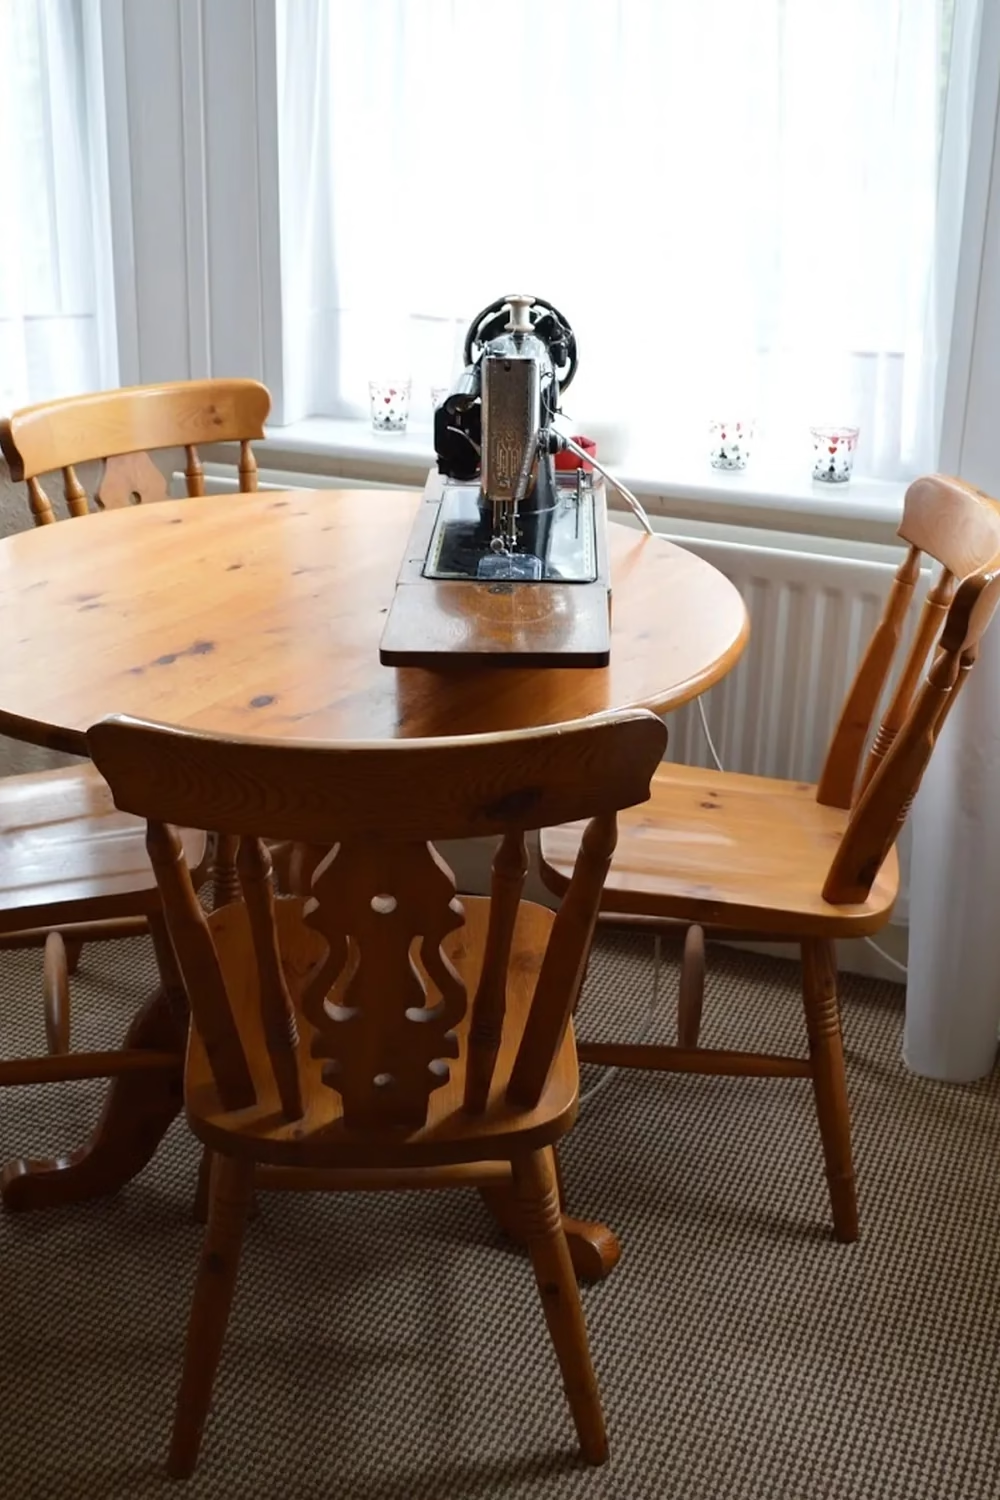
4. Hand-Crank Singer on a Round Pine Table

A single hand-crank machine sits on a round pine table in a bright bay window, framed by sheer white curtains. The honey-toned wood and the black and gold machine look gorgeous together, and the light from the window does the styling for you.

This is a great idea if you don’t have a spare room. Use a dining table and set the machine out when you want to sew. Keep the curtains sheer so the light stays soft. A few small votive glasses on the sill add a sweet touch without crowding the space.

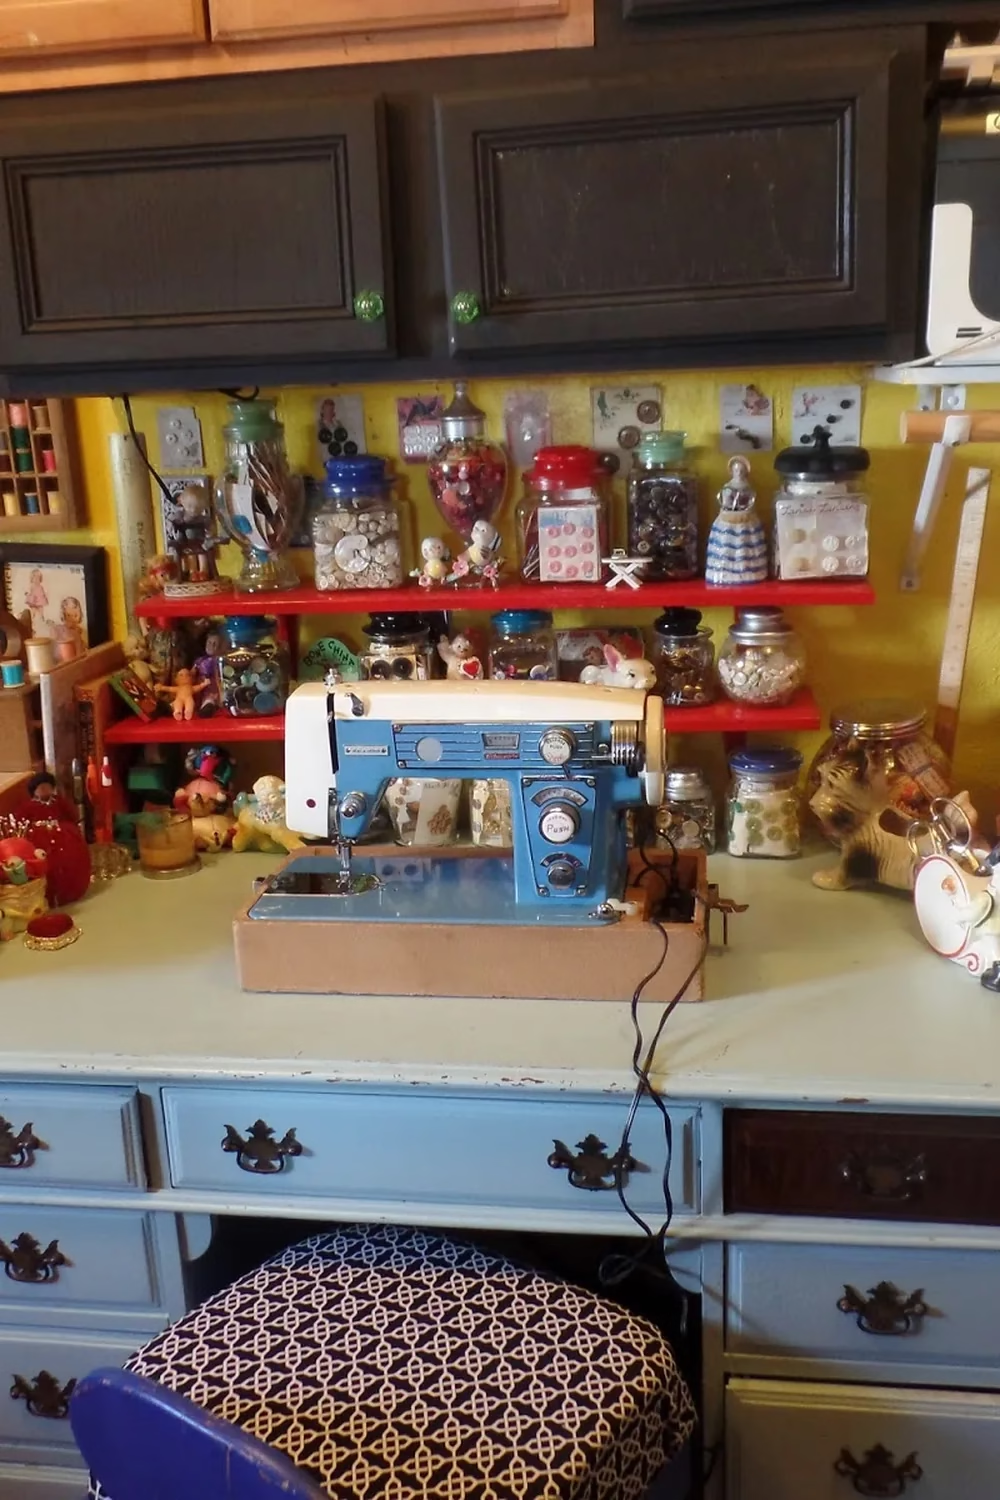
5. Blue Machine With Red Shelves and Button Jars

A retro blue and cream machine takes center stage against a sunny yellow wall. Two red shelves above it hold glass jars of buttons, little figurines and button cards, so every inch is colorful. The painted pale blue desk with dark pulls adds a worn, loved look.

Collect jars in different shapes and sort buttons by color to make them look like decor. Paint a simple shelf in a bright red to copy the pop. Swap the dark cabinet pulls for glass knobs for a small, cheap upgrade. It suits maximalists who love a lively, playful space.

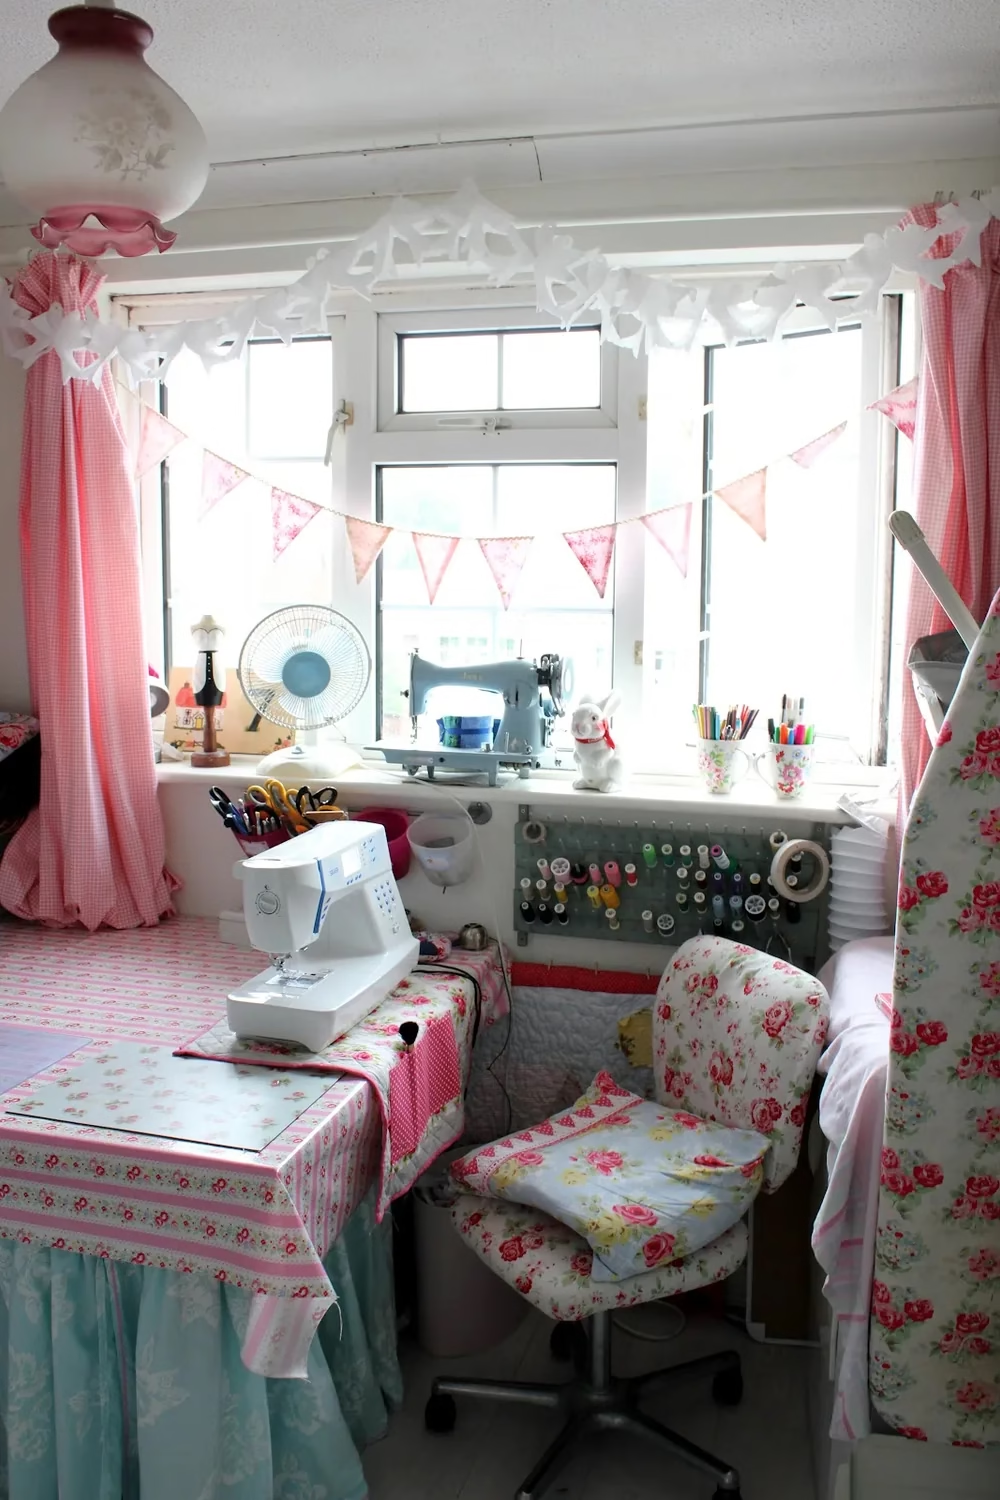
6. Pink Gingham Curtains and Floral Sewing Chair

Pink Gingham Curtains and Floral Sewing Chair
Source: ShabbyChicSarah

Pink gingham curtains, paper bunting and a rose-print chair turn this window nook into a sweet, shabby-chic corner. A pale blue vintage machine sits on the sill beside a white bunny, while a modern white machine does the daily work on a floral-covered table.

Mix prints in the same pink and red family so they feel connected, not messy. Cover an old office chair with a rose fabric, and cover an ironing board to match. Hang a thread rack under the sill to keep spools handy. It’s ideal if you love a cottage feel and still want a machine that works hard.

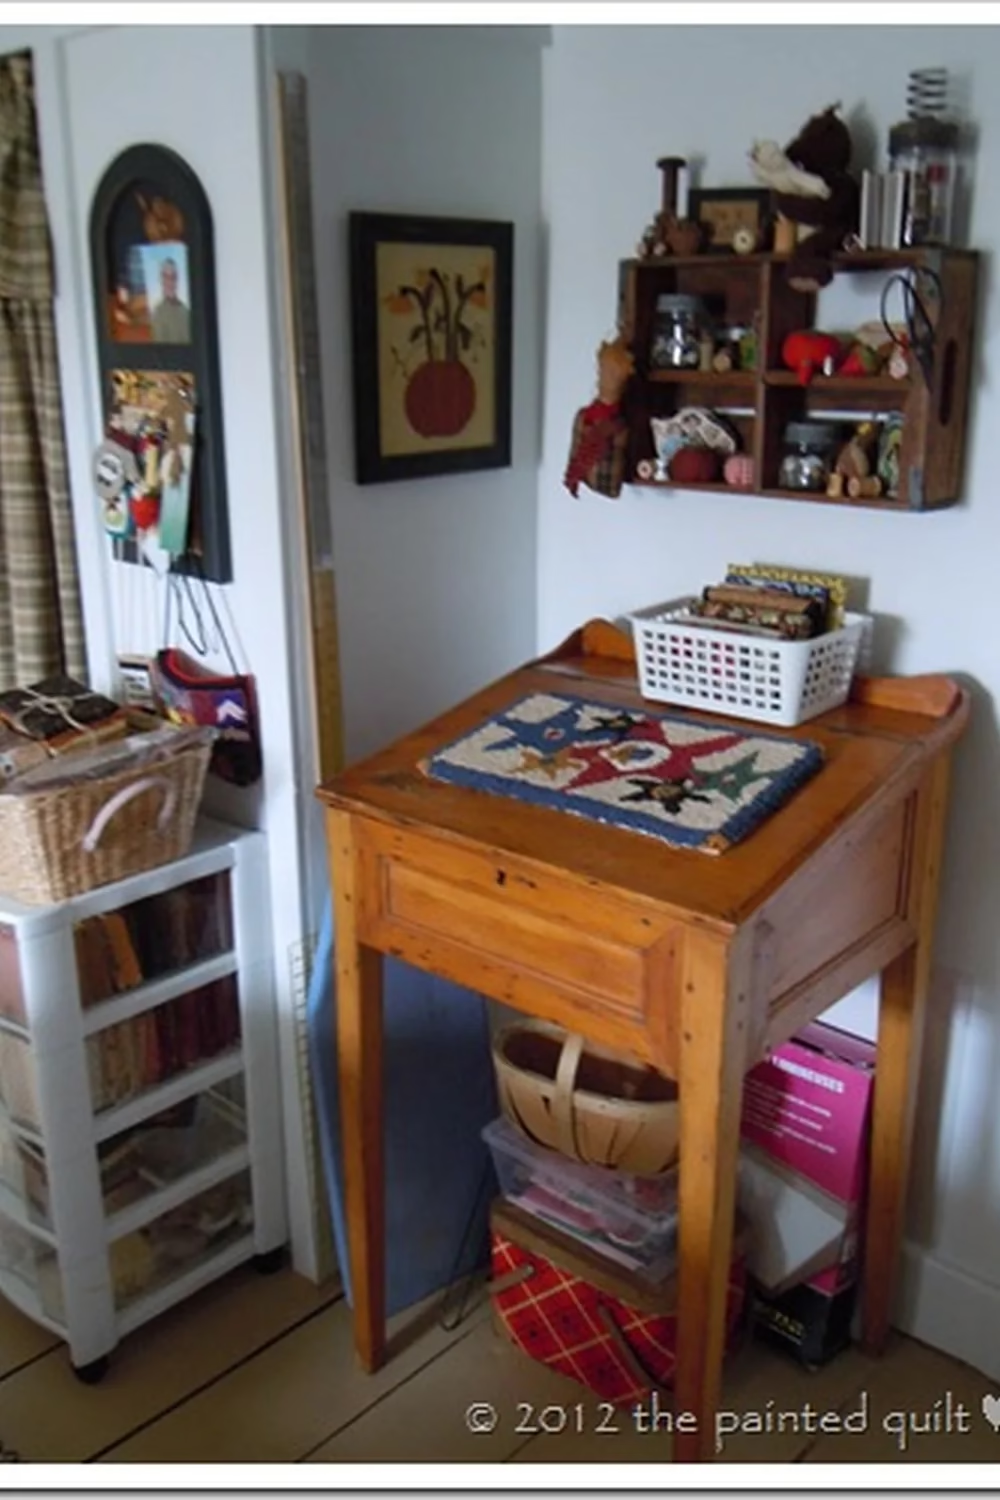
7. Antique Pine Desk Beneath a Crate Shelf

A slanted pine school-style desk stands in the corner with a hooked wool rug on top, and a rustic wooden crate hung above it holds spools, pincushions and a little teddy. The warm wood against pale blue-gray walls feels calm and country.

Hang an old crate on the wall as a shadowbox for small treasures, and use the desk lid to store fabric. A white plastic basket on top keeps fat quarters in view. Stash baskets underneath for extra storage. This is a lovely fit for a small corner or a hallway nook.

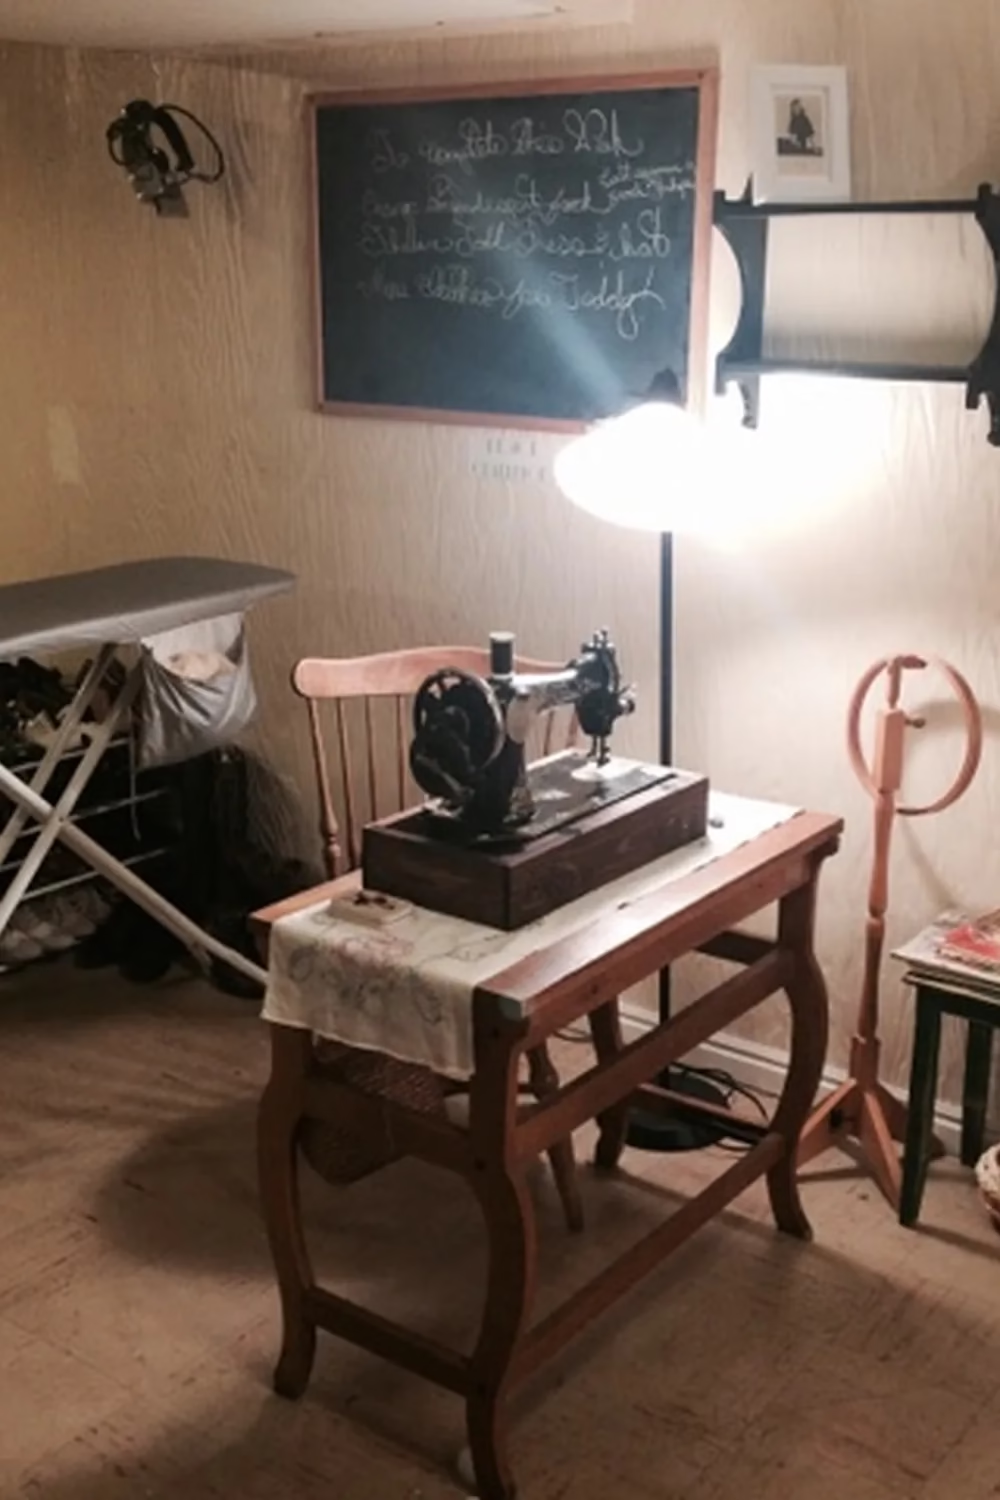
8. 1930s-Style Treadle Table With Chalkboard Wall

An old hand-crank machine in a wooden case sits on a simple wooden table covered with an embroidered runner, with a spindle-back chair tucked in behind. A framed chalkboard with handwritten script hangs above, and a wooden embroidery hoop stand waits in the corner.

Add a chalkboard to jot project notes or a favorite quote. Use a runner of old embroidered linen under the machine to protect the wood. A tall floor lamp gives good task light for hand stitching. This style suits you if you love a simple, old-fashioned workroom without a lot of clutter.

9. Black Stenciled Cabinet Beneath a Crystal Chandelier

Black Stenciled Cabinet Beneath a Crystal Chandelier
Source: Whipstitch

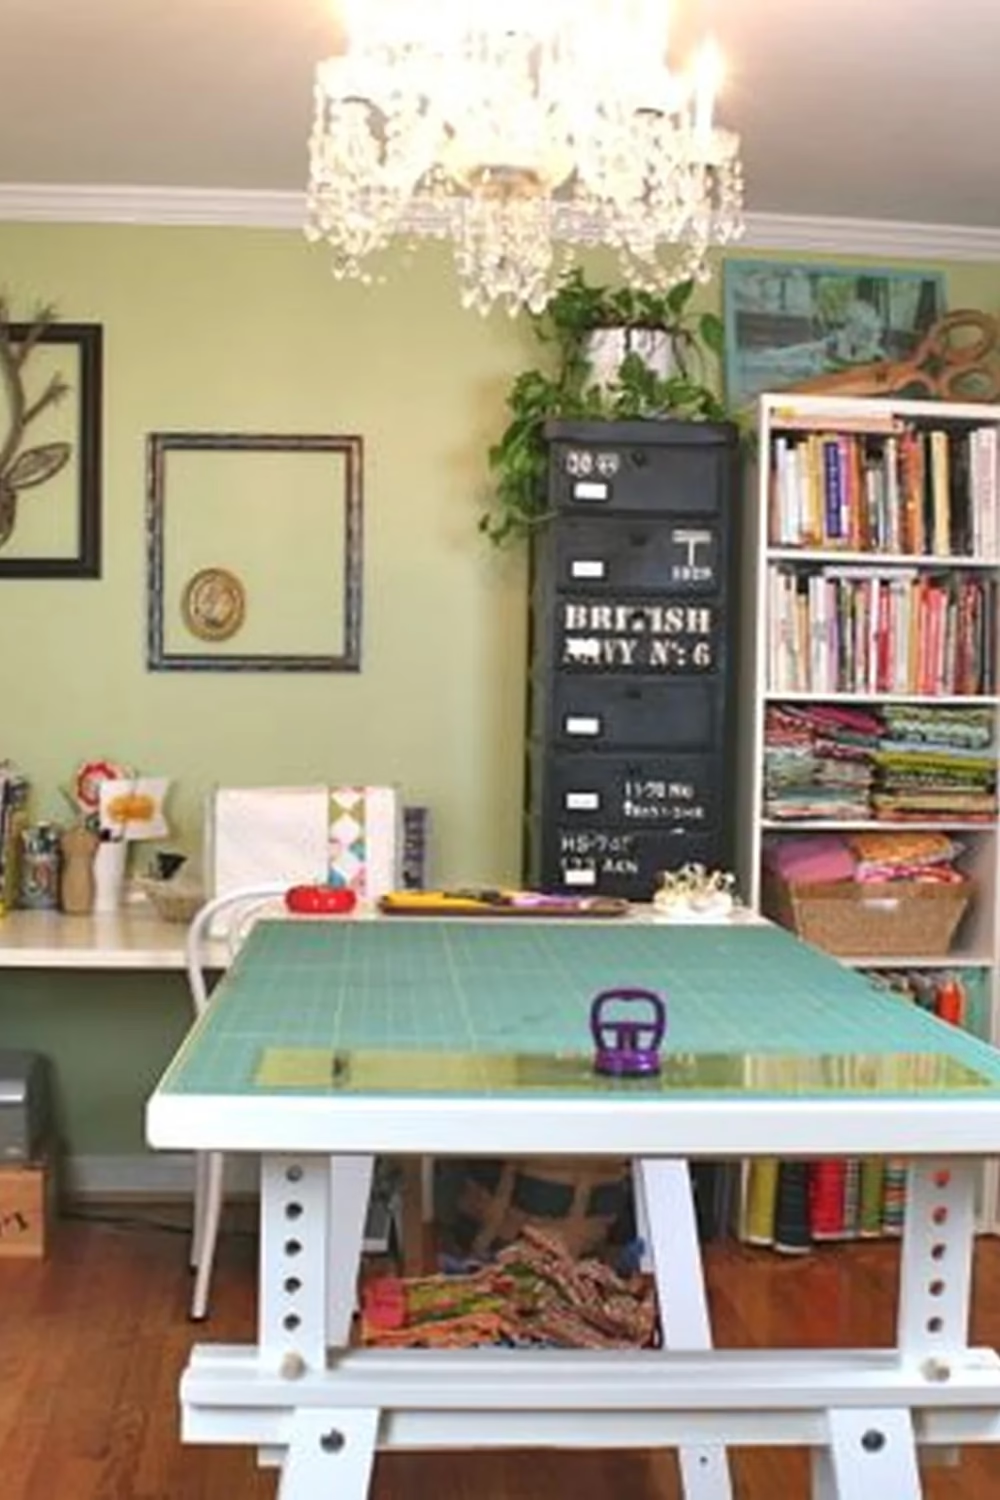
A crystal chandelier, sage green walls and a black stenciled cabinet give this studio its charm, while a big white trestle table with a green cutting mat shows it’s a real working space. A tall bookcase holds folded fabric in rainbow stacks.

Paint an old file cabinet black and stencil on a few letters for an industrial vintage look. Hang empty frames on the wall for a quirky gallery. Choose an adjustable trestle table so you can set the height for cutting. A trailing plant on top softens the dark cabinet.

10. Windsor Chair and Framed Needle Book Collection

Windsor Chair and Framed Needle Book Collection
Source: Artful Panoply

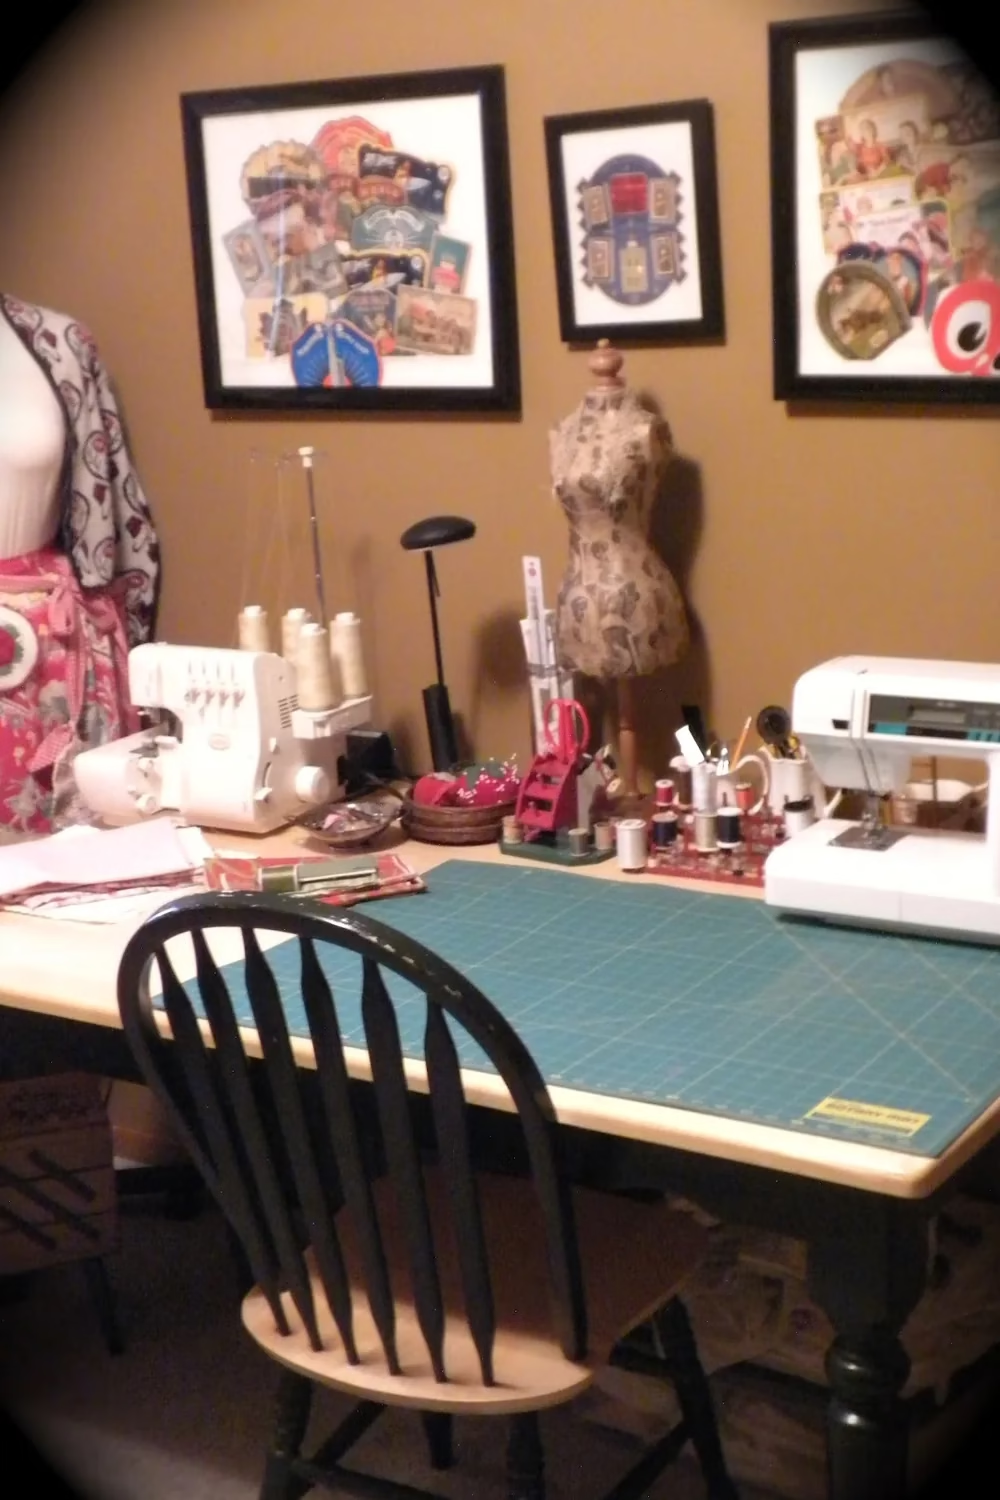
Warm caramel walls make a cozy backdrop for three black frames full of vintage needle books and packaging. A paper-covered dress form, a red thread stand and a dark Windsor chair at a long worktable give the room a collected, old-world feel.

Frame old needle packets or sewing cards in deep frames with white mats so the colors pop. Look for them at antique malls and online. Pair vintage touches with modern machines, since they’ll blend in with the right wall color. It’s perfect for anyone who wants heirloom charm and daily function.

11. White Glass-Front Hutch With Lace Shelf Trims

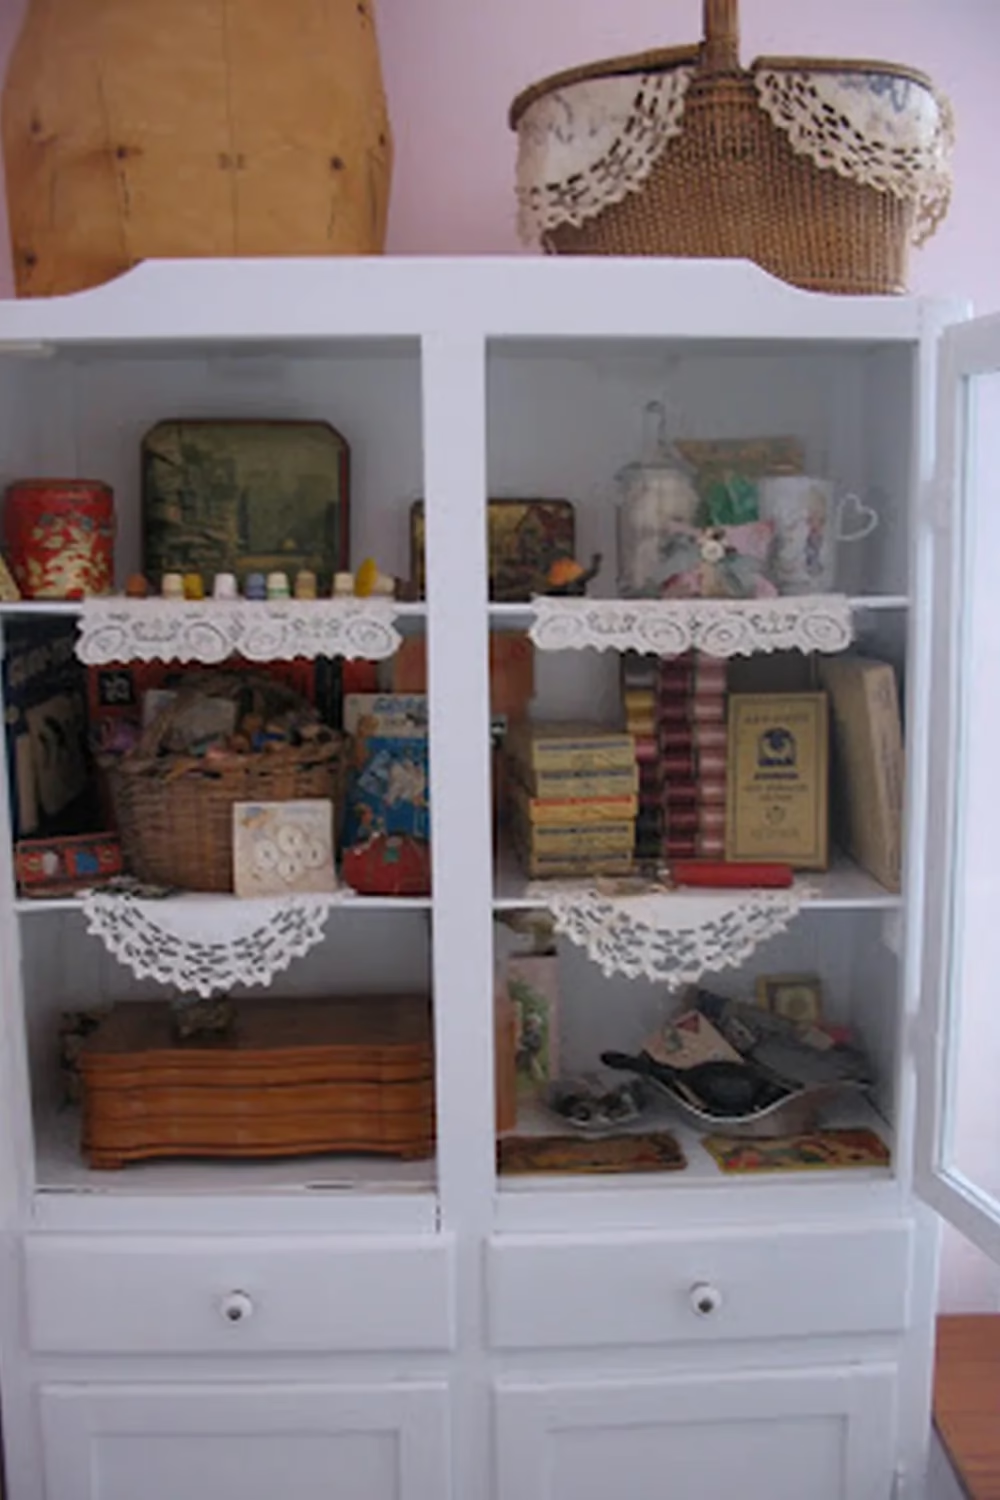
A white painted hutch shows off old tins, wooden thread spools, button cards and a woven basket, all lit against pale blue-gray backs. Scalloped lace trims on the shelf edges add a soft, handmade touch, and a lace-trimmed picnic basket sits on top.

Paint a secondhand cabinet white, then line the shelf edges with vintage lace or doilies. Group items by color or type so it looks calm, not cluttered. Tins and thimbles are cheap to find at flea markets. This is a good choice if you want to display your treasures while keeping notions dust-free.

12. Lime Green Wall With Antique Settee Display

Lime Green Wall With Antique Settee Display
Source: BessieMary

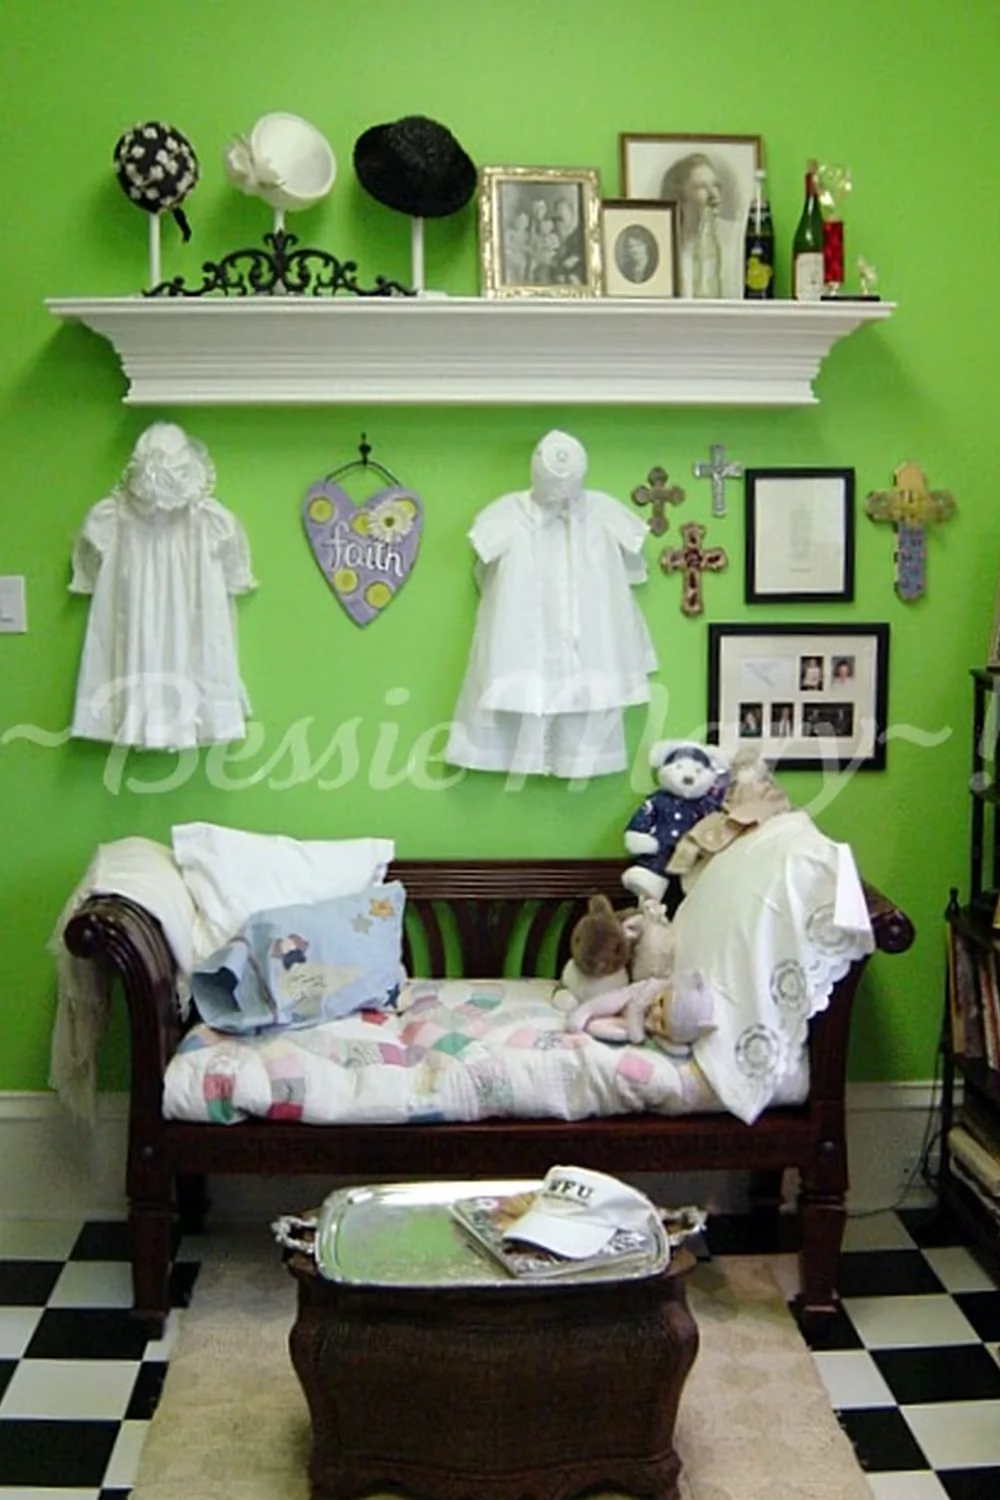
A bold lime green wall makes white heirloom baby dresses, vintage photos and old hats pop above a dark wood settee. A pastel patchwork quilt, stuffed animals and a white embroidered cloth fill the seat, and the black and white checkered floor adds graphic punch.

Hang christening gowns or small garments on pegs under a simple white shelf. Frame old family photos in mixed frames. If you love the color but not the commitment, paint just one wall. A thrifted bench with a quilt on top gives you a cozy spot to rest between projects.

13. Slate Blue Wall With Clipboard Inspiration Gallery

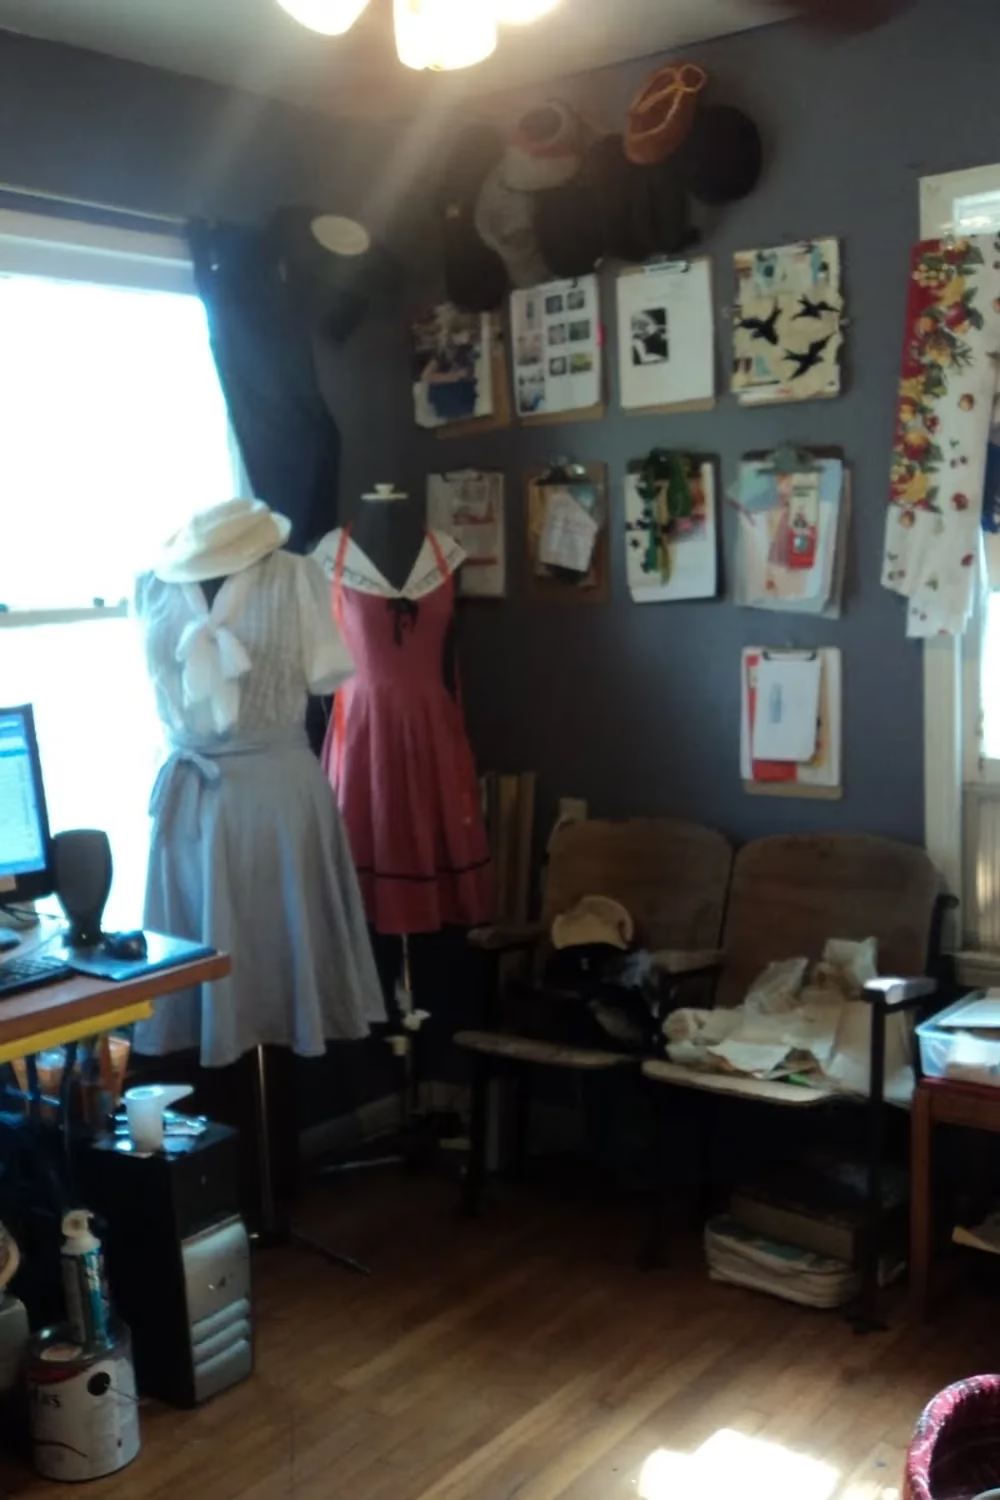
The deep slate blue wall gives this room its moody, collected feel. A grid of wooden clipboards holds fabric swatches, sketches and patterns, while a red cherry print hangs at the edge. Two dress forms wear a pale blue frock and a red sailor-collar dress, and old hats crown the wall above.

To recreate it, buy a few cheap clipboards and hang them in two tidy rows. Rotate your swatches and sketches as projects change. Hat hooks or small nails hold the hats. This works well if you love a gallery wall but need it to be useful. Ask for a matte paint in a smoky blue-gray.

14. Gold-Decal Singer Treadle With Woven Basket

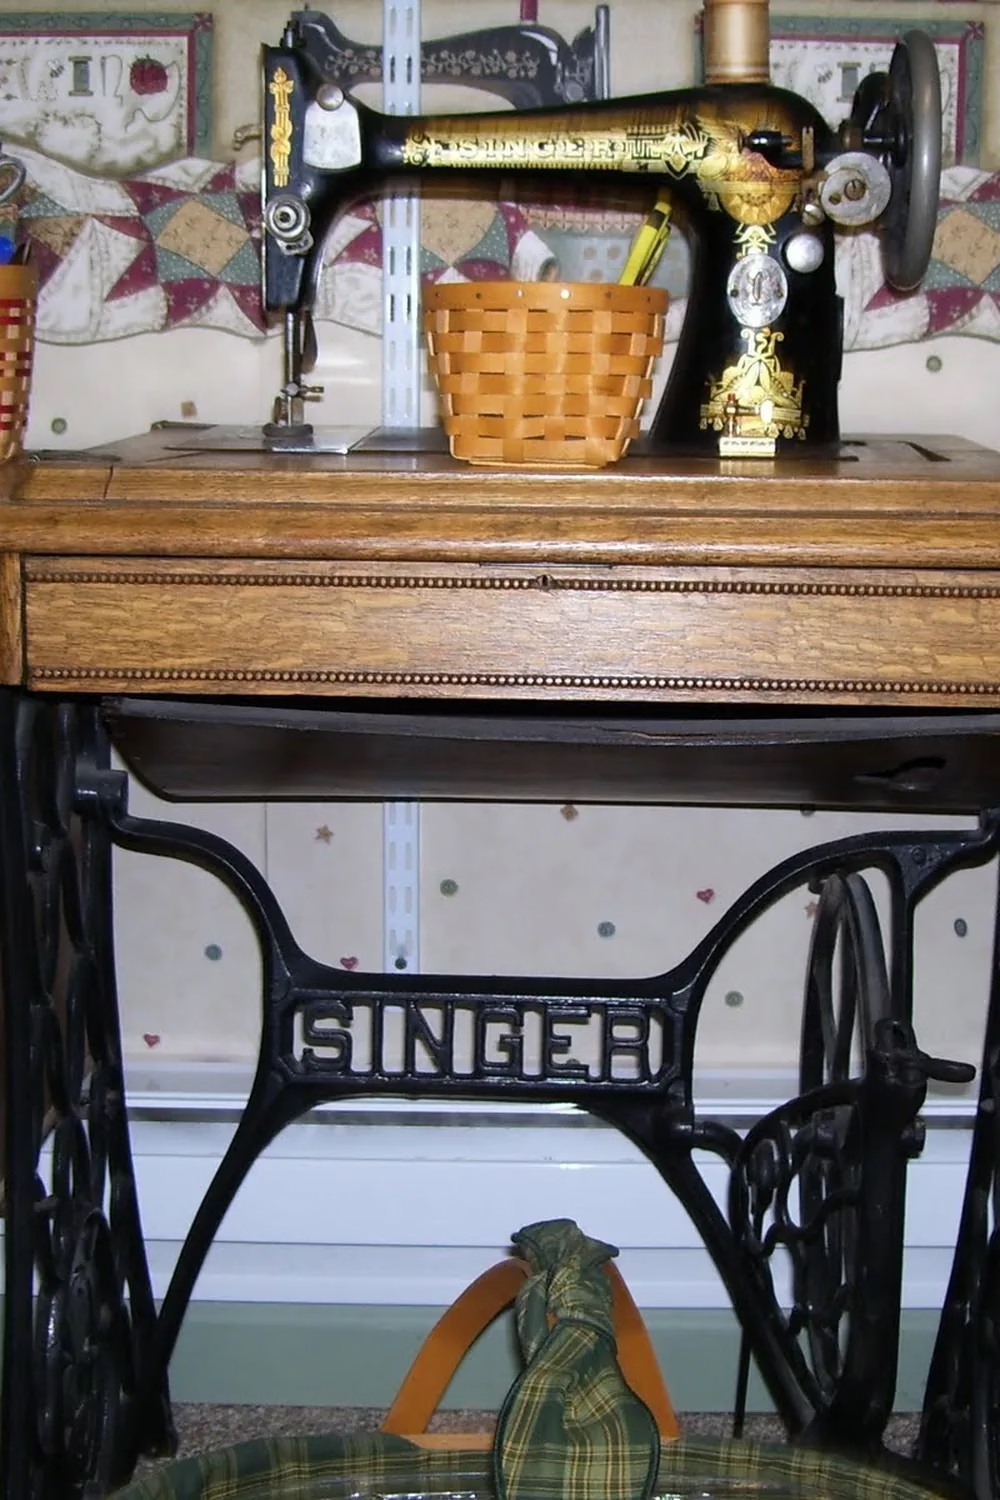
The black machine with its gold scrollwork decals really shines against the warm oak cabinet. A honey-toned woven basket holds pencils on top, and the cast iron treadle base with its open lettering adds weight. A green plaid fabric basket tucked underneath finishes the scene.

If you own a treadle, keep the top mostly clear so the decals stay the star. Use a small basket for pens and marking tools. When shopping for a base, look for cast iron with intact scrollwork. If you lack a treadle, a plain oak table with one basket gets close to this warm, traditional look.

15. Weathered Pine Table Beside Tall Divided Window

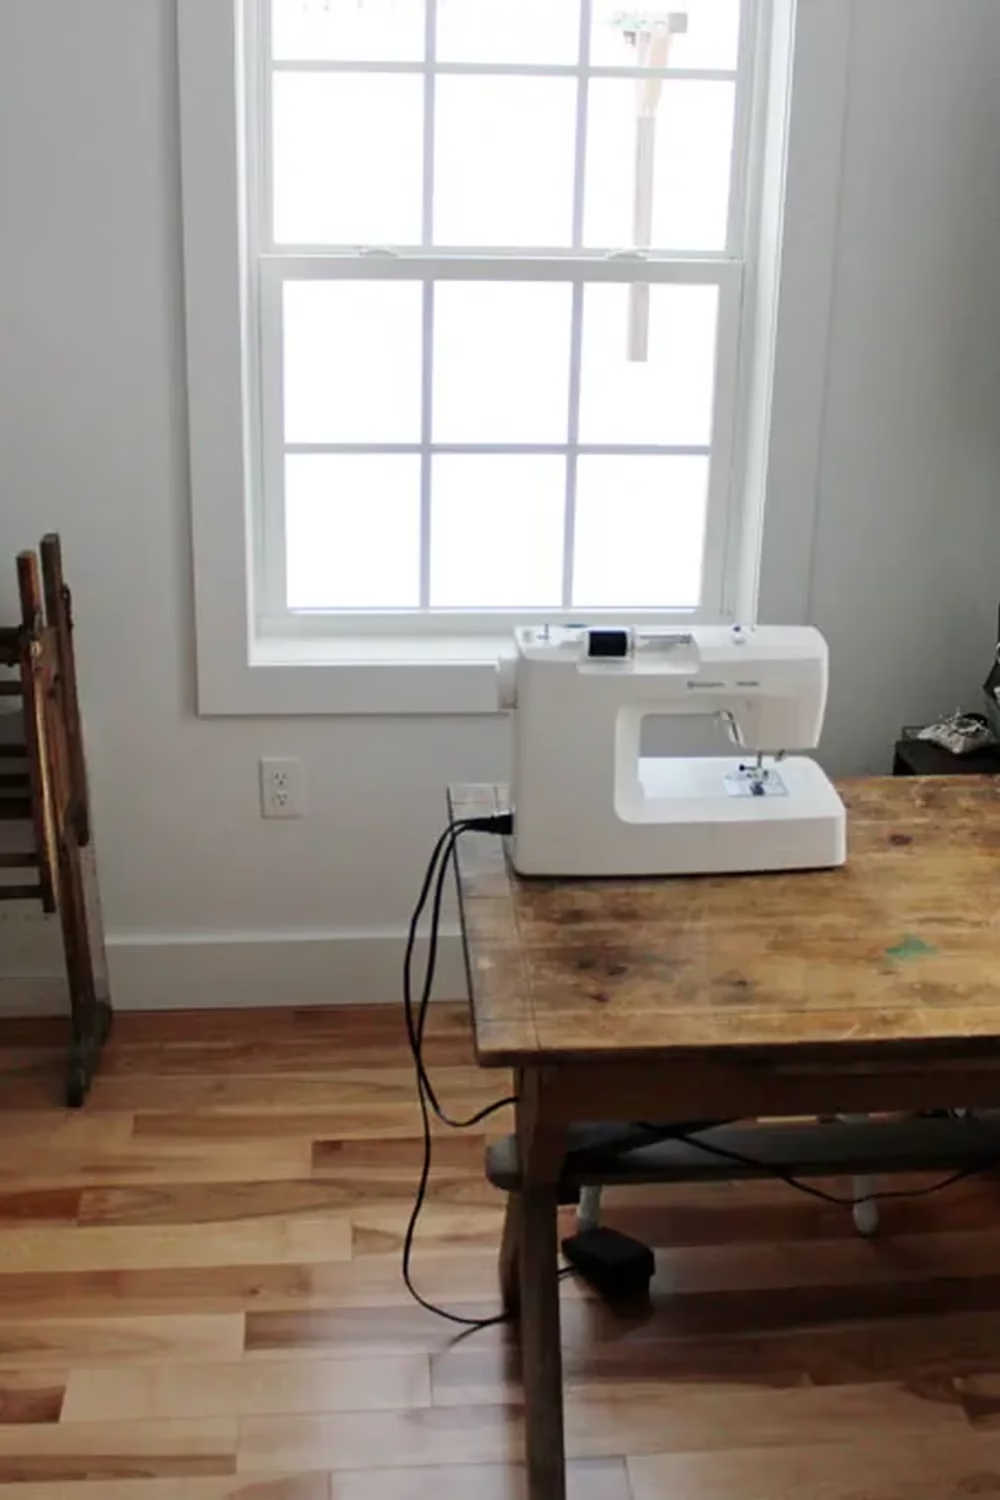
The simple look here comes from contrast. A scuffed, honey-brown wooden table meets a crisp white machine, pale gray walls and a big white-trimmed window. The wear marks on the tabletop give it character, and a rustic wooden rack on the left adds a hint of country.

You can copy this with a secondhand farmhouse table or an old kitchen table. Leave the scratches, or just wax it lightly. Tape down the machine cord to keep it tidy, and put the table where the window gives you daylight. It suits small budgets and anyone who wants a calm, uncluttered room.

16. Glossy Black Dresser With Peacock Feather Vase

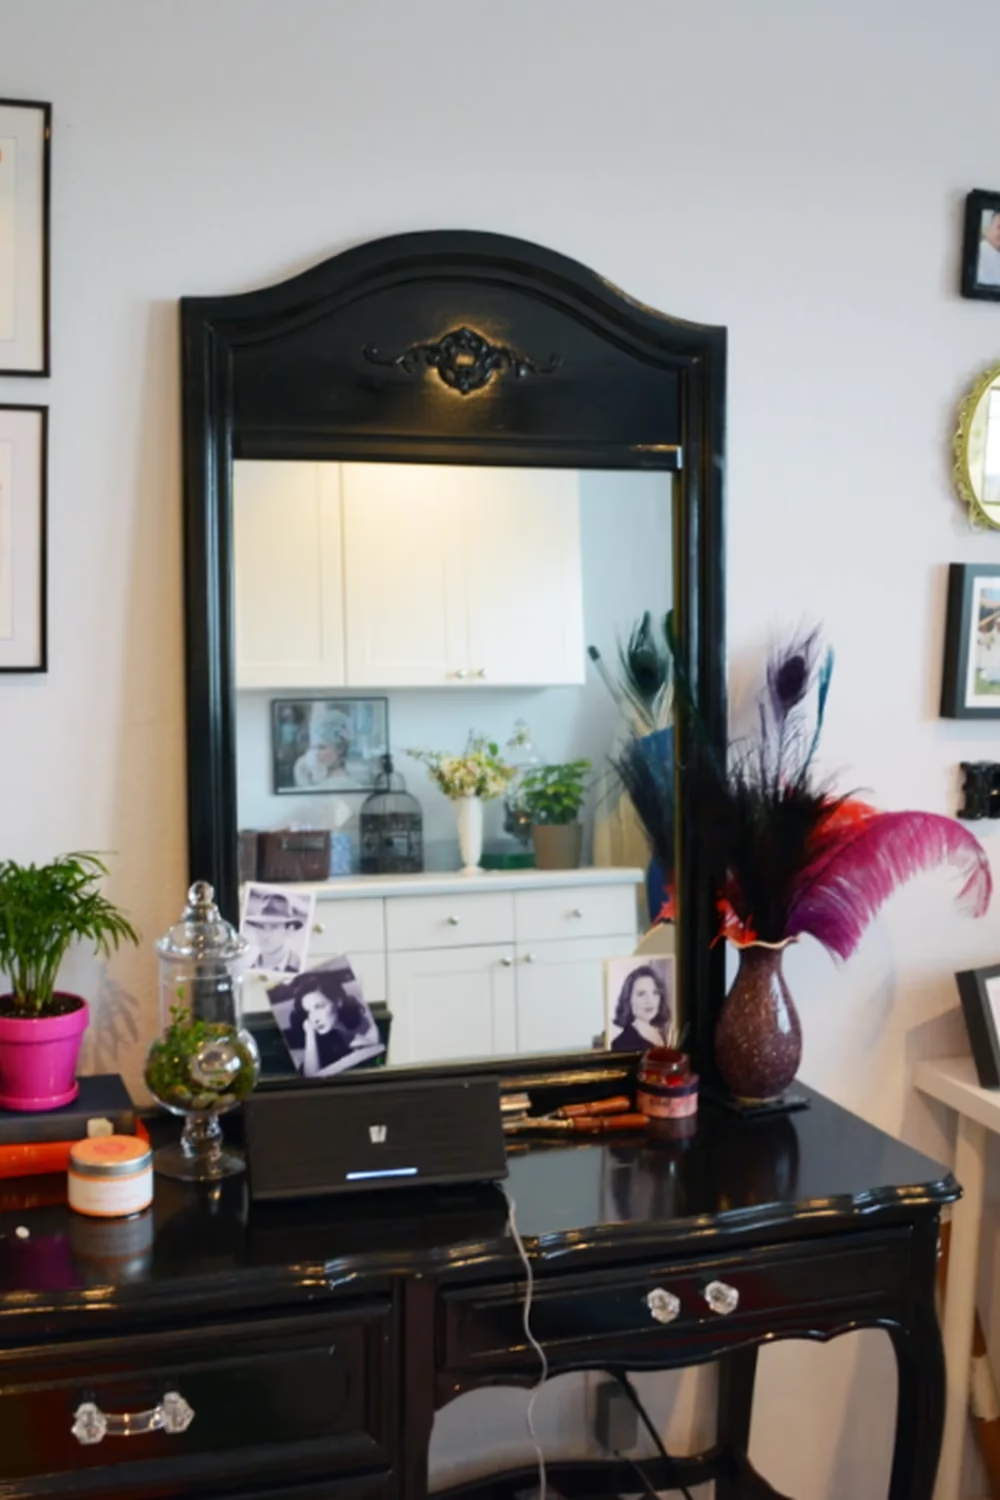
A high-gloss black dresser with an arched mirror and clear glass knobs makes a dramatic sewing room feature. Peacock and magenta feathers rise from a plum vase, while a bright pink pot, a glass apothecary jar and black-and-white portrait photos add a glamorous, old Hollywood mood.

To get the look, paint a thrifted dresser in black gloss and swap the pulls for glass knobs. Use the drawers for notions and trims. Pin vintage-style photos at the mirror edge for inspiration. It suits anyone who wants their sewing space to feel more like a boutique dressing table than a workroom.

17. Pastel Shelves Around a Curved Cream Desk

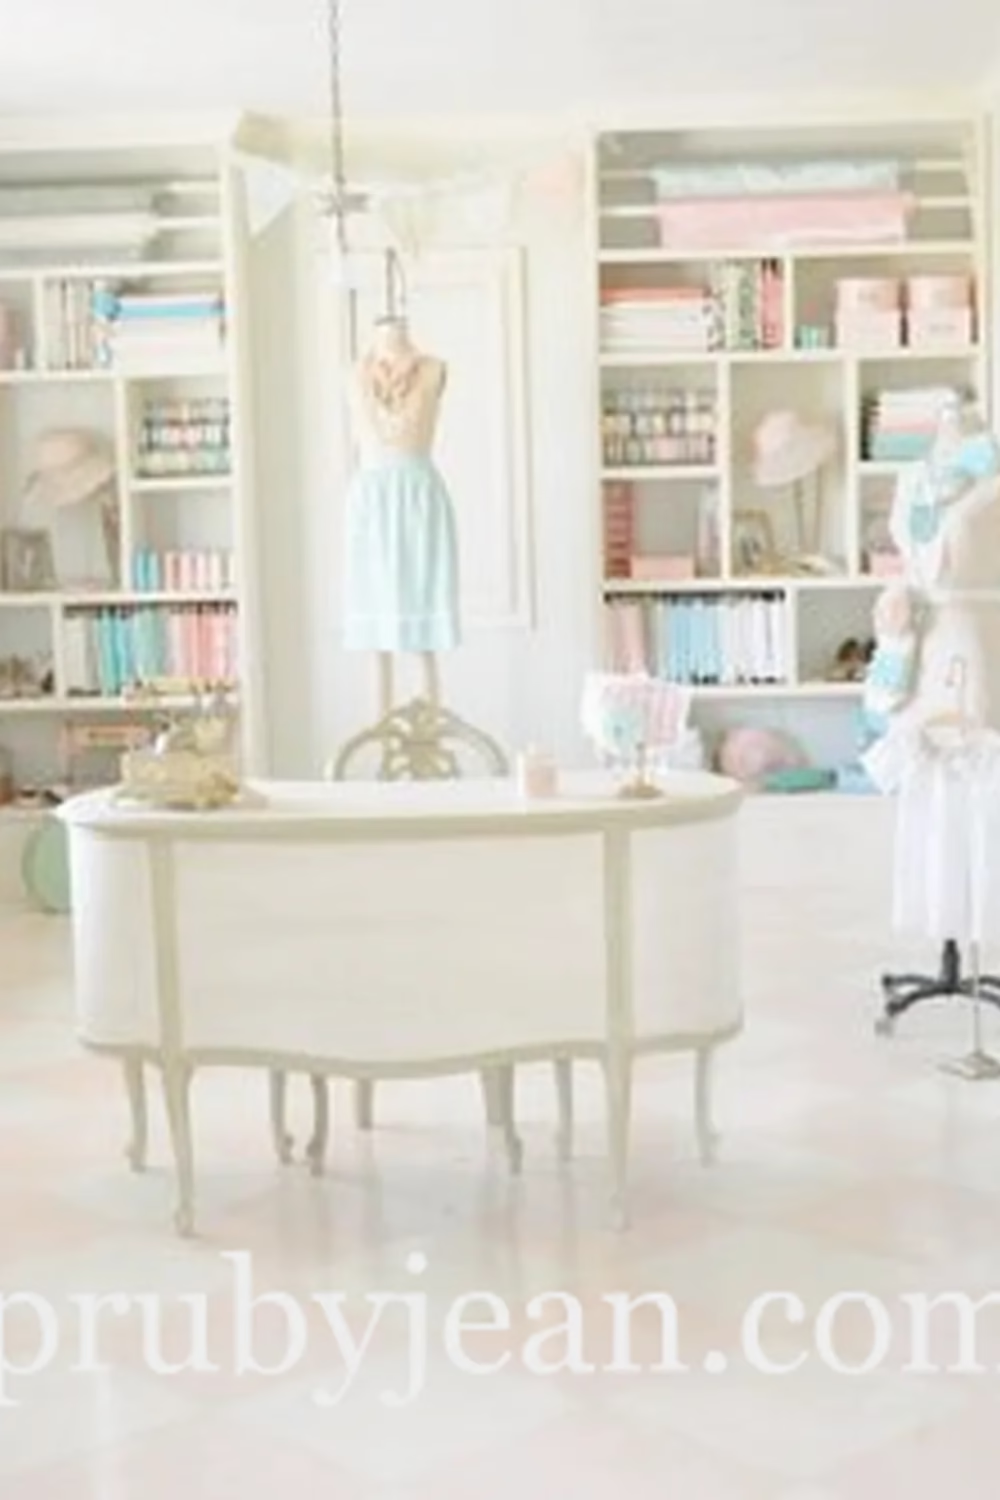
This airy room is all soft mint, blush and cream. White built-in shelves hold neat stacks of fabric, jars of trims and boxes in pale pink, while a curvy cream desk with slender legs sits in the middle. Dress forms in light skirts and a bunting garland add a gentle, romantic touch.

To recreate it, stick to a pastel palette and group items by color on open shelves. Look for a curved or French-style desk and paint it a warm cream. Hang a dress form beside it as decor. It suits larger rooms, though a single shelving unit can capture the same sweet, boutique feel.

18. Dark Wood Sewing Cabinet With Patchwork Stool

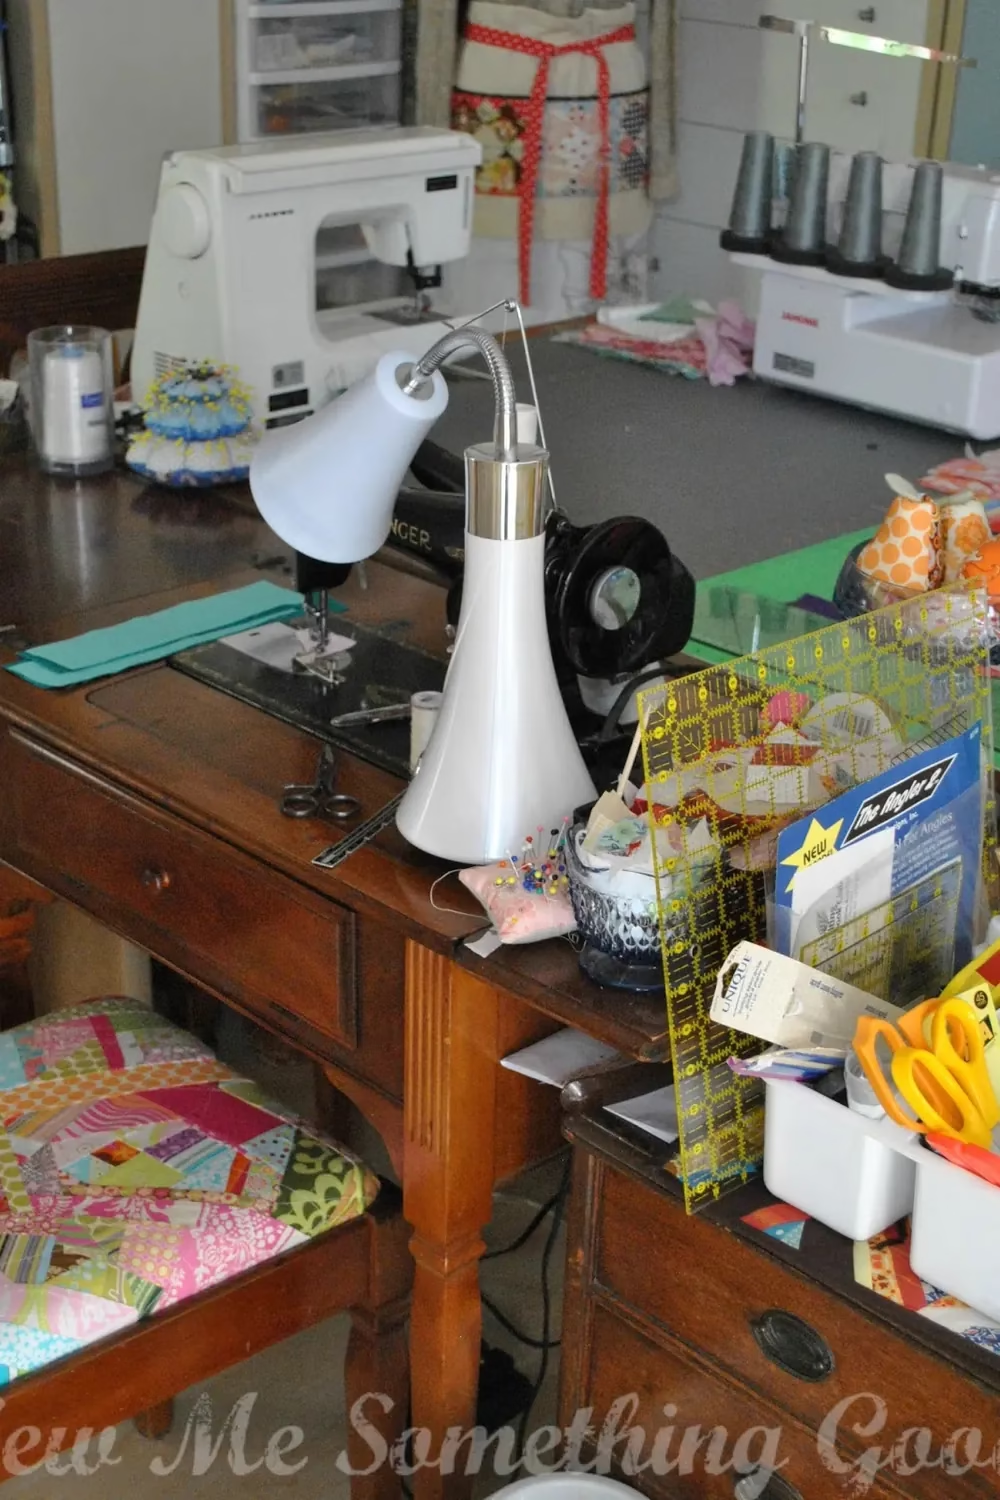
A dark wooden Singer cabinet takes center stage here, topped with a bendy white lamp and a pincushion bowl. The scrappy patchwork stool in pink, green and yellow brings bright color to all that brown wood. Rulers, orange-handled scissors and fabric pear pincushions keep everything close to hand.

Try making a patchwork seat cover from leftover scraps to freshen an old chair. A flexible task lamp helps light the needle without hiding the vintage cabinet. Use clear bins for rulers and tools. This look suits busy quilters who want a working space with plenty of cheerful, lived-in charm.

Save Your Favorite and Start Stitching

You do not need every antique in this list to get the look. One treadle table, a pretty quilt, or a painted wall can change how your sewing space feels.

Save the pins that made you smile, then try one small change this weekend. Your next project will feel a lot more special in a room you love.

17 Stunning Sewing Room Wall Decor Ideas That Make Your Craft Space Feel Inspiring

You sit down to sew, and the wall in front of you is blank. It's hard to feel creative when you're staring at plain paint.

Then the scraps, spare hoops, and finished quilts start piling up in drawers where nobody sees them. All that handmade color goes to waste.

Here are 17 sewing room wall decor ideas that turn your fabric stash, quilts, and notions into real art. Every look comes from a real sewing space, so each one is proven to work.

Scroll for dark botanical wallpaper, mini quilt walls, fabric hoops, and vintage frames. You'll get simple tips to copy each one.

1. Dark Botanical Wallpaper Behind a White Sewing Table

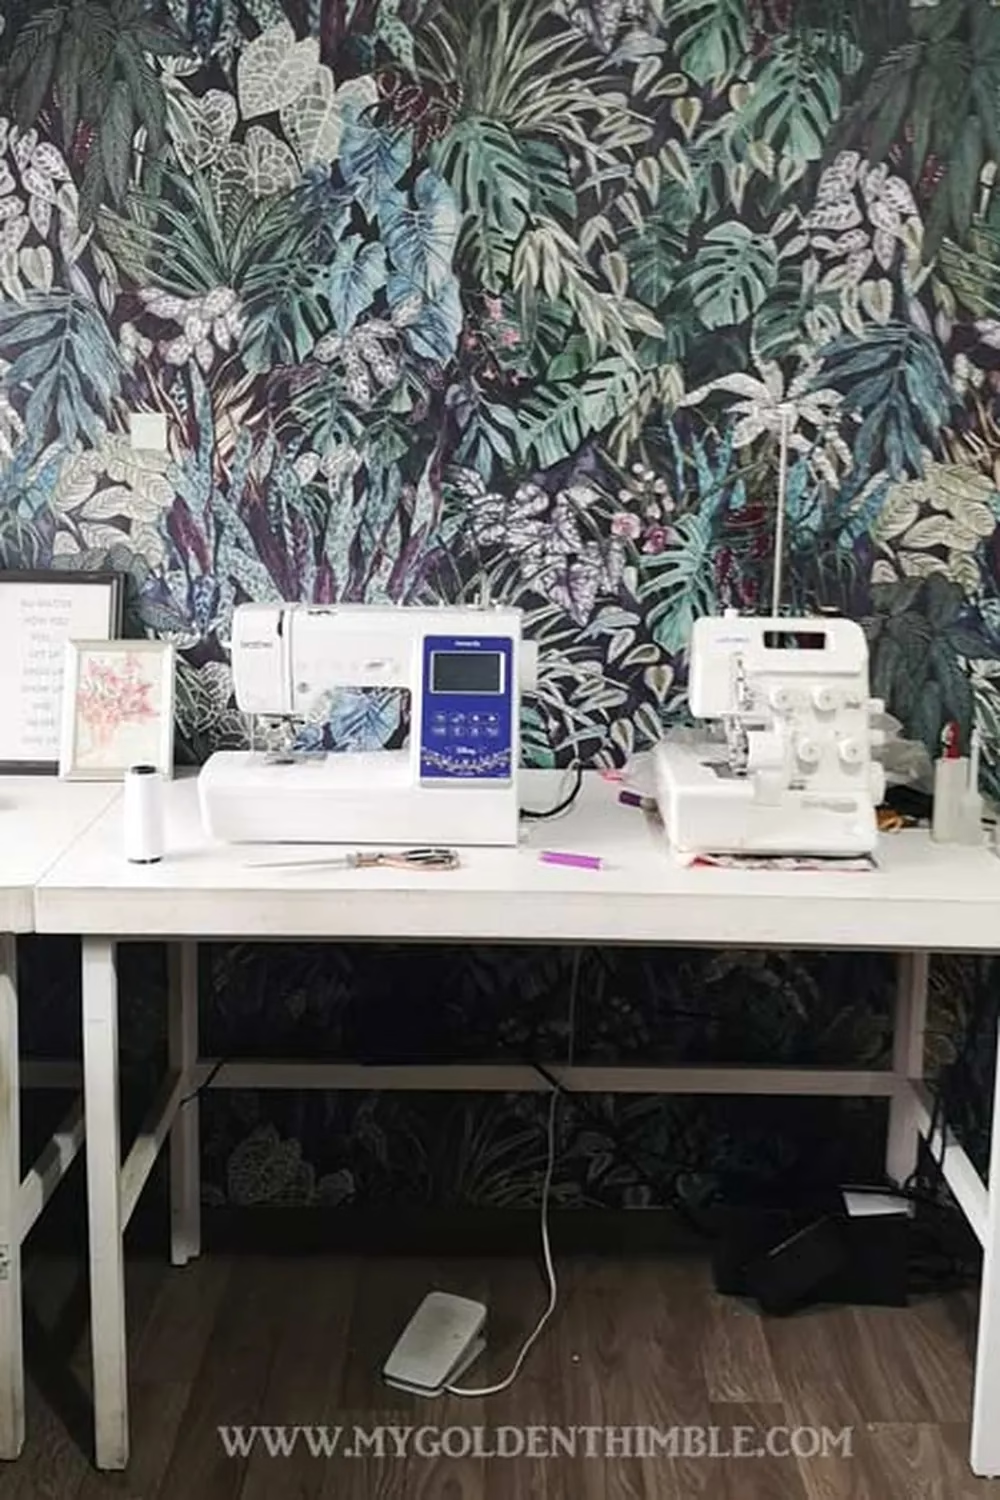
Layered leaves in teal, dusty blue, and plum make this wall feel like a jungle at midnight. The white sewing table and machines pop against all that depth, so your tools become the bright focal point. The small framed print and pink floral art on the table edge soften the drama.

To get the look, choose a large-scale leaf mural or peel-and-stick paper with a dark background. Keep furniture simple and light, as shown here. Renting? Peel-and-stick panels are easier to remove. On a tight budget, cover just the wall behind the machines instead of the whole room.

2. Oversized Star Quilt Above a Red Leather Loveseat

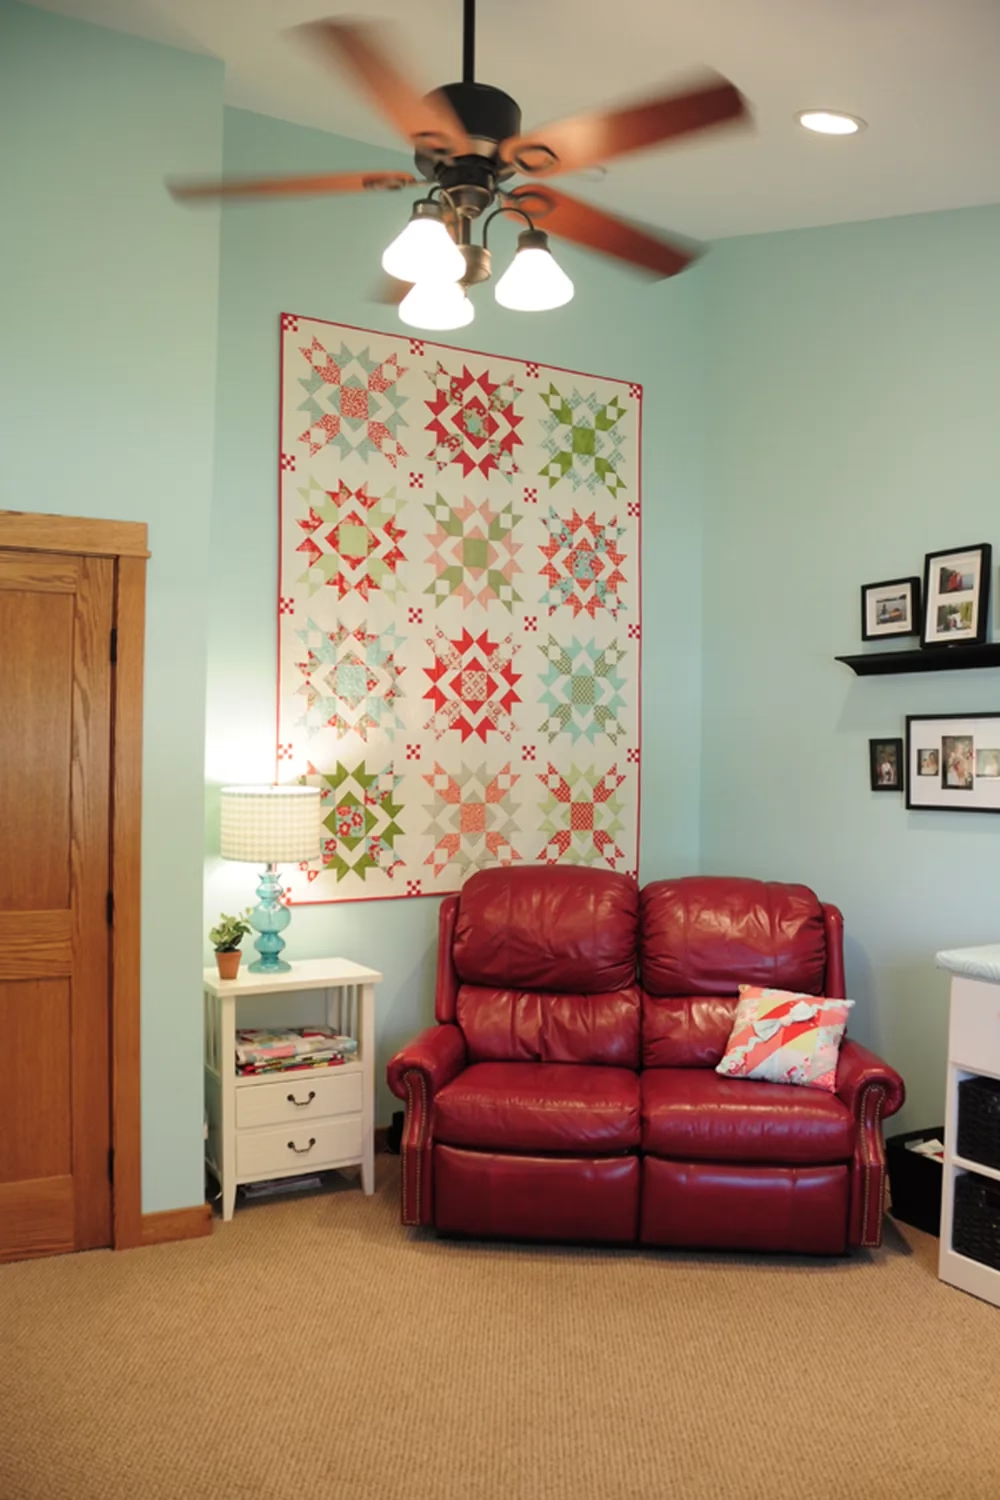
One big quilt can do the work of a whole gallery wall. This cream quilt, with star blocks in red, grass green, and aqua, hangs tall over the loveseat and echoes the pale aqua walls. The red trim around the edge gives it a crisp, finished frame.

Hang yours with a hanging sleeve and a flat rod so the weight spreads evenly. Place it where it won't get direct sun, which can fade fabric over time. If you don't have a quilt this size, ask a quilting friend about a wall-sized sampler, or sew a simple repeating block and make it your own.

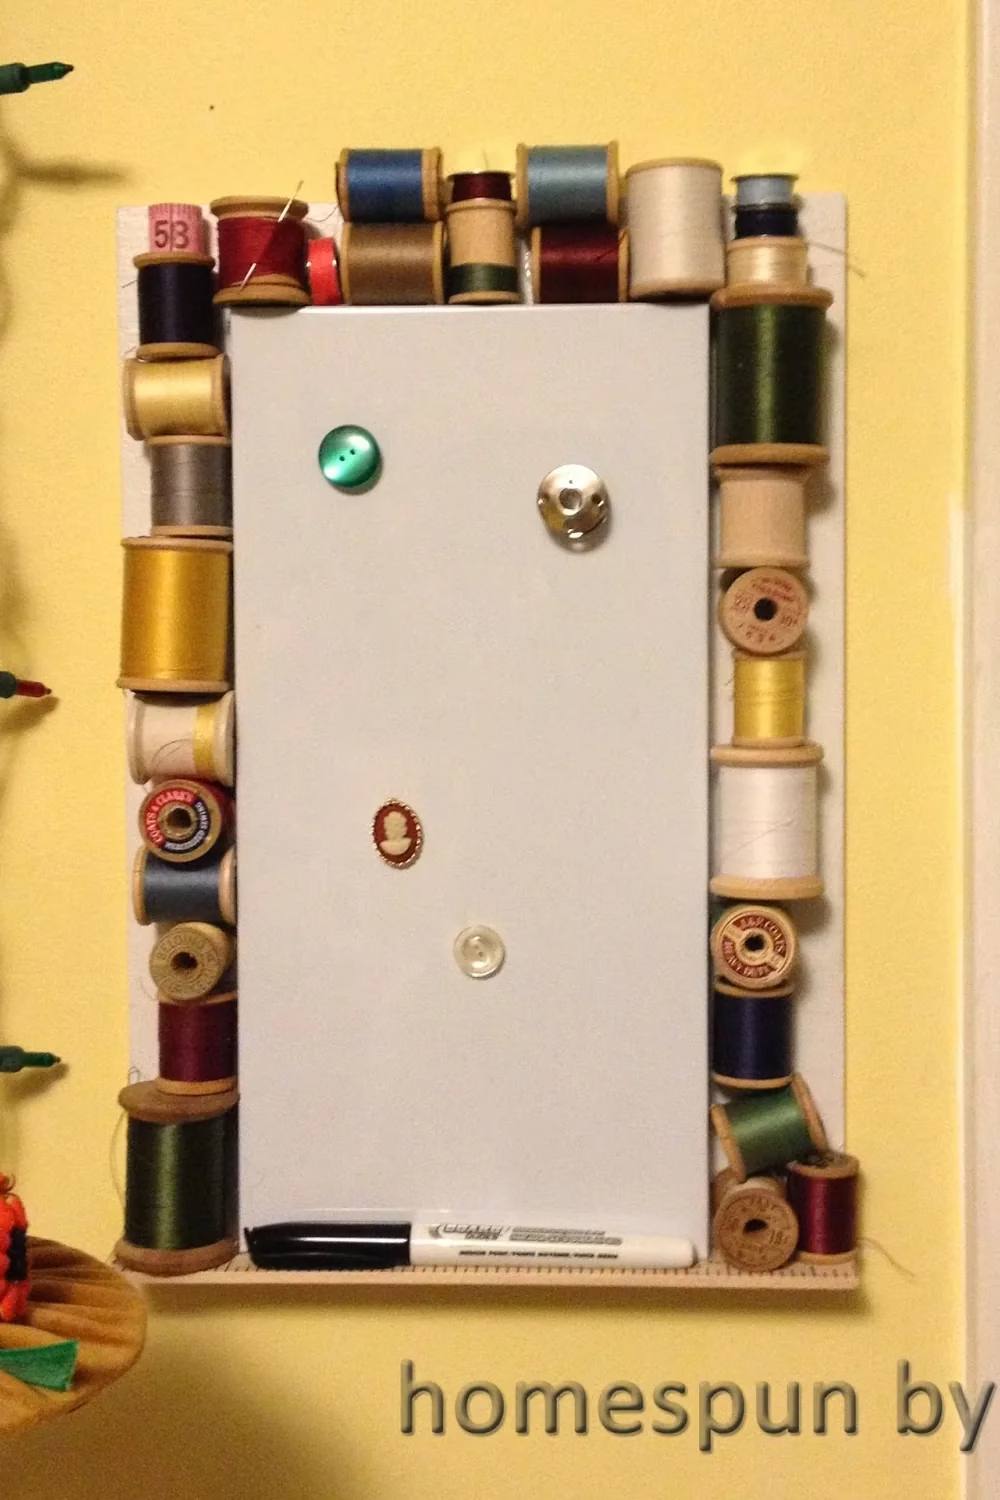
3. Vintage Thread Spool Frame Around a Magnetic Board

Wooden spools in navy, mustard, forest green, and cream line a white board like a colorful picture frame. Buttons act as magnets, and a marker rests on the bottom ledge, so it's pretty and useful for jotting measurements or project notes. The sunny yellow wall makes the old spool colors glow.

To make one, glue spools around a painted wood panel with a metal or magnetic dry-erase sheet in the center. Check thrift stores and estate sales for old wooden spools, which are usually cheap. Use strong craft glue, and mix in a few empty spools if you run short.

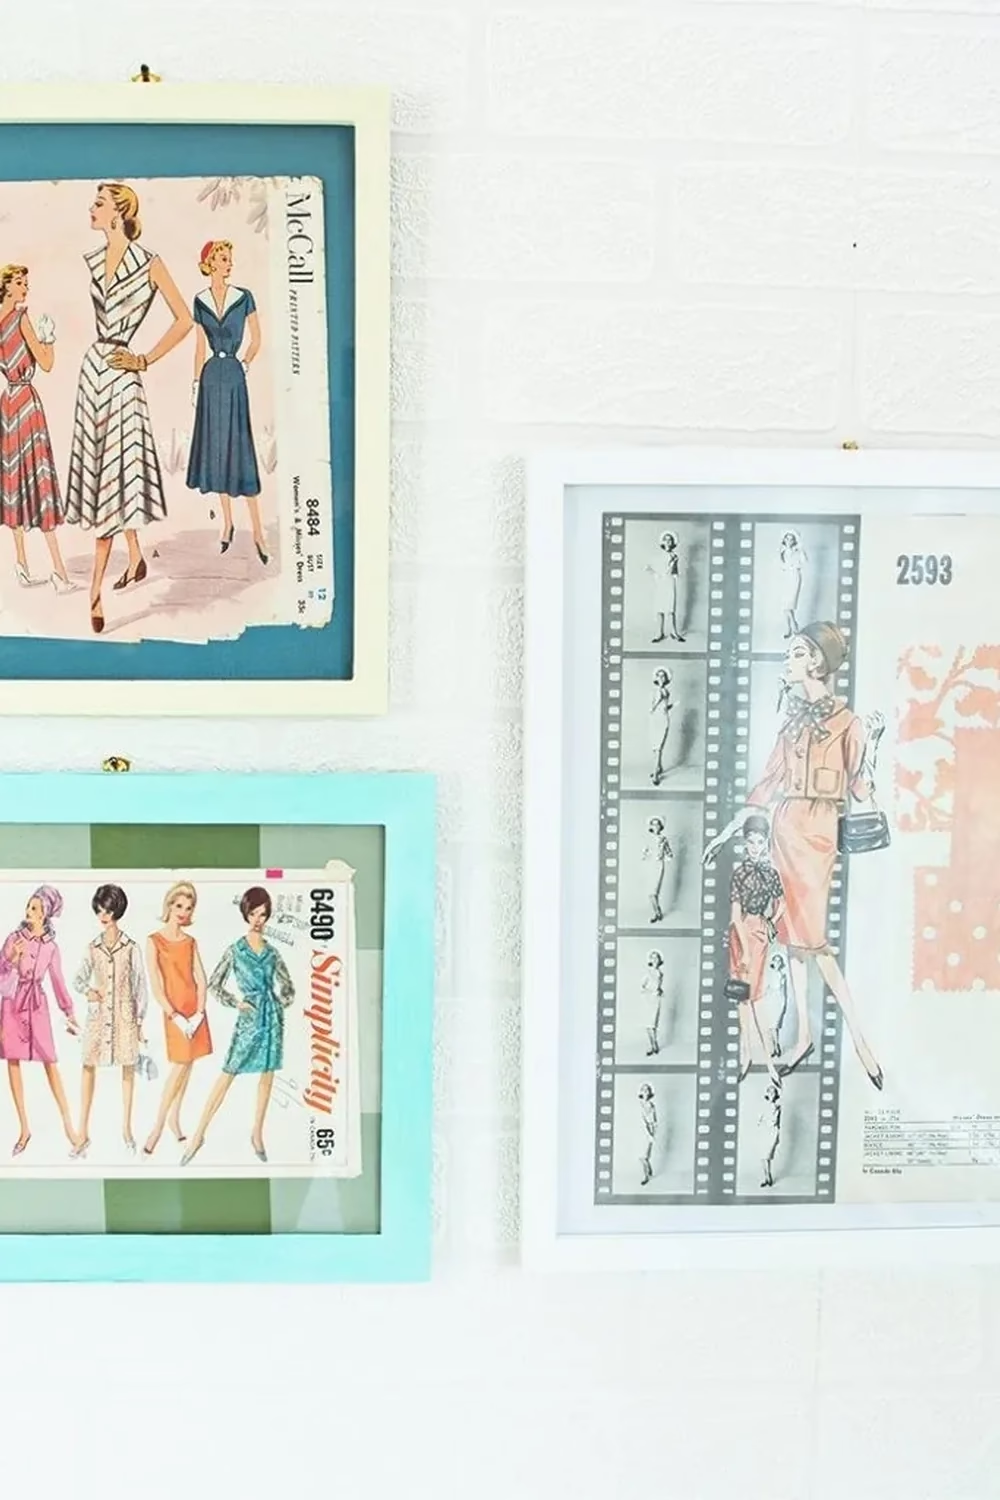
4. Vintage Pattern Envelopes in Painted Fabric-Backed Frames

Old dress pattern covers are tiny pieces of fashion history, and these three are framed with plenty of personality. A cream frame with a teal mat, an aqua frame with green gingham behind the glass, and a crisp white frame make a relaxed trio on a white brick-textured wall.

Look for envelopes at flea markets or in your own stash. Paint cheap frames in candy colors, then cut fabric or scrapbook paper to use as the backing. Offset the frames instead of lining them up, as shown. It suits anyone who loves retro style but wants a light, fresh look.

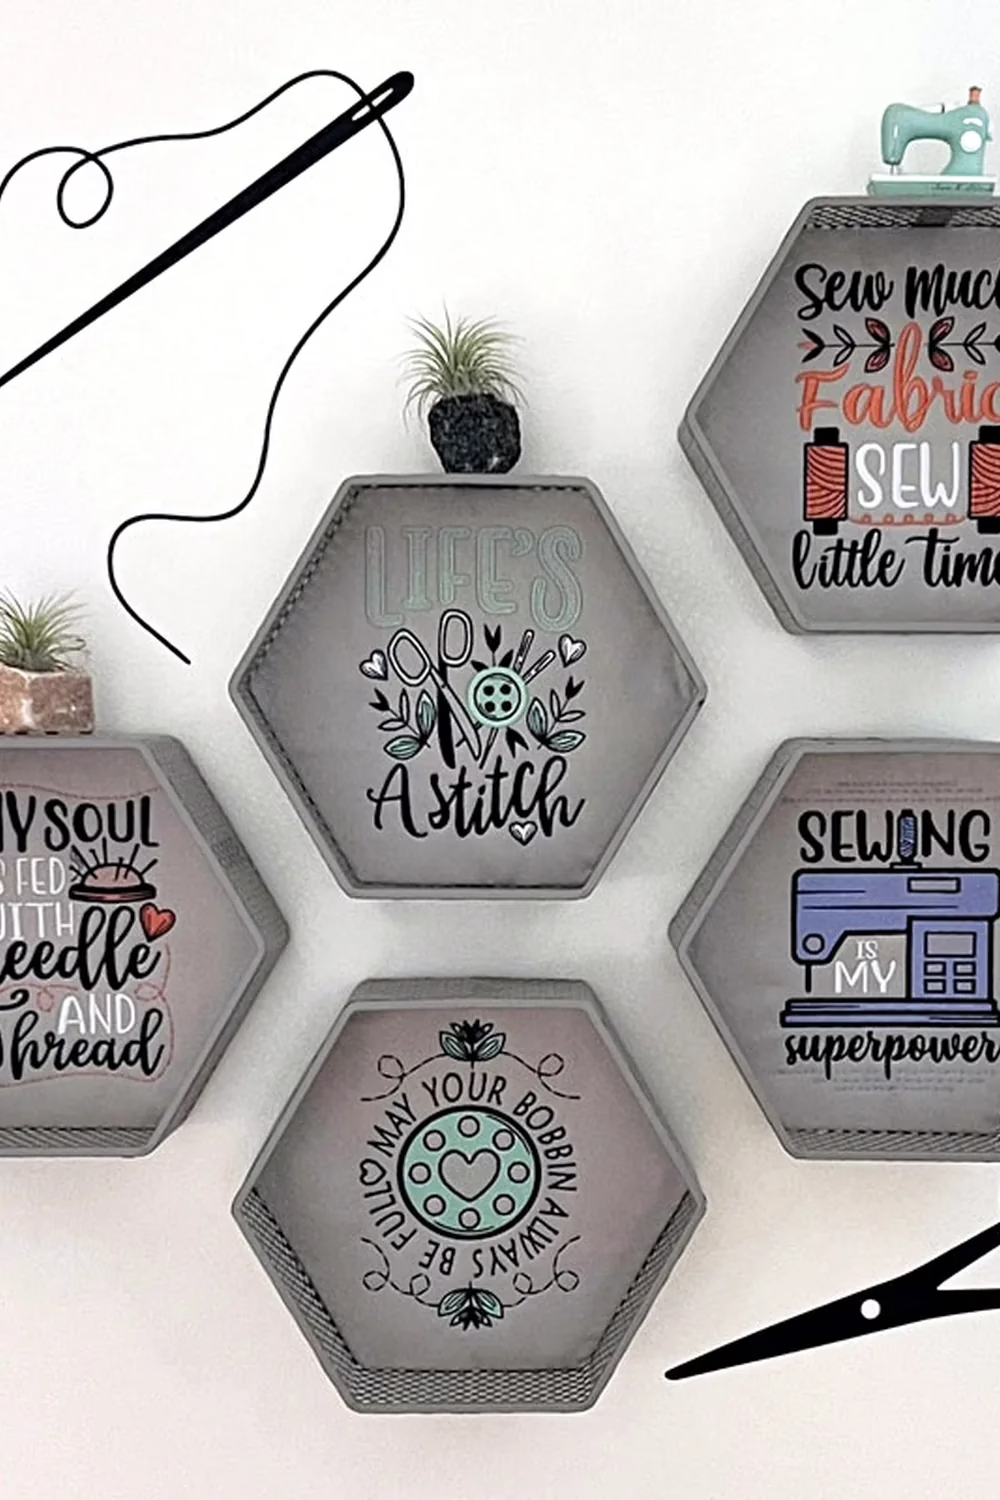
5. Gray Hexagon Shadow Boxes With Stitched Sewing Quotes

Honeycomb-style hexagon boxes make a fun wall cluster, and the sewing sayings inside add humor. Each design uses a soft palette of mint, coral, and lavender on gray fabric. Air plants and a small mint sewing machine on top add height and a little life.

If you stitch machine embroidery, this is a great way to show off your own designs. Cut your finished pieces to fit the back of each box and glue them in. No embroidery machine? Print quotes on fabric sheets instead. Stagger the hexagons so the edges nest together neatly.

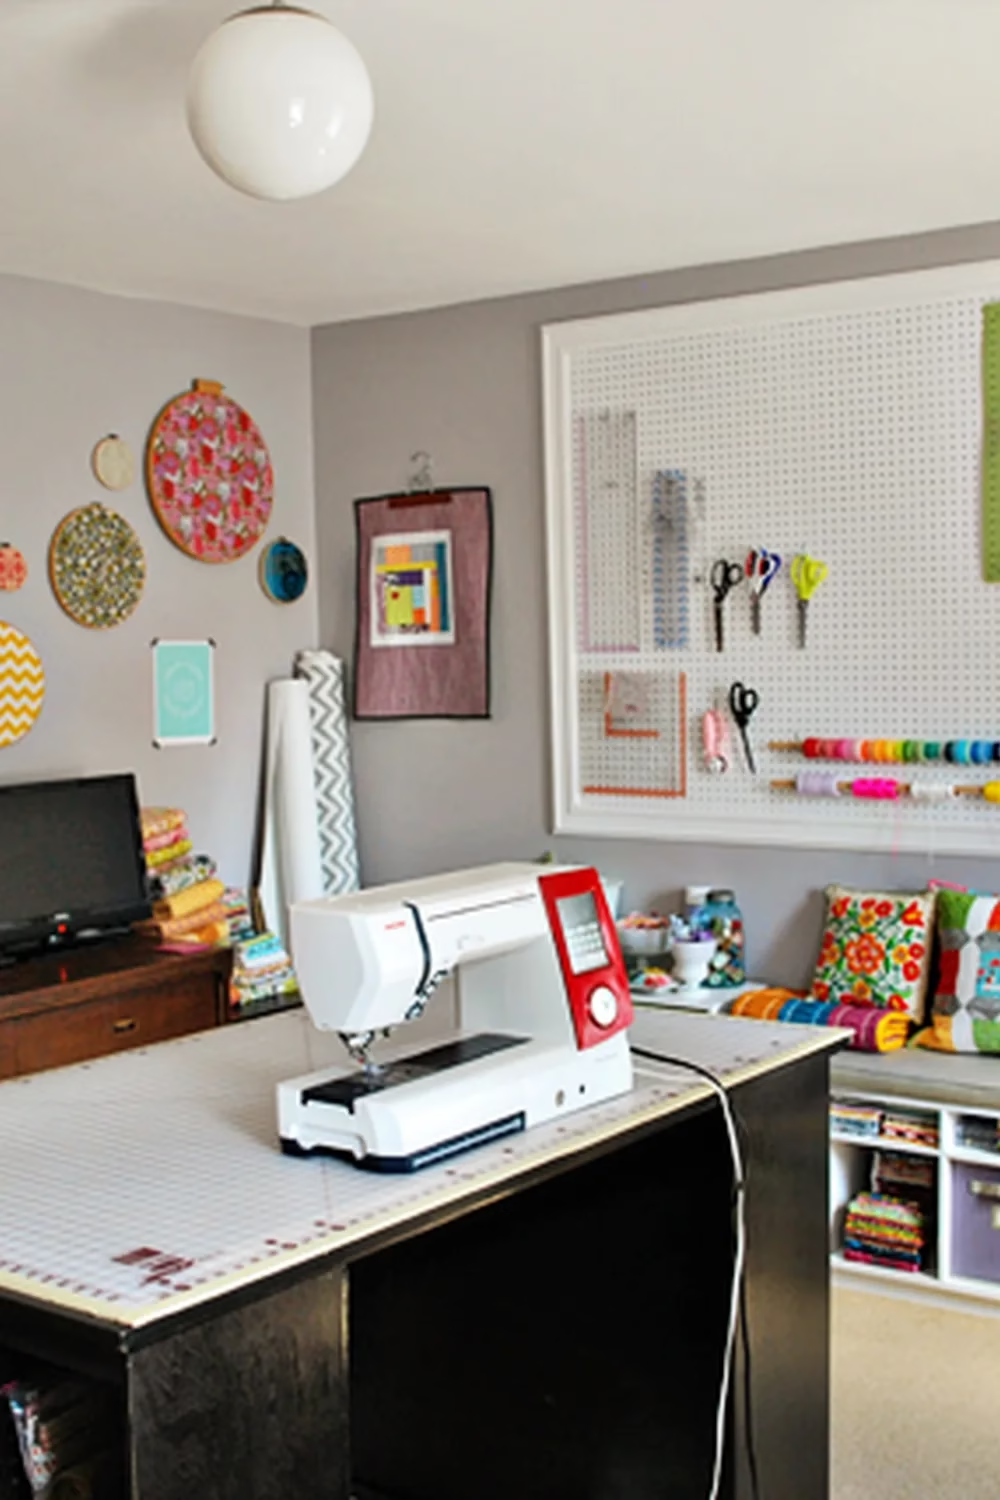
6. Colorful Fabric Hoop Wall Beside a Framed Pegboard

Hoops in different sizes hold bright prints like pink floral, mustard chevron, and tiny patterns. They give the gray wall a playful, collected feel. Next to them, a huge white-framed pegboard holds rulers, scissors, and spools on dowels, so your tools stay in reach and look tidy too.

Start with one big hoop and add smaller ones around it, spacing them unevenly for a natural look. For the pegboard, frame a standard sheet with trim and paint it white. Group tools by type and keep the colorful thread at eye level. It works well for small rooms where you need storage on the wall.

7. Giant Black Line Drawings of Antique Scissors

Giant Black Line Drawings of Antique Scissors
Source: Suz Place

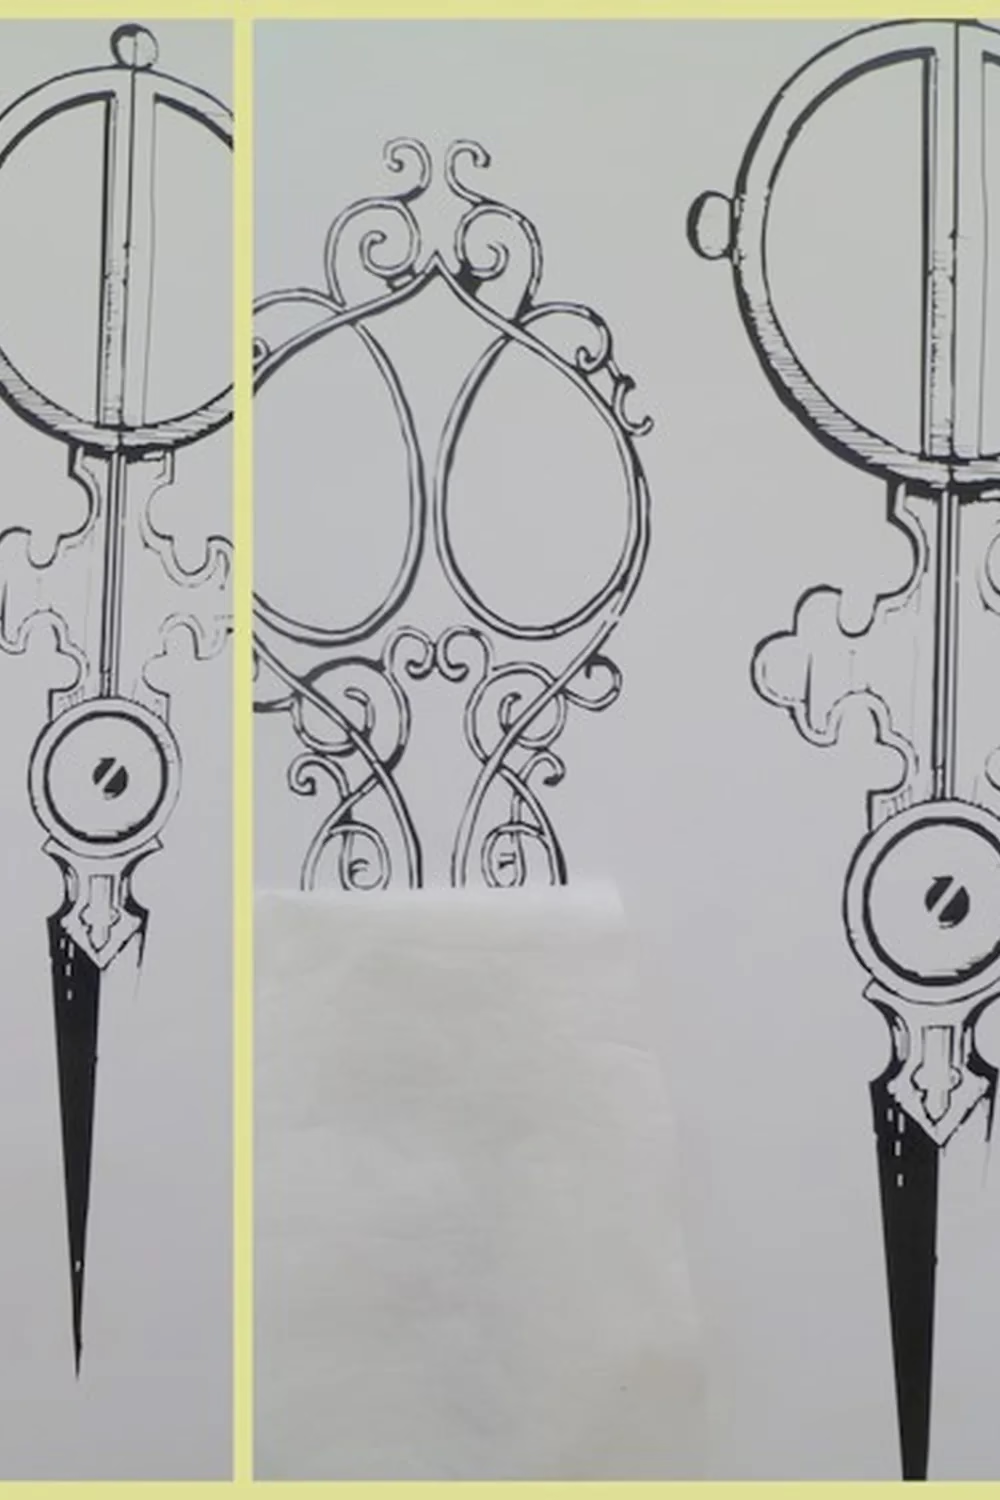
Ornate scissors become bold art when drawn at this scale. The loops, scrolls, and sharp blades read like old engravings against the pale wall. The center pair, with its swirled handle, makes a lovely contrast to the rounder pair on each side.

You can recreate this with large vinyl decals, or trace a scissors illustration onto the wall with a projector and fill it in with black paint. Test your sizing on paper first. It's a great fit for a plain partition or a room divider where you want impact without adding clutter.

8. Pastel Geometric Serger Print Held With Washi Tape

Blocks of aqua, lilac, butter yellow, and blush stack up into a playful serger, with thin black lines for the thread. The word SERGE sits in matching pastel letters above. Colorful washi tape at each corner keeps the whole thing relaxed and easy to swap.

Print a favorite design on thick paper and tape it up. That's the whole project, and it costs almost nothing. Pick tape colors that echo the print, as shown here. It's perfect for renters or anyone who likes to change the wall often, and a pair of prints would look great side by side.

9. Vintage Gallery Wall With Gold Frames and Sunburst Mirrors

Vintage Gallery Wall With Gold Frames and Sunburst Mirrors
Source: Miss MonMon

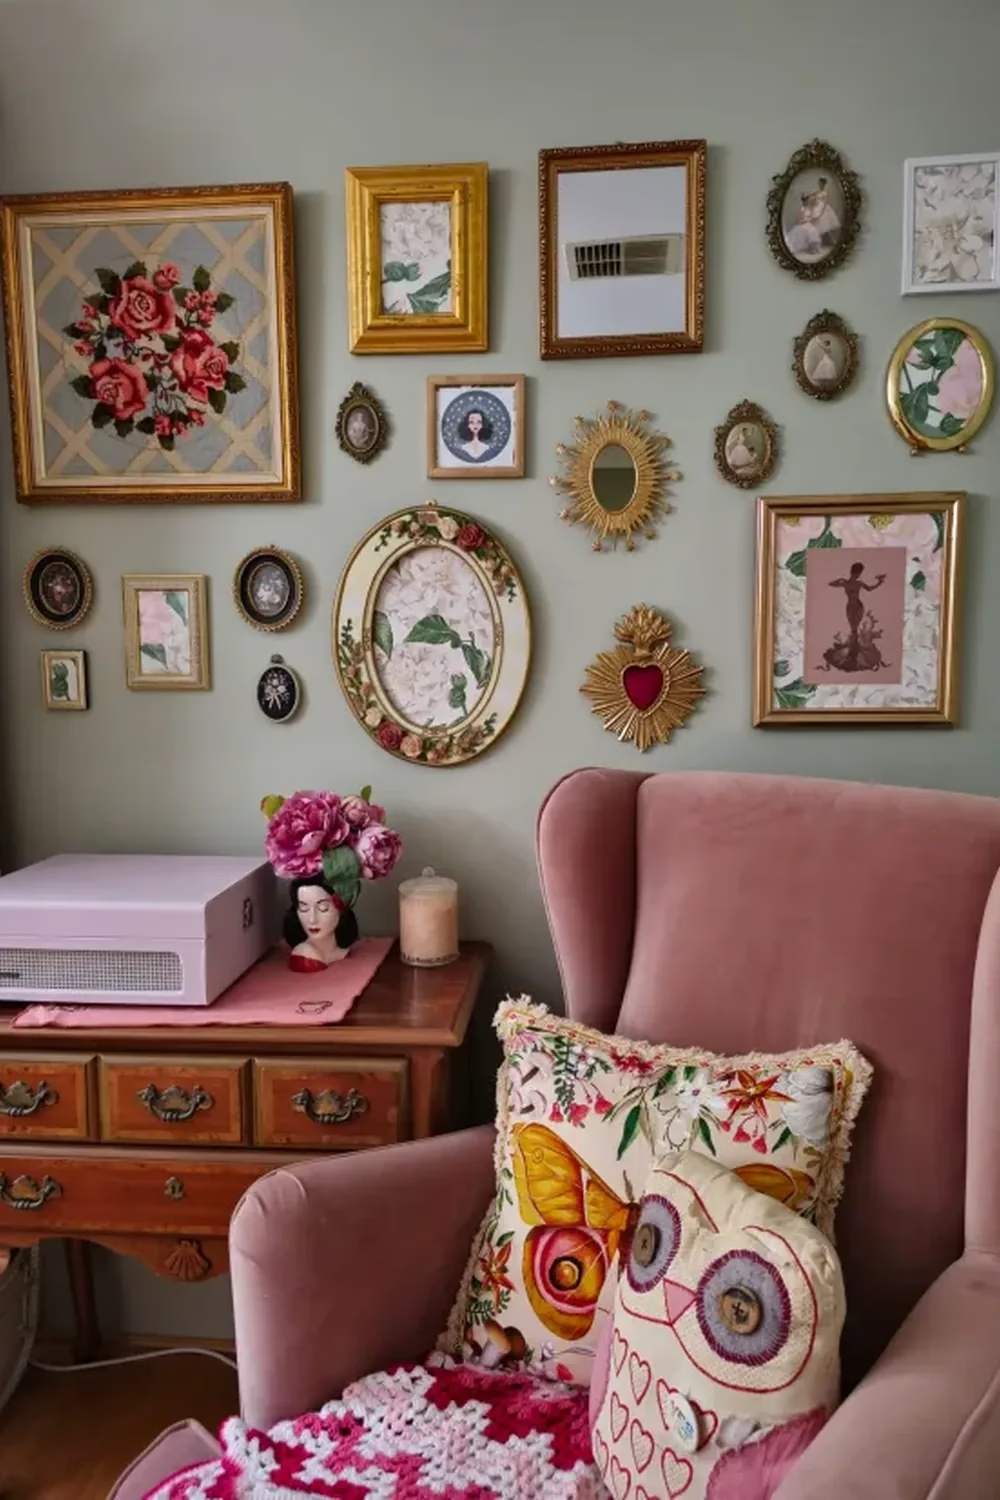
Gold frames in many shapes, oval portraits, small mirrors, and a framed needlepoint rose panel cover a sage green wall. The sunburst mirrors and the heart with rays add sparkle. Soft florals inside the frames tie everything to the pink velvet wingback chair below.

Hunt for mismatched frames at thrift shops and keep the metal tones similar. Put floral wallpaper or fabric scraps inside the frames instead of buying art. Start with your largest piece, then fill in around it with small ovals. This suits anyone who loves a cozy, romantic corner for hand stitching.

10. Pink and Navy Fabric Hoop Pockets Holding Notions

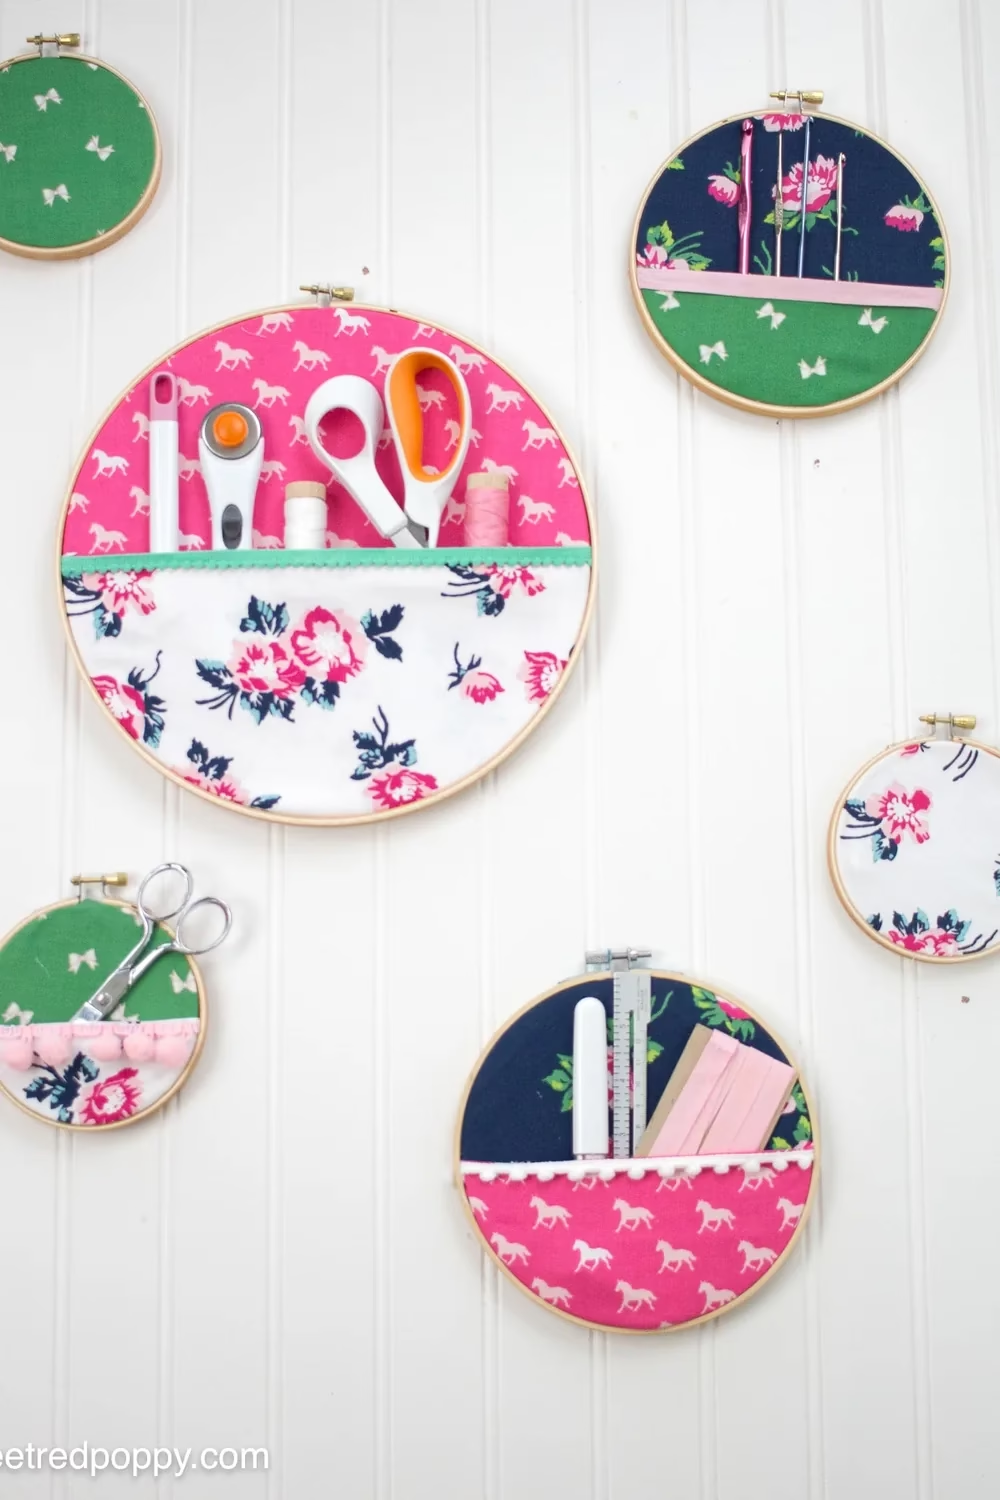
These hoops hold both fabric and tools. Pink horse prints, navy florals, and green bow prints are split by trims like pink pom-poms, mint rickrack, and white balls. Scissors, a rotary cutter, crochet hooks, and thread peek out of the pockets, so storage becomes the decoration on the white beadboard wall.

To make one, stretch fabric in a hoop, sew a curved pocket from a second fabric, and add trim along the opening. Use a stiff fabric so the pocket holds its shape. Keep heavy tools in the largest hoop and tiny items like hooks in the small ones. It's a quick scrap-friendly project.

11. Framed Fashion Sketches Around a Starburst Wall Clock

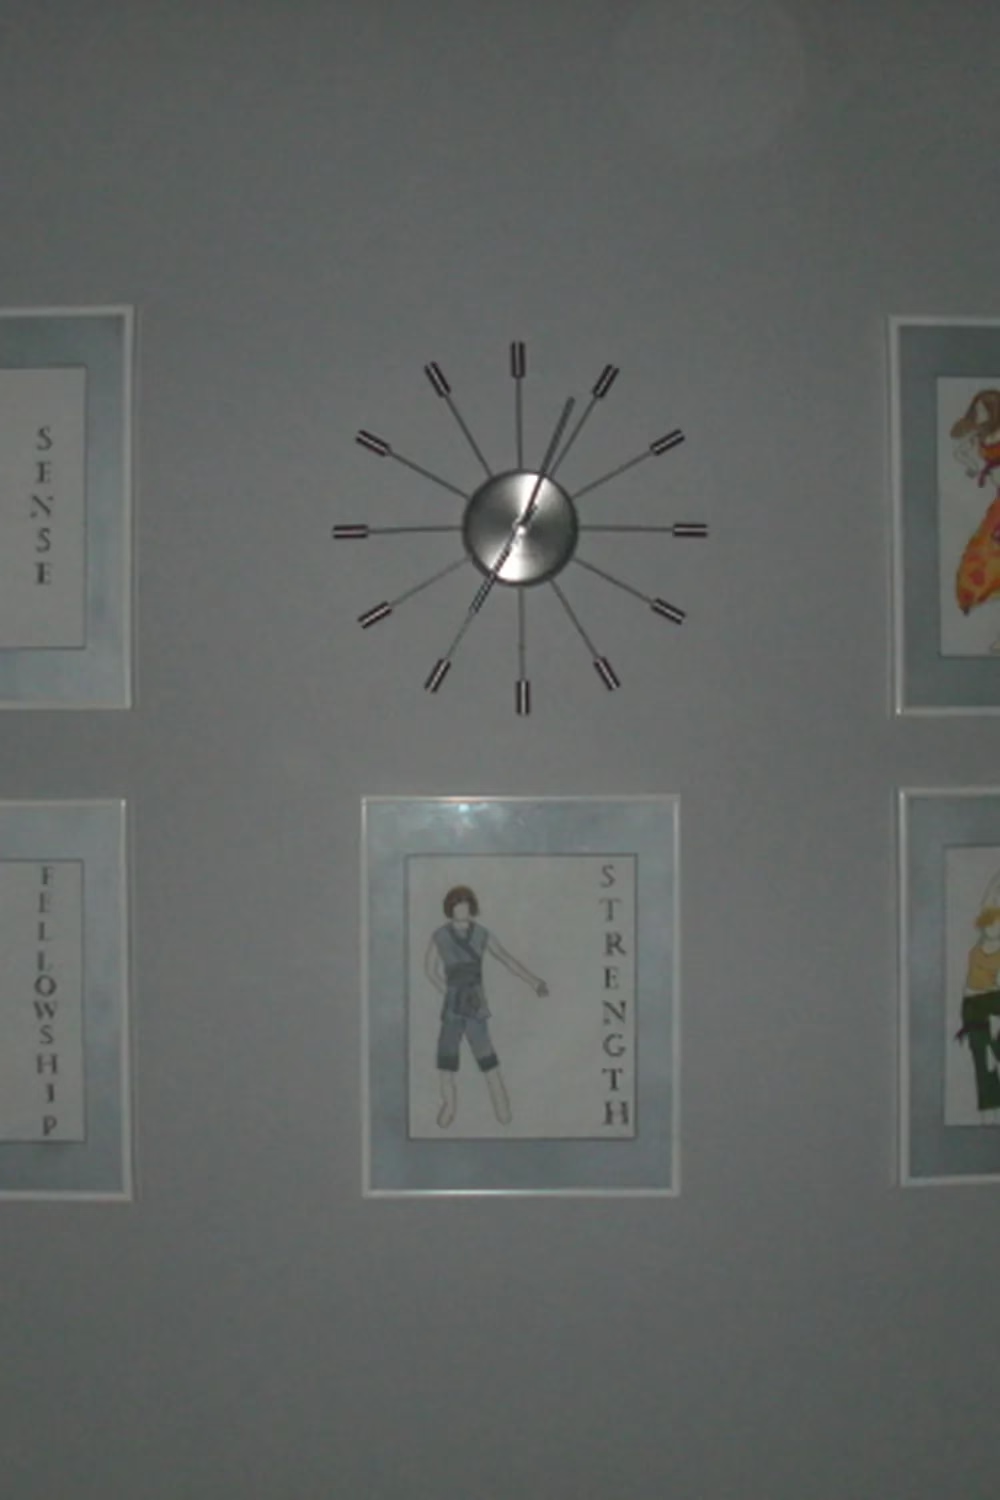
A silver starburst clock sits between pale blue-matted prints of costume sketches and single words like Strength and Fellowship. The soft gray wall keeps the look calm, and the clock gives the grid a bit of retro shine in the middle.

Use your own fashion drawings or print free vintage illustrations. Cut mats from the same blue-gray cardstock so the frames feel like a set. Keep spacing even, with the clock as the anchor. It suits a quiet, grown-up space, and the words add a little encouragement while you work.

12. Floor-to-Ceiling Red and Cream Mini Quilt Wall

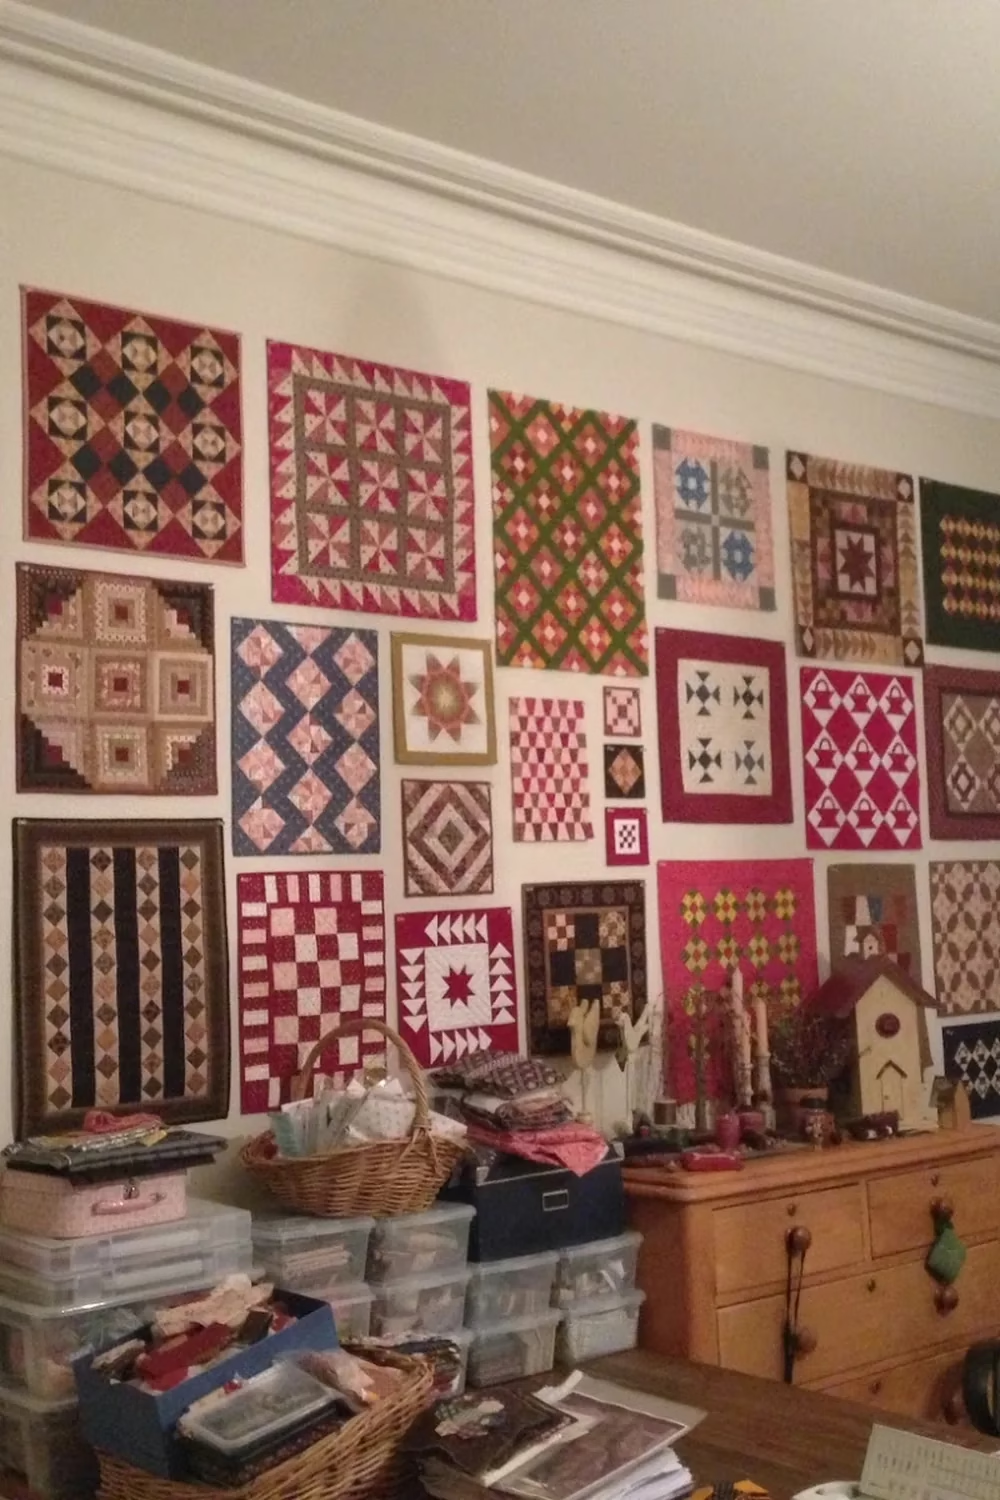
Dozens of small quilts hang edge to edge, and the repeating reds, creams, forest greens, and navy keep it cohesive. Each block pattern is different, from log cabin to baskets to stars, so there's always something new to look at. The pine chest and basket of fabrics below keep it homey.

Mini quilts are a good way to try a new pattern without committing to a full-size one. Hang them with small hanging sleeves or discreet pins. Mix sizes and leave narrow gaps so the wall looks full but not crowded. Keep the colors in one family, as shown, so it feels planned.

13. Pink and Orange Patchwork Heart Beside Rainbow Quilts

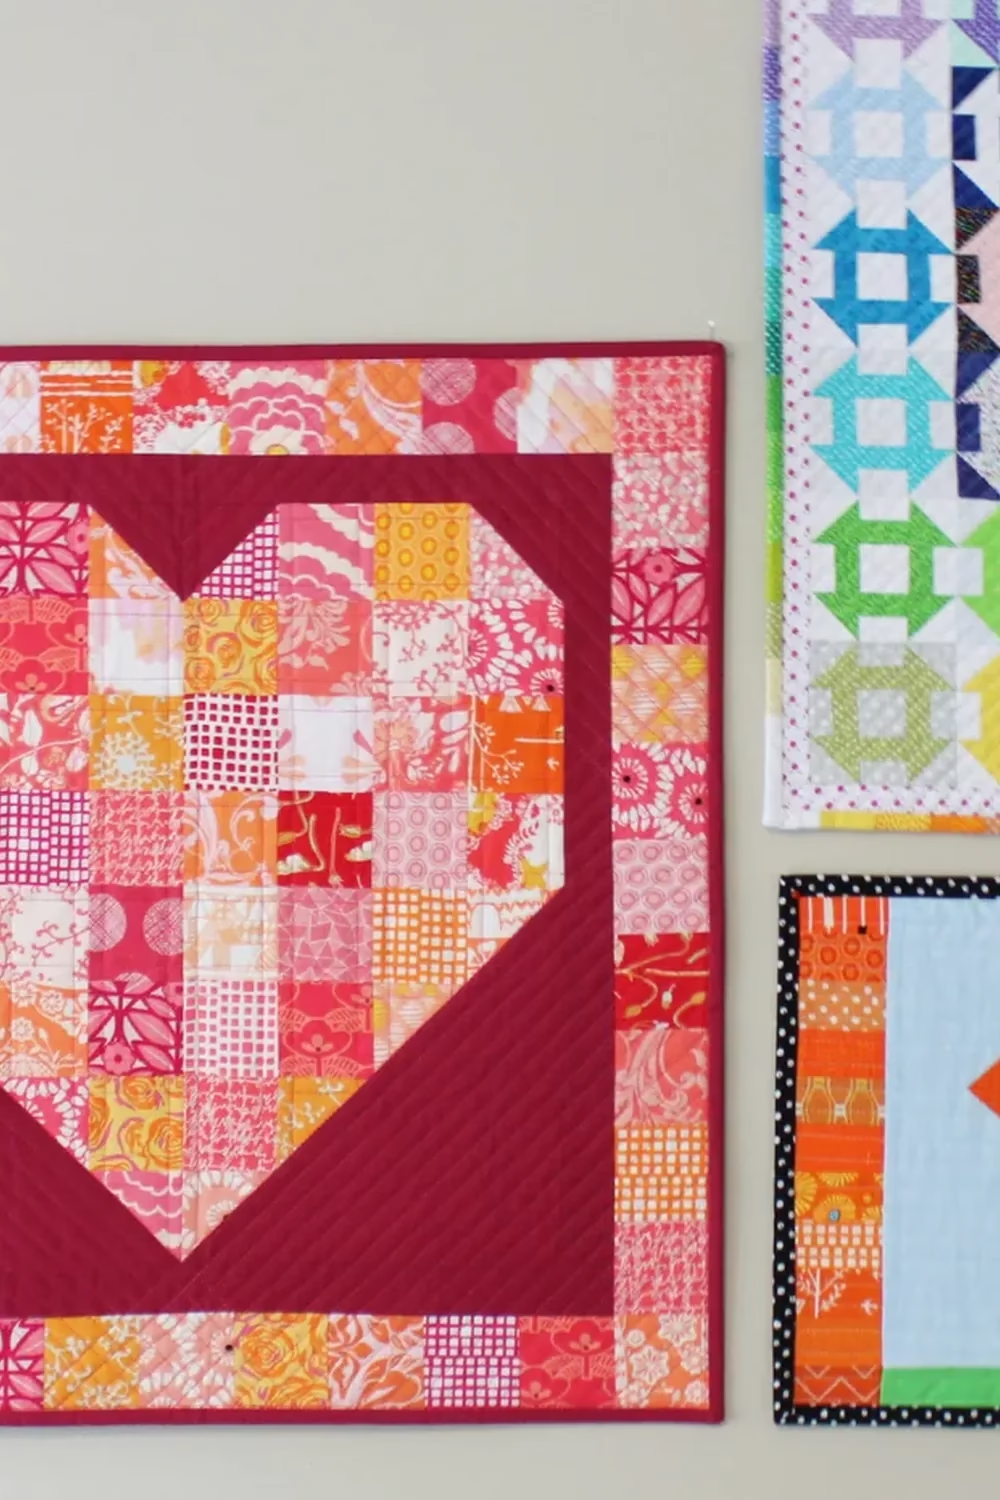
A heart built from tiny squares in pinks, corals and oranges sits inside a deep raspberry frame, and the busy prints stay calm because the solid border holds them together. Beside it, a rainbow churn dash runner and a small quilt with black polka dot binding make a tight, cheerful cluster.

To copy this, hang a few small quilts close together with an inch or two between them. Use one solid color around your scrappiest block so it reads as a focal point. Scraps work well here, so raid your stash instead of buying new fabric. Diagonal quilting lines in the solid border add texture without much effort.

14. Traditional Mini Quilts Packed Tightly in a Corner

Traditional Mini Quilts Packed Tightly in a Corner
Source: Sunshine Yellow

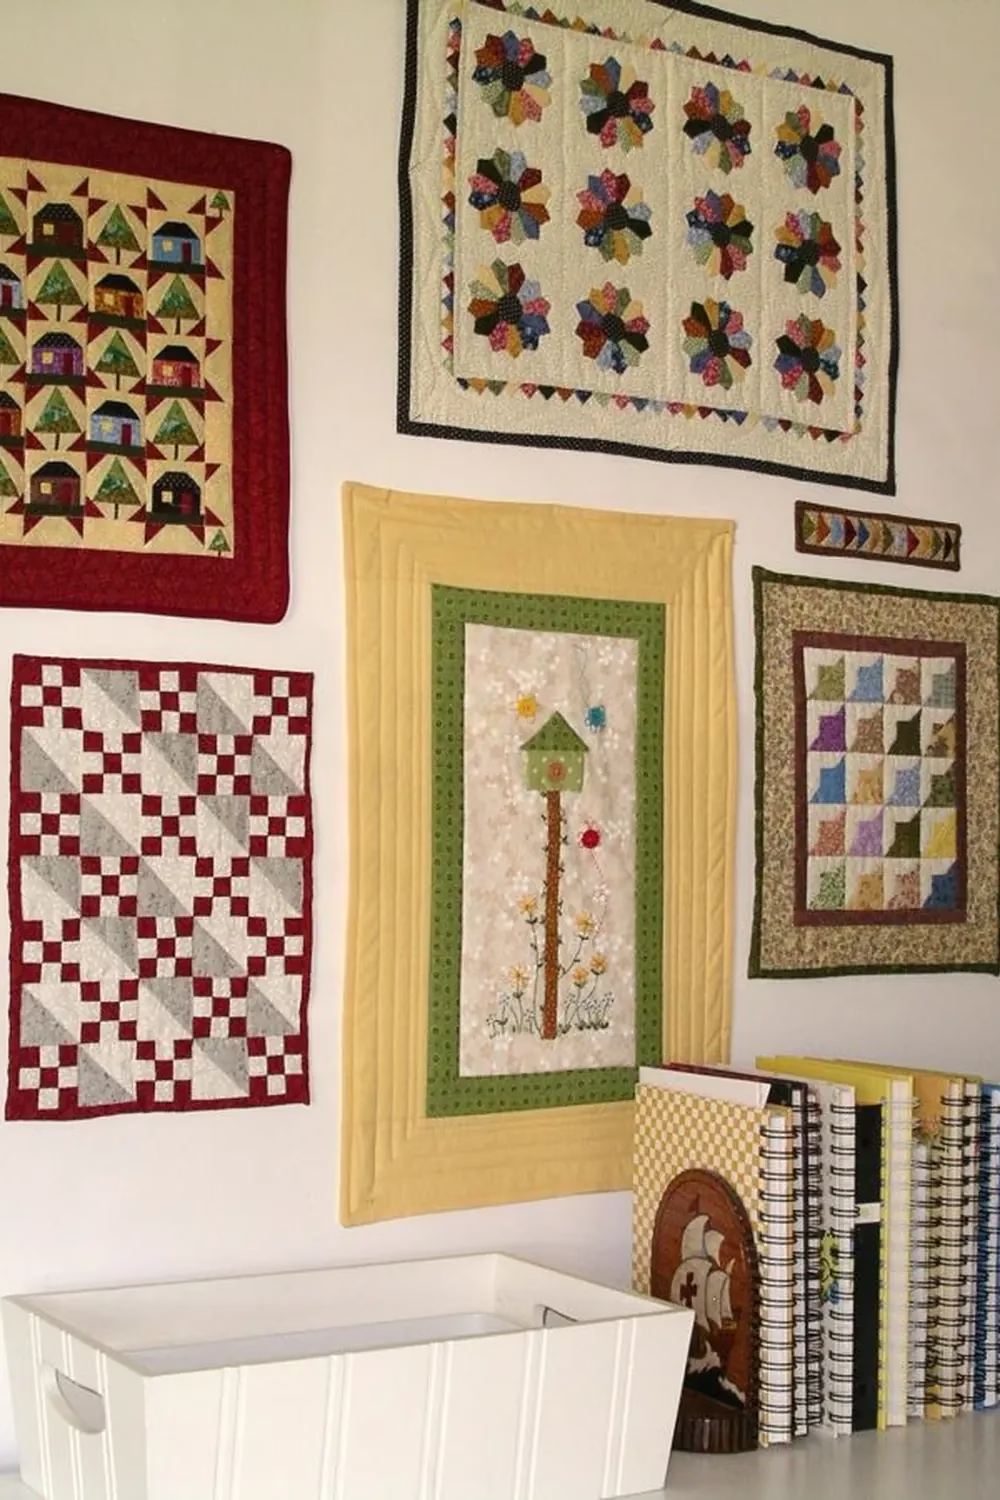
This corner works because every quilt is different but the colors agree. Burgundy, mustard, cream and olive run through the little houses, the dresden plate flowers, the checkered block and the birdhouse panel. A thin flying geese strip tucked between them fills an awkward gap.

Lay your quilts on the floor first and shuffle them like puzzle pieces until the spaces feel even. Mix one tall piece with a few wide ones so the eye keeps moving. Small plastic rings or hook-and-loop tape on the back keep them flat. A shelf of notebooks below makes the whole corner feel useful, not just pretty.

15. Bright Quilt Gallery Beside a Vintage Sewing Desk

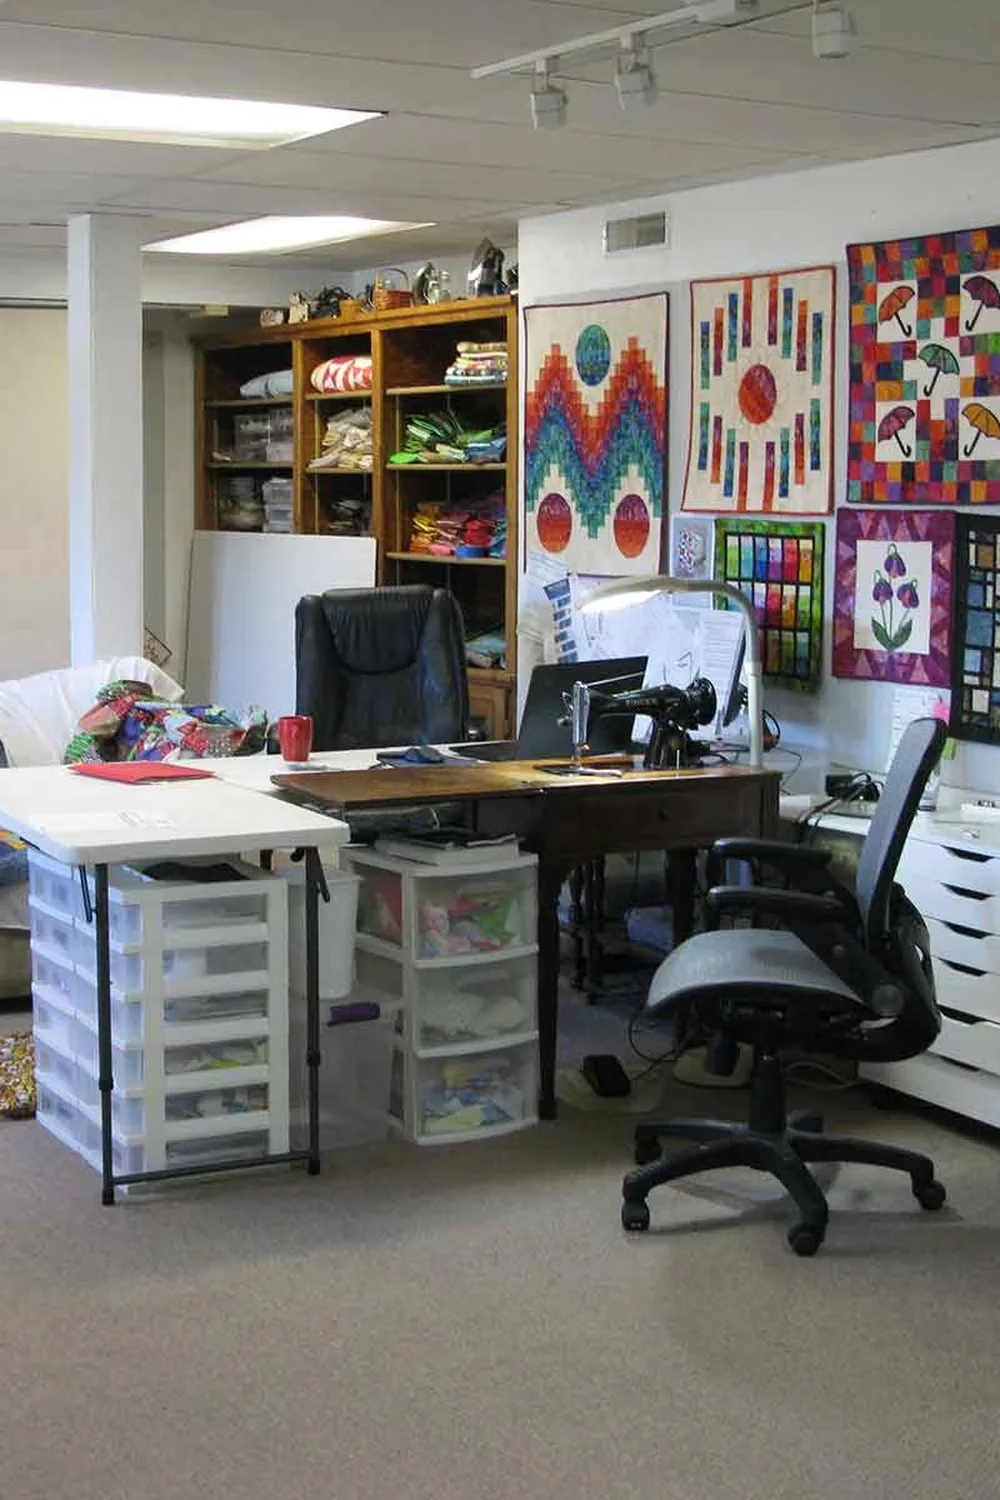
Jewel-toned quilts cover the wall right next to the workspace, so color is always in view while you sew. A zigzag bargello, a sunburst pattern, a block of umbrellas and a purple flower all hang within arm's reach of the old black machine on its wooden desk.

Put your wall of quilts close to where you work, so they act as a mood board as well as decor. Hang at eye level and leave space for notes or pattern sheets nearby. On a budget, finished practice blocks or sample squares make great mini quilts. Plain white walls let the saturated colors do all the talking.

16. Teal Polka Dot Fabric Frame Under Trailing Pothos

Teal Polka Dot Fabric Frame Under Trailing Pothos
Source: Whipstitch

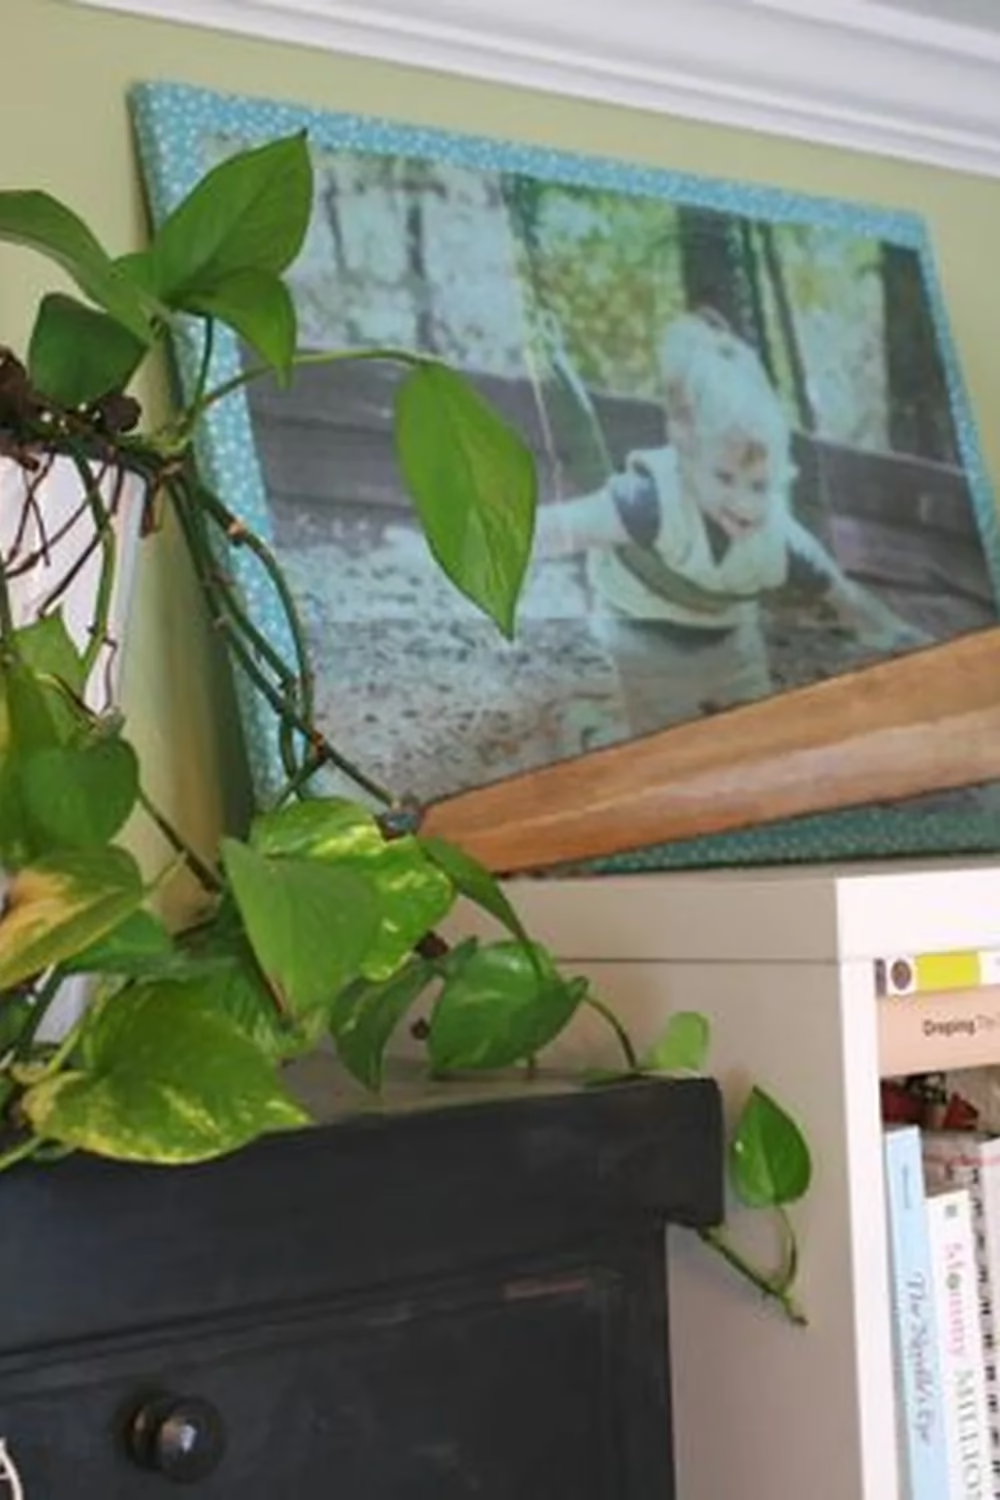
A framed photo of a laughing toddler gets a handmade touch from a teal polka dot fabric border. Propped on top of a cabinet against a soft green wall, it leans casually instead of hanging. The trailing pothos in front adds a fresh, leafy layer.

You can make this by wrapping a canvas or foam board in a favorite fabric, then stapling it tight at the back. Choose a print that picks up a color from your photo so they feel like a pair. Lean it on a shelf or dresser if you rent and want to skip nail holes. Add a plant with long vines to soften the edge.

17. Pastel Fabric Hoops Above a Three Panel Bulletin Board

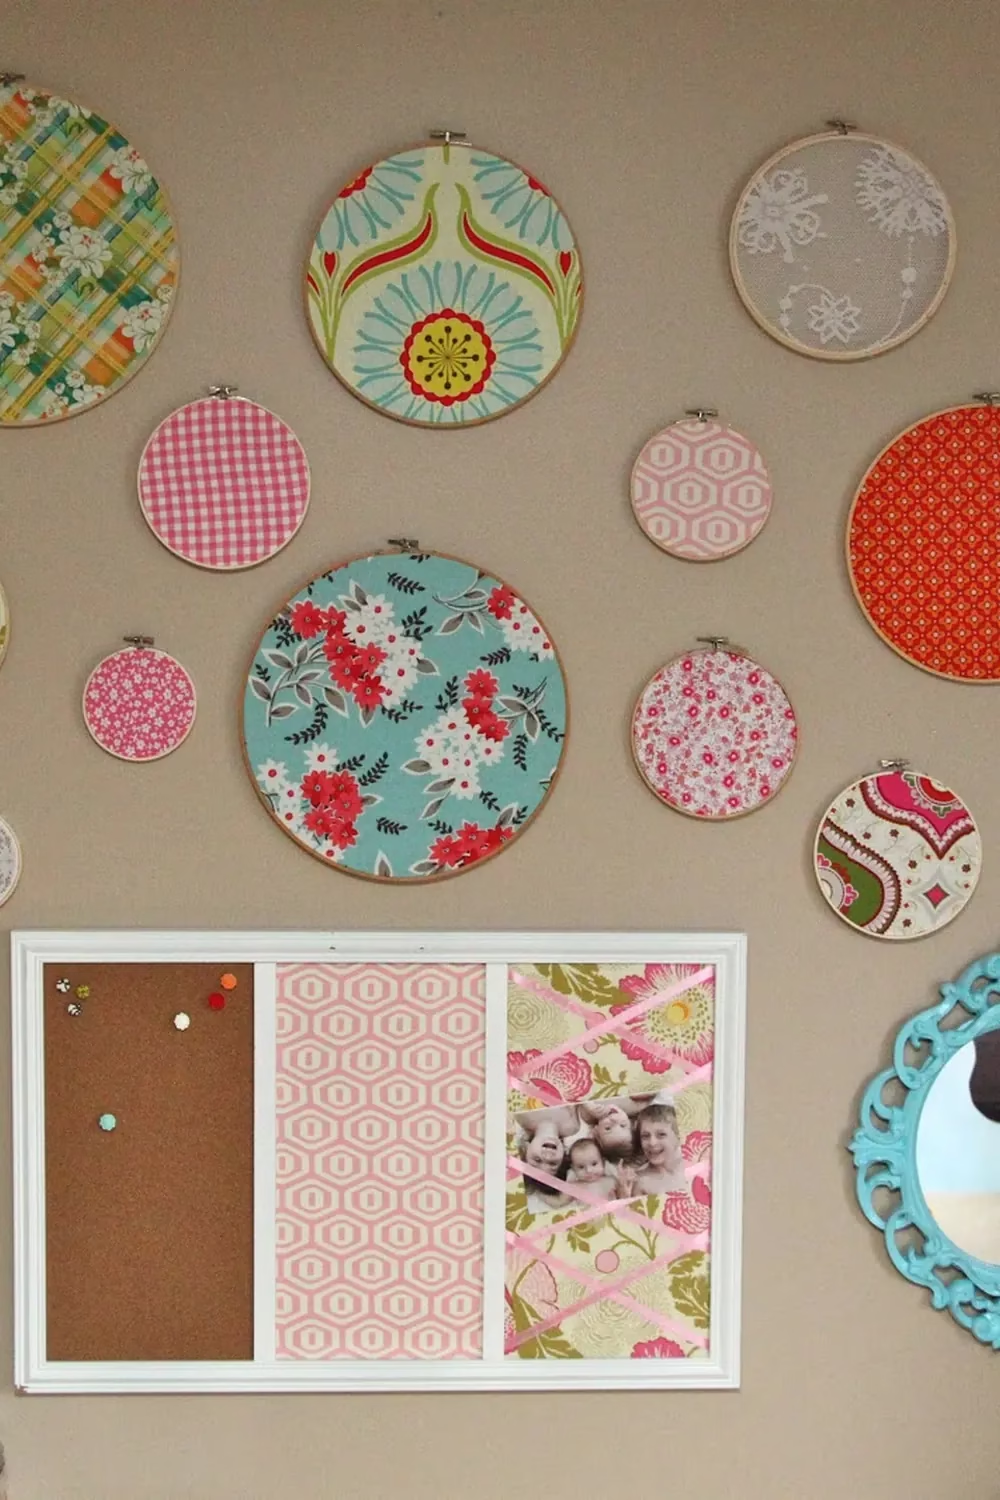
Embroidery hoops in many sizes hold turquoise florals, pink gingham, orange geometrics and one piece of white lace. They float across a warm taupe wall above a white framed board with cork, pink fabric and a ribbon-crisscrossed section for photos. A turquoise scrolled mirror adds one more bold color at the edge.

Start with the biggest hoop, then fill in around it with smaller ones at uneven heights. Cut fabric a few inches larger than each hoop, stretch it tight and trim the back. Thrifted hoops and fabric remnants keep the cost low. Choose prints that share pink, aqua or red so the mix looks planned.

Pick One Wall and Start Stitching It Into Style

You don't need to redo the whole room. Choose one idea, like a few fabric hoops or a single framed pattern envelope, and start there.

Save your favorite look to your Pinterest board so it's easy to find when you're ready to hang something. Your sewing wall should make you want to sit down and make something.