15 Best Camping Crafts for Kids That Spark Big Outdoor Smiles
If you’ve ever tried to keep kids entertained at a campsite after the s’mores are gone, you know the struggle is real. Good news: these camping crafts are fun, low-mess, and actually useful around camp. We’re talking nature art, DIY gear, and memory-makers you’ll keep long after the tent comes down.
Pack a small craft kit (think twine, washi tape, glue sticks, markers, clothespins, and safety scissors), then raid nature’s pantry for the rest. Ready to turn “I’m bored” into “Can we make another one?” Let’s craft.
1. Nature Treasure Necklaces

Turn the day’s discoveries into wearable art. Kids can string leaves, feathers, and found charms onto twine for an instant keepsake—basically a tiny portable museum around their neck.
What You’ll Need
- Twine or yarn (pre-cut lengths make it easy)
- Large beads (optional, for spacing)
- Hole-punched leaves or lightweight finds with natural holes
- Washi tape to wrap delicate stems
Tips
- Use a hole punch on sturdy leaves and bark pieces.
- Make it a scavenger hunt: 1 feather, 2 leaves, 3 tiny stones, etc.
- Keep a “no-pick” policy for living plants. Only use fallen items.
Why it’s great: Zero mess, fast payoff, and it doubles as ID bling when you add a name bead or tag.
2. Leaf Lantern Jars
These cozy little lanterns turn your picnic table into a fairy grove. Kids can glue leaves onto a jar, and boom—instant campsite ambiance.
What You’ll Need
- Clean glass jars (save from pasta sauce)
- Mod Podge or glue sticks
- Flattened leaves (press under a book for 30 minutes if you can)
- Battery tea lights (safety first)
- Twine for a loop handle
Tips
- Layer light-colored leaves for a stained-glass effect.
- Wrap the rim with twine and a bow for extra charm.
- Let them dry in the sun—camp hack drying rack = cooling rack or a flat rock.
Why it’s great: Useful decor that helps at dusk when everyone’s rummaging for marshmallows.
3. Stick Weaving Wall Hangings
Turn two sticks and some yarn into a mini loom. It’s surprisingly soothing and makes gorgeous little wall hangings for the tent or bunk.
What You’ll Need
- Two sturdy sticks about 8–12 inches
- Yarn or twine in a few colors
- Nature extras like pine needles or grasses
How-To
- Make a rectangle frame with two sticks and yarn corners.
- String vertical lines of yarn to create the warp.
- Weave yarn, grasses, or ribbons horizontally.
Why it’s great: Builds fine motor skills and creates a legit decor moment in your campsite—yes, we’re calling it rustic-chic.
4. Pinecone Fire Starters

Let the kids make something useful for the grown-ups. These pinecone fire starters look cute and actually work—just be mindful of local fire rules.
What You’ll Need
- Dry pinecones
- Wax (old candle stubs are perfect)
- Cotton string or wick pieces
- Optional: Dried herbs like rosemary for scent
How-To
- Melt wax in a tin can set in a pot of hot water (adult job).
- Dip pinecones, sprinkle with herbs, and let dry on parchment.
- Tie a short wick or string to help light them.
Why it’s great: Totally practical and looks like a cabin-store souvenir. FYI: Only use in approved fire rings.
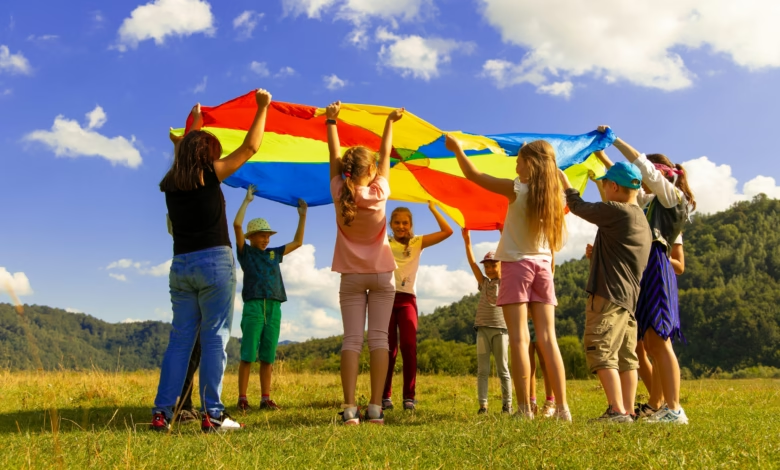
5. Camp Flag Banners
Declare your campsite fabulous with DIY flags. Kids can design their own emblems—think team names, silly mascots, or a family crest (with s’mores, obviously).
What You’ll Need
- Felt sheets or fabric scraps
- Safety pins or glue
- Markers or fabric paint
- String or twine
- Sticks for flagpoles
Tips
- Cut triangles or pennants and string them into a bunting.
- Add “Cabin 2” or “Bear Patrol” to organize groups and gear areas.
- Hang between trees at eye level for a festive entrance.
Why it’s great: Instant identity. Also helps kids find your site after a bathroom run in the dark.
6. Rock Pets With Campsite Homes
Rock painting is a classic for a reason. Add a tiny “home” and suddenly it’s a whole imaginative world.
What You’ll Need
- Smooth rocks in various sizes
- Acrylic paint or paint pens
- Googly eyes and glue
- Small box or bark tray for a “home”
Ideas
- Ladybugs, turtles, owls, or space aliens—go wild.
- Create a tiny yard with moss, pebbles, and stick fences.
- Leave kindness rocks on a trail—check park rules first.
Why it’s great: Creative play plus decor. The rock village doubles as a campsite centerpiece.
7. Nature Press Postcards
Snail mail meets science. Kids press leaves and flowers, then turn them into pretty postcards to send grandparents.
What You’ll Need
- Cardstock cut to postcard size
- Clear packing tape or contact paper
- Flat leaves and petals
- Markers for notes
How-To
- Arrange finds on cardstock.
- Seal with tape/contact paper—trim edges.
- Write a note and mail later from home.
Why it’s great: Portable, mess-light, and turns a hike into a treasure hunt.
8. Paracord Friendship Bracelets
Craft meets survival vibes. Paracord bracelets look cool and double as handy cord in a pinch.
What You’ll Need
- Paracord in 2–3 colors
- Plastic buckles (optional)
- Scissors and a lighter to seal ends (adult job)
How-To
- Use a basic cobra weave—tons of quick tutorials if you need a refresher.
- Size it to the wrist; seal ends carefully.
- Add bead initials for ID.
Why it’s great: Fidget-friendly, wearable, and teaches a practical skill. Kids feel like mini rangers.
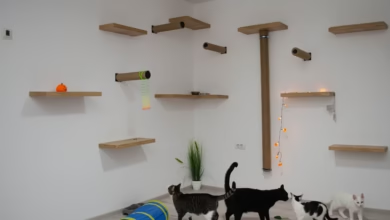
9. DIY Bug Hotels
No creepy-crawly evictions here—just cozy bug B&Bs built from found materials. This one turns curiosity into kindness for tiny wildlife.
What You’ll Need
- Small cardboard box or tin can (edges taped)
- Dry twigs, pinecones, bark, straw
- String for hanging
How-To
- Pack dry natural materials tightly into the container.
- Secure with string; hang low on a tree or rest near a log.
- Observe respectfully—no shaking or poking.
Why it’s great: Teaches kids about habitats and stewardship. Also, free “field trips” right by the tent.
10. Camp Memory Keychains
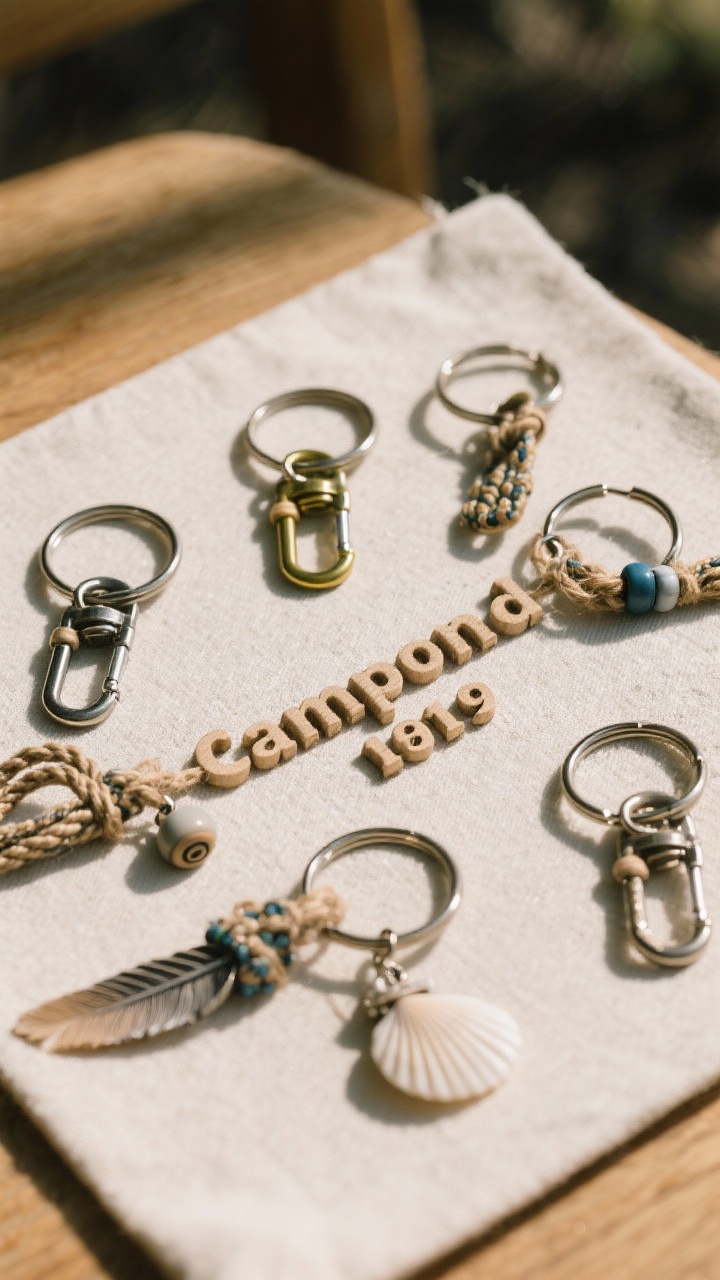
Skip the gift shop keychain and make your own. A few charms, a bead or two, and suddenly you’ve got a keepsake that doesn’t take up backpack space.
What You’ll Need
- Key rings or carabiners
- Beads and letter cubes
- Short lengths of paracord or twine
- Tiny charms like a feather or small shell
Tips
- Spell the campground name or year.
- Use different knot styles for each kid.
- Clip to water bottles to tell them apart.
Why it’s great: Fast, fun, and genuinely useful—no plastic clutter required.
11. Map Collage Journals
Give kids their own camp journal with a personalized cover. A map collage turns it into a “where we’ve been” scrapbook on the go.
What You’ll Need
- Composition notebooks
- Old maps or park brochures
- Glue sticks and clear tape
- Stickers and markers
How-To
- Collage the cover with map pieces and trail names.
- Seal edges with clear tape for durability.
- Add a pocket on the inside cover for leaf finds.
Why it’s great: Encourages writing, sketching, and stealthy geography lessons. Plus, it looks cool. IMO, this becomes a cherished keepsake.
12. Solar Oven S’mores Boxes
Science that ends in chocolate? Yes, please. Build mini solar ovens and let the sun do its melty magic.
What You’ll Need
- Shoe box or pizza box
- Aluminum foil and black paper
- Plastic wrap or a clear page protector
- Tape and scissors
- S’mores ingredients
How-To
- Line the inside with black paper; foil the lid flap.
- Seal the opening with plastic wrap to create a window.
- Angle toward the sun; wait for gooey goodness.
Why it’s great: STEM meets snack time. Teaches solar energy while feeding the crew—peak camp parent win.
13. Leaf Rubbing Field Guides
Make a mini field guide using leaf rubbings and notes. Kids become mini botanists without realizing they’re learning.
What You’ll Need
- White paper or journal pages
- Crayons with labels peeled
- Flat leaves with distinct veins
How-To
- Place leaf under paper; rub sideways with crayon.
- Label with location, tree type if known, and date.
- Collect a few each day and staple into a booklet.
Why it’s great: Simple, quiet, and perfect for post-lunch downtime. The patterns look shockingly artistic.
14. Twig Frame Photo Holders
DIY frames that actually look stylish? Absolutely. These twig frames make camp photos look like they came from a boutique.
What You’ll Need
- Sturdy twigs cut to size
- Twine or hot glue (use low-temp and adult help)
- Clothespin or paper clip
- Polaroid or printed photo later
How-To
- Create a square or rectangle with twigs—tie corners with twine.
- Attach a clothespin at the top center.
- Stand the frame by wedging into the ground or leaning on a rock.
Why it’s great: Rustic decor that showcases your best camp shot. Cute enough for the mantel back home.
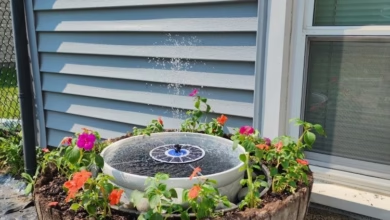
15. Campsite Wind Chimes
Make the breeze part of the show. Wind chimes from sticks, shells, and beads add gentle sound and serious style to your site.
What You’ll Need
- Stick or small branch for the top
- String, fishing line, or twine
- Lightweight dangly pieces like shells, beads, washers, or pinecones
- Optional: Small bells
How-To
- Tie 4–6 strings to the top stick at even intervals.
- Knot on found objects so they clink gently.
- Hang from a branch where it won’t bonk anyone.
Why it’s great: Sensory, soothing, and totally customizable. It’s the campsite’s finishing touch, like throw pillows—but outdoorsy.
Quick Packing List For Crafty Campers
- Essentials: Twine, washi tape, glue sticks, scissors, markers, hole punch, safety pins, clothespins
- Nice-to-haves: Mod Podge, paint pens, googly eyes, beads, paracord, clear tape
- Base supplies: Jars, small boxes, key rings, tea lights, old maps, foil, plastic wrap
- Nature finds: Leaves, pinecones, sticks, smooth rocks, grasses, feathers (only found ones)
Pro Tips To Keep It Easy
- Set up a craft station on a picnic table with a wipeable cloth.
- Use a lidded bin for supplies to keep curious raccoons uninterested.
- Schedule craft time during shade windows—late morning or early evening.
- Dry projects on a cooling rack or cookie sheet so they can be moved fast.
- Snap a photo of each finished piece for a memory album later.
Final Words
There you go—15 camping crafts that are fun, simple, and cute enough to keep. Pick a couple for your next trip and stash a tiny craft kit in your trunk. You’ll be ready the second someone says, “What can we do now?” And honestly, isn’t that the real camp superpower?